Creating, Duplicating, and Deleting a Rate
Learn the steps to designing and implementing a new rate structure.
4.0 min read
|This article is about the Billing Manager app, not the Billing Wizard in 3PL Warehouse Manager. To learn about the Billing Wizard, please refer to the articles in the Billing Setup.
This article offers a step-by-step guide on creating a new rate using the rate builder, duplicating an existing rate, and deleting a rate.
Billing Manager lets you create rates that match your needs. By using the rate builder, you can select the charges you want from the data fields available in 3PL Warehouse Manager.
Creating Rate
Follow the steps below to create a new rate:
- Open the Billing Manager app in Extensiv.
- Click Rates. Then, select Rate List.

- Click Create Rate to open the rate builder tool.

- Choose among the following:
- For transaction-based charges
- Automated rate
- Manual Rate
- UOM count
- For agrregate billing
- Transaction Minimum
- Transaction Markup
- For recurring rates
- Scheduled flat charge
- Other
- Packing Materials Fee

For Packing Material Fee, skip steps 5-6.
For Manual Rate, skip step 6.
- Packing Materials Fee
- For transaction-based charges
- Choose between the Simple Rate or the Smart Rate.
- Smart Rate follows the If/Then statement when applying rates. You can define the rate based on the conditions or parameters you selected.
- Simple Rate follows a single parameter when applying rates. It doesn't follow an If/Then statement.
- Choose between a Tiered Rate or a Flat Rate.
- Flat Rate refers to a fixed, uniform rate.
- A Tiered Rate lets you define the rate to apply based on the counting unit you have selected.
- Click Continue.
The succeeding fields you need to fill in to create a new rate may vary based on the options you selected for Steps 4 and 5.
- Fill in the Rate Name, Rate Description, and Charge Label fields to provide basic details of the new rate. These details describe the rate and can be used for accounting and invoicing purposes.
The Charge Label is the description your customers will see on their invoice when viewing this detail.Special Characters
Special characters are accepted in Billing Manager but not in 3PL Manager. To ensure compatibility when using both systems, we recommend avoiding special characters.

- Select the Transaction Type and Charge Category that match the rate.


The Transaction Type determines which transaction types generate charges for the rate. It is important as it tells the Billing Manager which events to apply those rates to. Additionally, certain data fields or options may vary depending on the selected transaction type.
- Review the details you entered. Click Continue to proceed.
Refer to each of the guides outlined below for the steps on how to create a rate by type.
Simple-Flat Rate
Select Simple Rate and Flat Rate on Steps 6 and 7.
- Follow Steps 1-9 mentioned above.
- For the Charge Method step, choose your preferred Charge Type, Counting Unit, and Calculate By.
In the below example, I want to charge a flat amount based on the count of the number of palletized.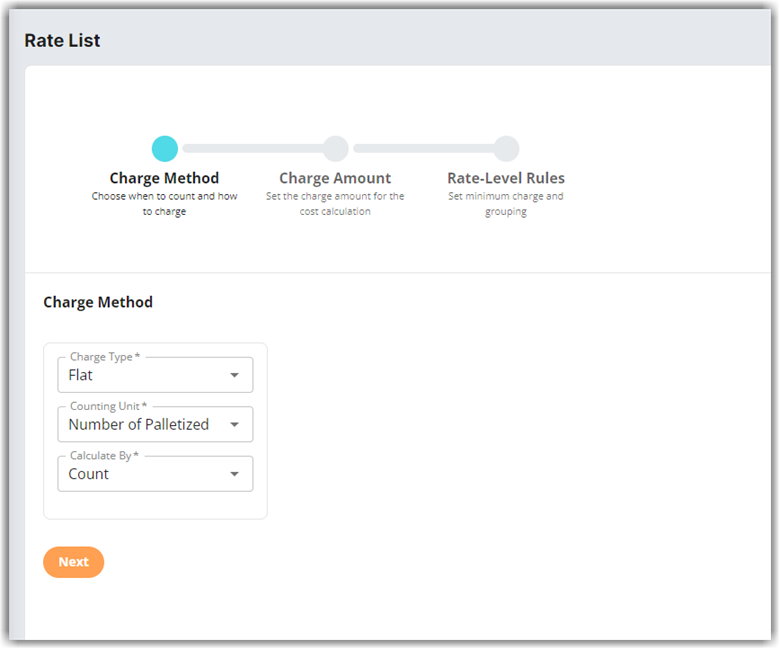
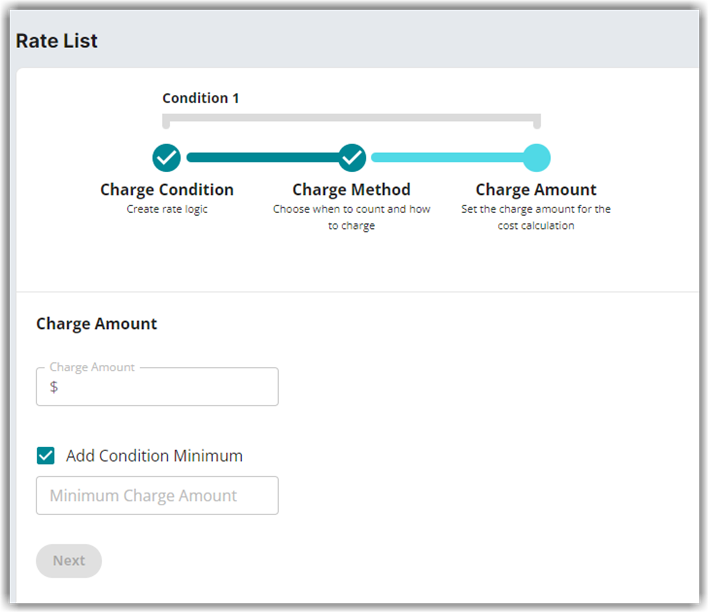
- Next, proceed to the Charge Amount step and set the charge amount for cost calculation. Then, click Next.
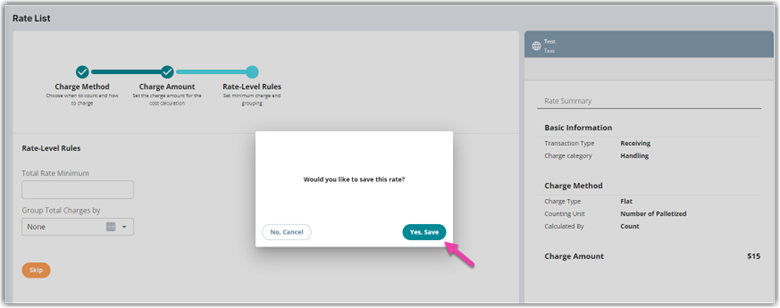
- Set the Total Rate Minimum or Group Total Charges on the Rate-level Rules step according to your preference. You can either skip or click Next to move to the next step.
With Group Total charges, the rate will charge for each unique combination of the counting unit and the group. For instance, if the counting unit is SKU and the group is Location, the rate will charge for each unique combination of SKU/Location.
- Review the details you have entered and check the rate summary displayed on the right side of the page. Finally, click Yes, Save.
Simple-Tiered Rate
Select Simple Rate and Tiered Rate in Steps 6 and 7.

- Follow Steps 1-9 as outlined above.
- Choose between ‘Standard Tiering’ or ‘Volume Tiering’ on the Tiers step.
What's the difference?
For Standard Tiering, the rate will be applied for each tier being used, while Volume Tiering depends on which tier the quantity falls within
- Click Next to begin creating tiers and tier charges.
- Fill in the Tier 1 and Tier 2 fields, and add another tier if necessary by clicking the + button.
be charged.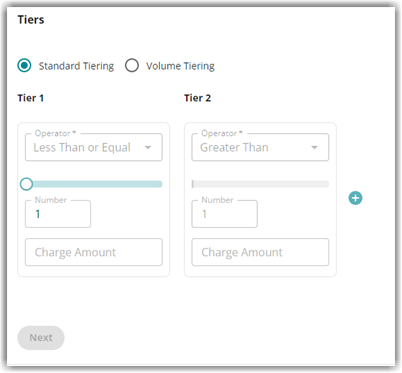
- Click Next.
- On the Charge Method step, choose your preferred Charge Type, Counting Unit, and Calculate By.
- Get the Total Rate Minimum or Group Total Charges on the Rate-level Rules step according to your preference. You can either skip or click Next to move to the next step.
With Group Total charges, the rate will charge for each unique combination of the counting unit and the group. For instance, if the counting unit is SKU and the group is Location, the rate will be charged for each unique combination of SKU/Location.
- Review the details you have entered and check the rate summary displayed on the right side of the page. Finally, click Yes, Save.
- Standard Tiering: A pricing model where each tier has a fixed rate applied to all usage within that tier.
- Volume Tiering: A pricing model where the rate applied to each tier decreases as usage increases,
Smart-Flat Rate
Select ‘Smart Rate’ and ‘Flat Rate’ in Steps 6 and 7.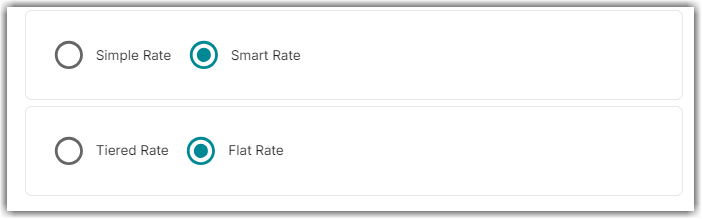
- Follow Steps 1-9 as outlined above.
- On the Charge Condition step, create rate logic by filling in the Conditional Field, Operator, and Conditional Value fields. Think of this step as an If/Then statement. You can add another condition by clicking the + button.
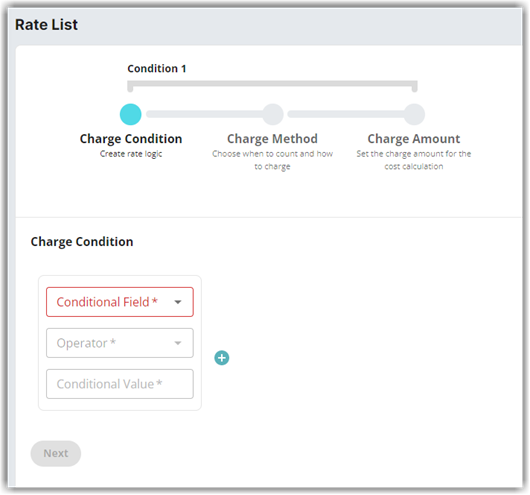
- Click Next to proceed.
- On the Charge Method step, choose your preferred Charge Type, Counting Unit, and Calculate By.
- Enter the desired charge amount for this rate,
- Review the details you have entered and check the rate summary displayed on the right side of the page. Finally, click Yes, Save.
- Click Next to proceed.
- Review the Rate Summary section on the right side of the page.
- To add another condition to this rate, click Yes, Add Condition (up to 3 charge conditions). Otherwise, click No.
If you choose to add another condition, the conditional field will be locked into the initial choice you made on the Charge Condition step to prevent duplicate charges.
- On the Rate-Level Rules step. You can Skip or fill in the Group Total Charges by field (optional), then click Next.
- Review the rate summary section to confirm the details, then click Yes, Save.
Duplicating Rates
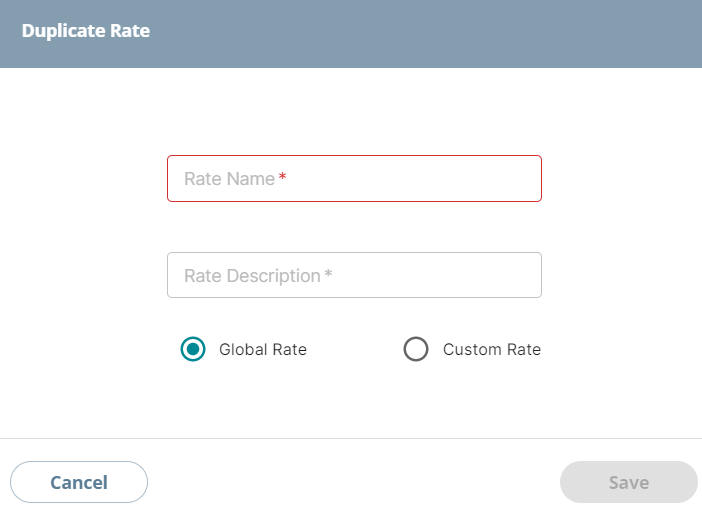
- To duplicate a rate, select a rate from the list of rates you have and click on the Duplicate Rate icon as shown below.

- Provide a Rate Name and Rate Description.
- Choose between Global Rate and Custom Rate. To understand the difference between these options, refer to our article on Understanding Global Rates vs Custom Rates.
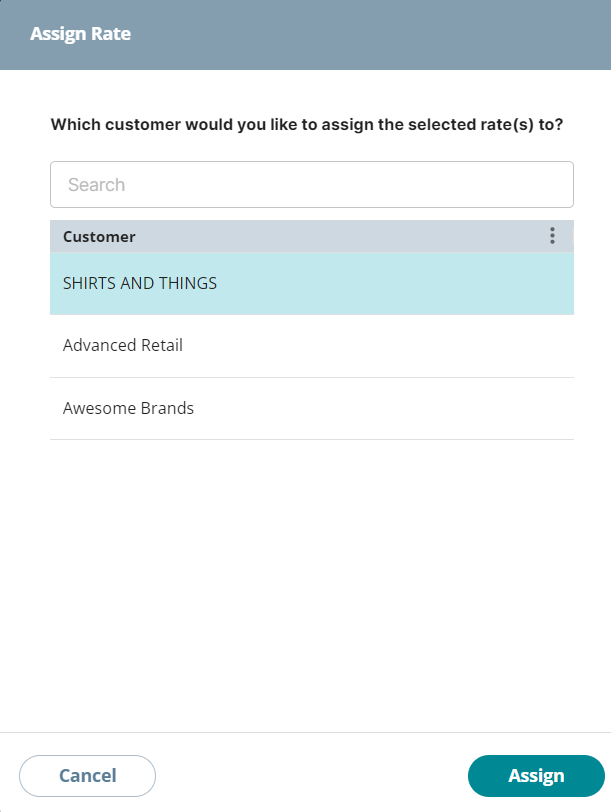
- Select which customer to assign the selected rate(s) to. Then, click Assign.
Deleting Rates / Rate Sheets
- Choose the rate you want to delete from the list of rates.
- Click on the red trash bin icon. A confirmation alert will appear.

- Click Yes, Delete to proceed with the deletion.
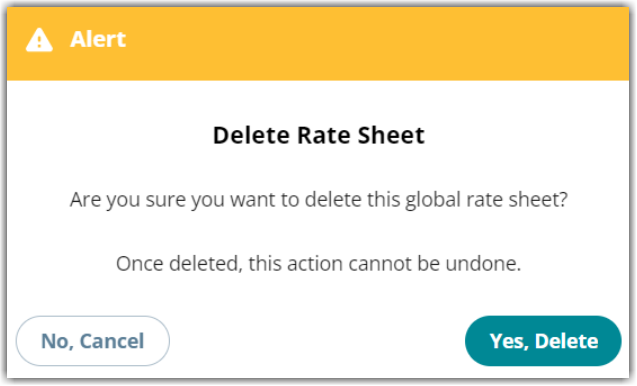
You won't be able to delete a rate if it is currently assigned to a customer. Unassign it first before you proceed with the deletion. For steps on how to unassign a rate from a customer, see our article on Unassigning a Rate From a Customer.
