
Creating and Duplicating a Rate Sheet
1.4 min read
|This article is about the Billing Manager app, not the Billing Wizard in 3PL Warehouse Manager. To learn about the Billing Wizard, please refer to the articles in the Billing Setup.
A rate sheet is a collection of global rates that can be added in any quantity. Using a rate sheet saves time when assigning multiple standard rates to a customer. For example, when onboarding a new customer, there's no need to assign 20 global rates to each customer individually. Instead, those 20 rates can be added to a standard rate sheet. Any changes made to the rate sheet will apply to all customers assigned to it.
The following outlines the steps on how to create a new rate sheet.
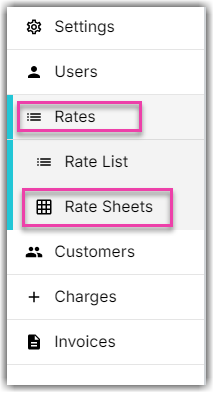
- Navigate to the Rates module of Billing Manager. Then, click Rate Sheets.
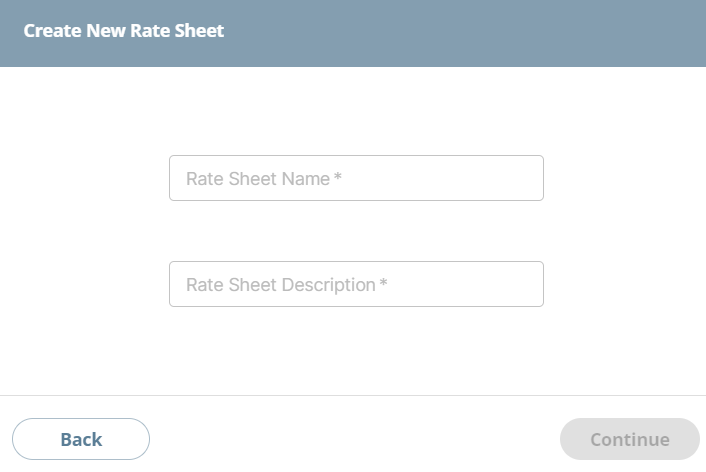
- Click Create Rate Sheet. This will open the Create New Rate Sheet window.

- Provide the Rate Sheet Name and Rate Sheet Description. Afterwards, click Continue.
- On ‘Edit Rate Sheet’ page, you'll find the add button per category. It will open the ‘Add Rate to This Rate Sheet’ window.
Currently, we have 5 categories. These are Shipping, Receiving, Adjustments, Assemblies, and Returns.
- Add rates from here by clicking the + button.
You can filter this page by category by clicking the dropdown arrow instead of All.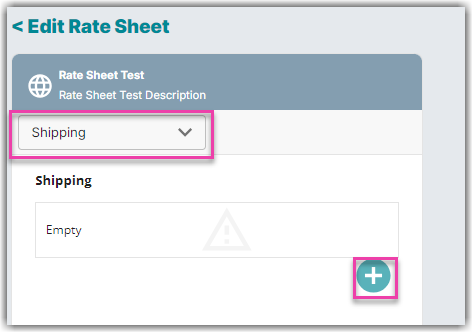
- Select which rates you want to add to your rate sheet. Use the search function to locate the rate you want to add.
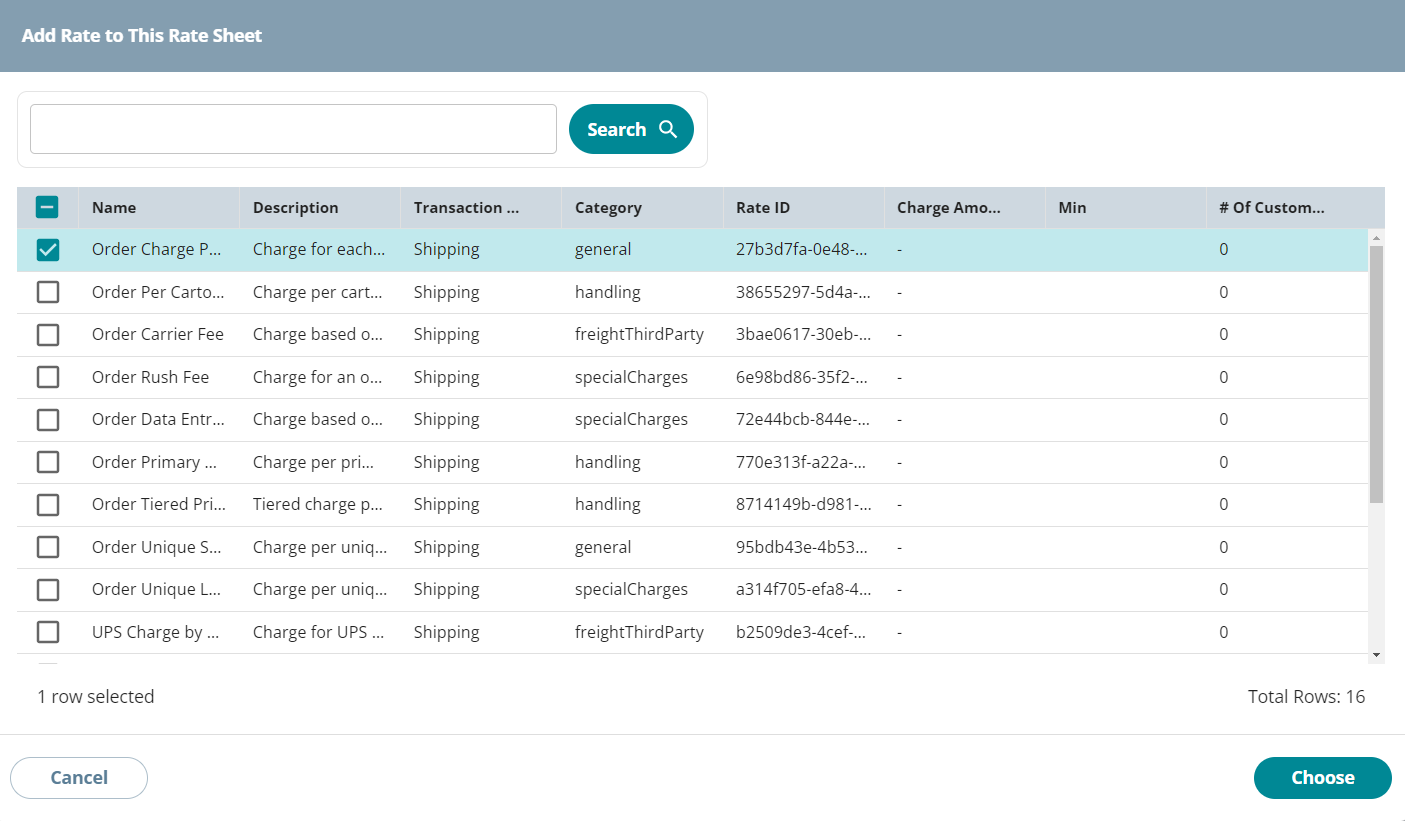
- Click Choose. You will find the rate added to the category.
- Continue adding rates as necessary. Click Done once finished.
Duplicating a Rate Sheet
This article outlines the steps for copying and assigning a rate sheet to a customer.
- Open Biling Manager.
- Go to Rates > Rate Sheets.
- Select the rate sheet you want to duplicate from the Rate Sheets list.
- Click Copy and Assign rates.

- Select a customer for whom you want to create these custom rates. Then, click Create.

- Review and adjust the new custom rates for your selected customer as needed. You can either select a rate from the list or use the search functionality to preview the settings. If changes are made, click Save.

- Click Done at the top-right corner if you've finished reviewing the custom rates. Proceed to Step 12 to modify a rate.
A separate prompt appears to confirm this action. Click Done.
Note: A success message is displayed when you returned to the Rate Sheets page. To view and edit them again, go to Customer's Settings.
Was this article helpful?
Share additional feedback about this article