Add Billing Permissions to a Role
1.5 min read
|This article is about the Billing Manager app, not the Billing Wizard in 3PL Warehouse Manager. To learn about the Billing Wizard, please refer to the articles in the Billing Setup.
This summary outlines the process of adding a Billing Manager permission to either an existing role or creating a new role specifically for Billing Manager.
Add Permission to a New Role
To grant specific permissions to a new role in Extensiv, follow these steps:
-
Log in to Extensiv: Access Extensiv and log in with your credentials.
-
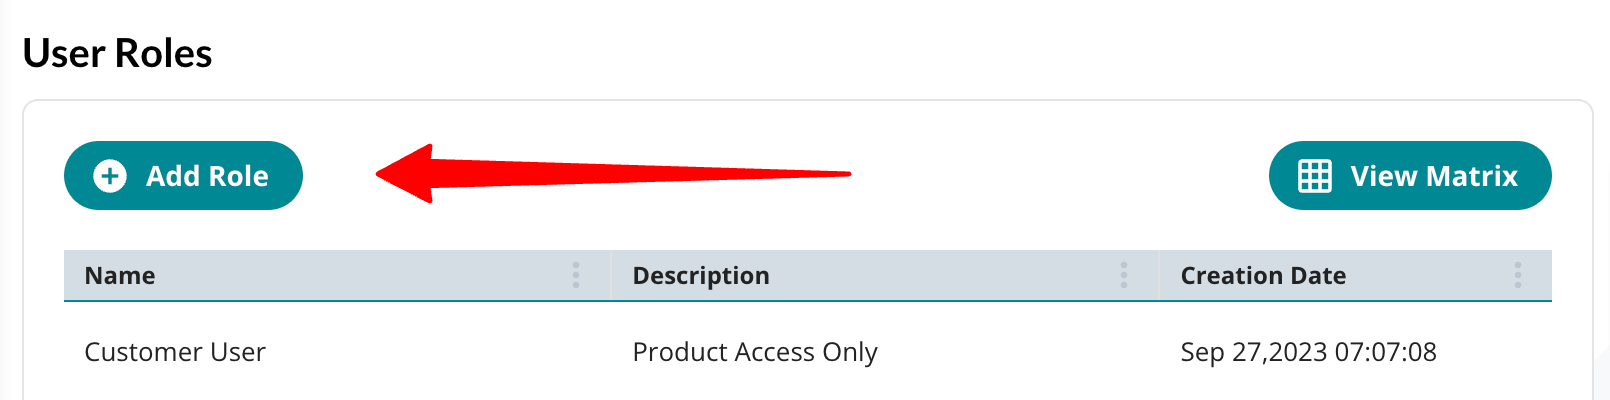
Navigate to Roles: Click on "Roles" in the left navigation menu.
-
Create a New Role: Select "+ Add Role" at the top of the User Roles page.
-
Provide Role Information: In the "Create New Role" window, enter a meaningful "Role Name" and provide a relevant “Description” (e.g., Billing Manager Admin).

-
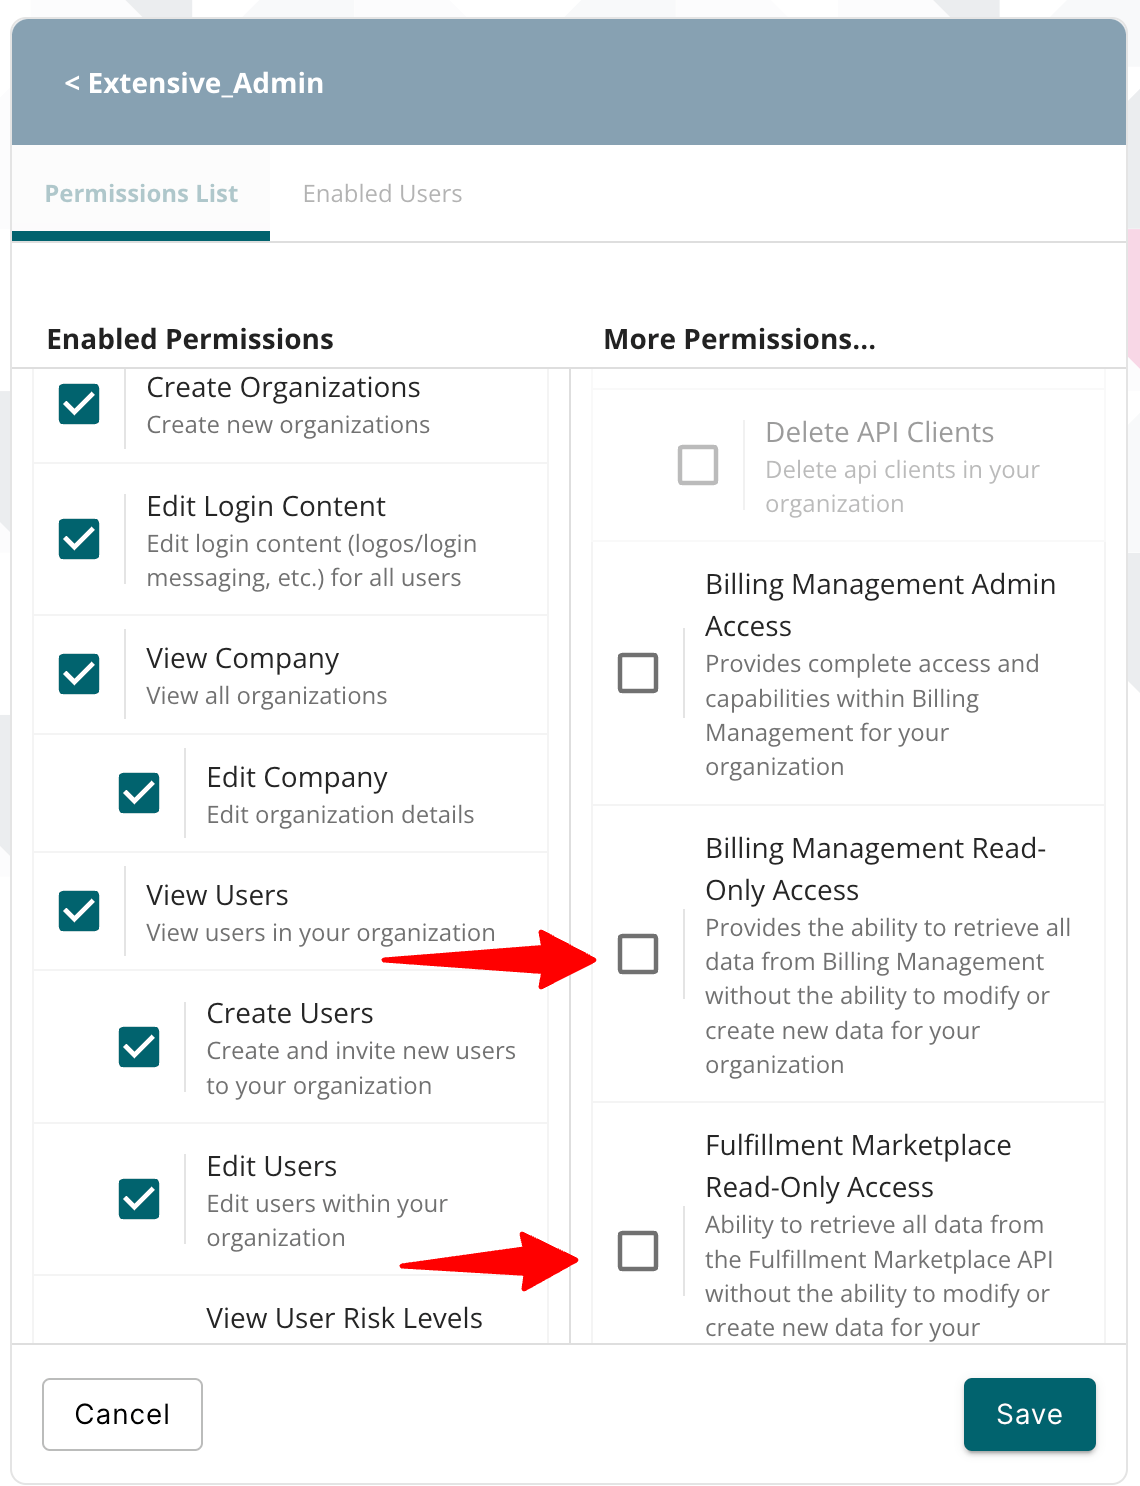
Assign Permissions: Under the "More Permissions…" column within the Permission selector window, select the appropriate permissions for this role. Ensure to include any of the Billing Roles: "Billing Management Read Only Access" or “Billing Management Admin Access” by checking the checkbox next to the listing.
- Save the Role: After selecting all the necessary permissions, click the "Save" button.
The new role now possesses the required Billing Manager permissions.
Admin Access
If you provided yourself “Billing Management Admin Access” permissions to your own role, you will then need to log out and log back in to access Billing Manager.
Add Permission to an Existing Role
To add permissions to an existing role in Extensiv, follow these steps:
-
Log in to Extensiv: Access Extensiv and log in using your credentials.
-
Navigate to Roles: Click on "Roles" in the left navigation menu.
-
Select the Existing Role: Click on the existing role that requires updates.
-
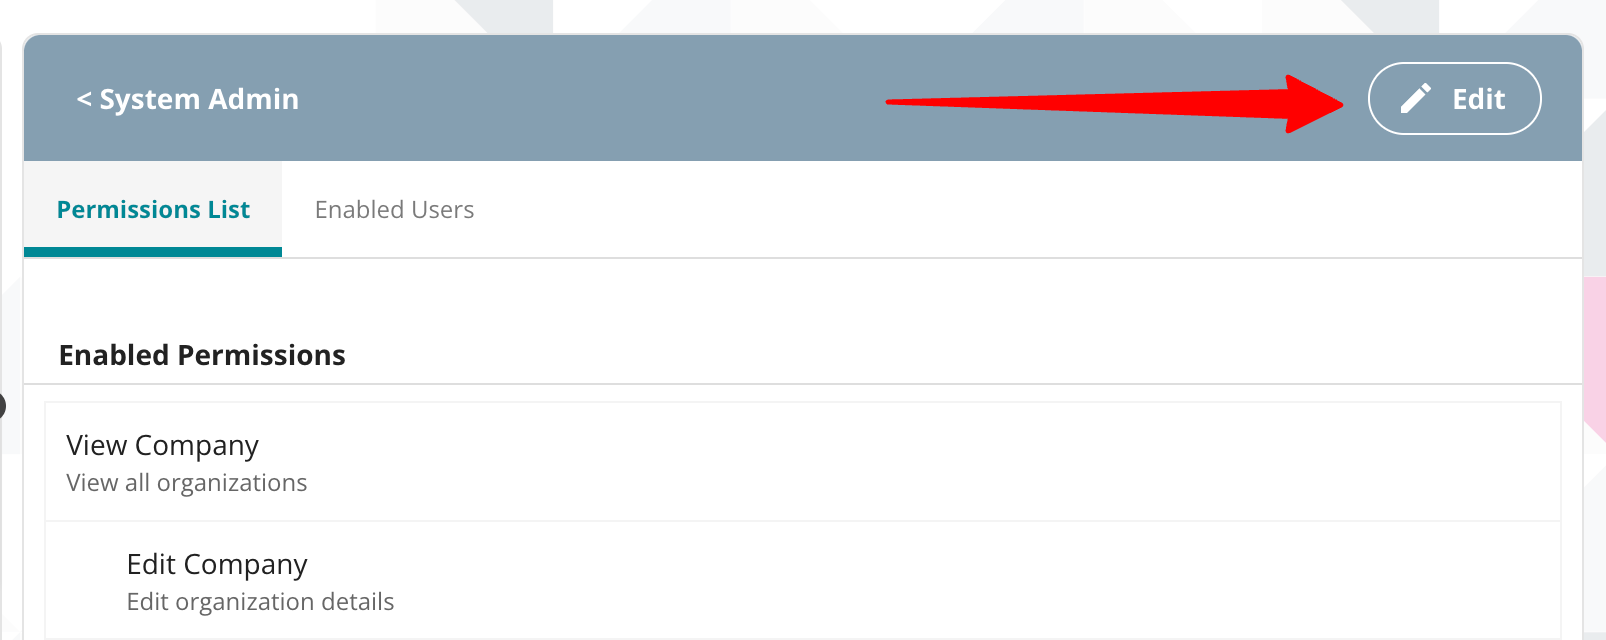
Access Edit Mode: In the right panel, select the "Edit" button with the Permissions List tab active.
-
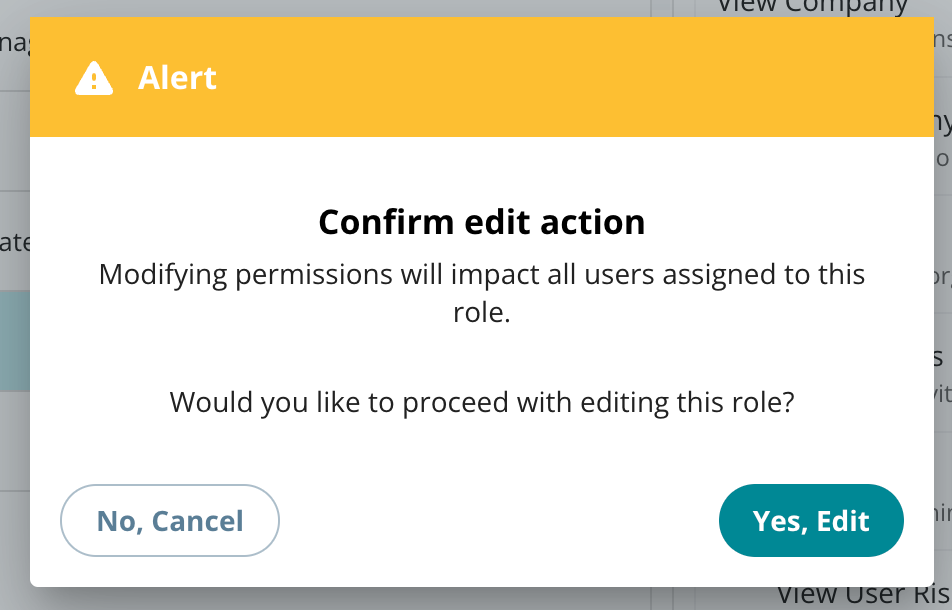
Confirm Edit Action: Click "Yes, Edit" on the Confirm edit action window.
-
Assign Additional Permissions: Under the "More Permissions…" column within the Permission selector window, select "Billing Management Read Only Access" or “Billing Management Admin Access” permission by checking the checkbox next to the listing.
- Save Changes: After selecting the necessary permissions, click the "Save" button.
The existing role now includes the added Billing Manager permission, allowing users assigned to this role to edit profiles as needed.
Billing Manager Roles
Billing Manager has two roles that control the visibility and access to Billing Manager. The two billing manager roles include the following:
Billing Management Admin Access
Provides complete access and capabilities within Billing Management for your organization
Billing Management Read-Only Access
Provides the ability to retrieve all data from Billing Management without the ability to modify or create new data for your organization.