Locations Reports
2.9 min read
|This article reviews each report specific to locations and how to generate these reports.
To learn which permissions are required to access any of the reports reviewed below, please see Understanding Reports.

Navigate to Reports > Locations, then proceed to the relevant guidelines below.
Location Identifier
The Location Identifier Report allows you to pick a single location or range of locations to view the items that are currently placed there.
- Click Location Identifier.
- Select the relevant Customer Name and Warehouse from the grid. To select multiple customers, use < Ctrl > on your keyboard to multi-select.
- To narrow the results of the locations that populate in the Location grid, complete the relevant search filters. For example, if "A" is entered in Field 1, only locations that contain "A" display.
- Specify whether you want to 'Show Locations with Inventory > 0'.
- To narrow the results based on Allocation Priority, enter a Priority Value and select a Comparison Operator from the drop-down menu.
- Click Refresh Grid to populate the locations of the customer(s) selected.
- Select one or more locations from the grid (using < Ctrl > to multi-select), then click Run Report.
The report generates with the following columns:
- SKU: Primary identifier of an item
- Qualifier: Relevant item qualifier
- Description: Description of item
- Customer: Name of customer
- OnHand: Number of primary units currently in the warehouse
- Allocated: Number of primary units currently allocated to Open and Complete orders
- Quarantined: Number of primary units placed in a quarantined location
- Available: Number of primary units available for allocation
- Cartons: Number of packaging units available for allocation
- Packed: Number of primary units that are packed for shipment
- Cu Ft: Total default volume of primary units measured in cubic feet
- Lbs/Kgs: Total default weight of primary units measured in Imperial or Metric
- Link To: Links to the Stock Status Report (currently not supported)
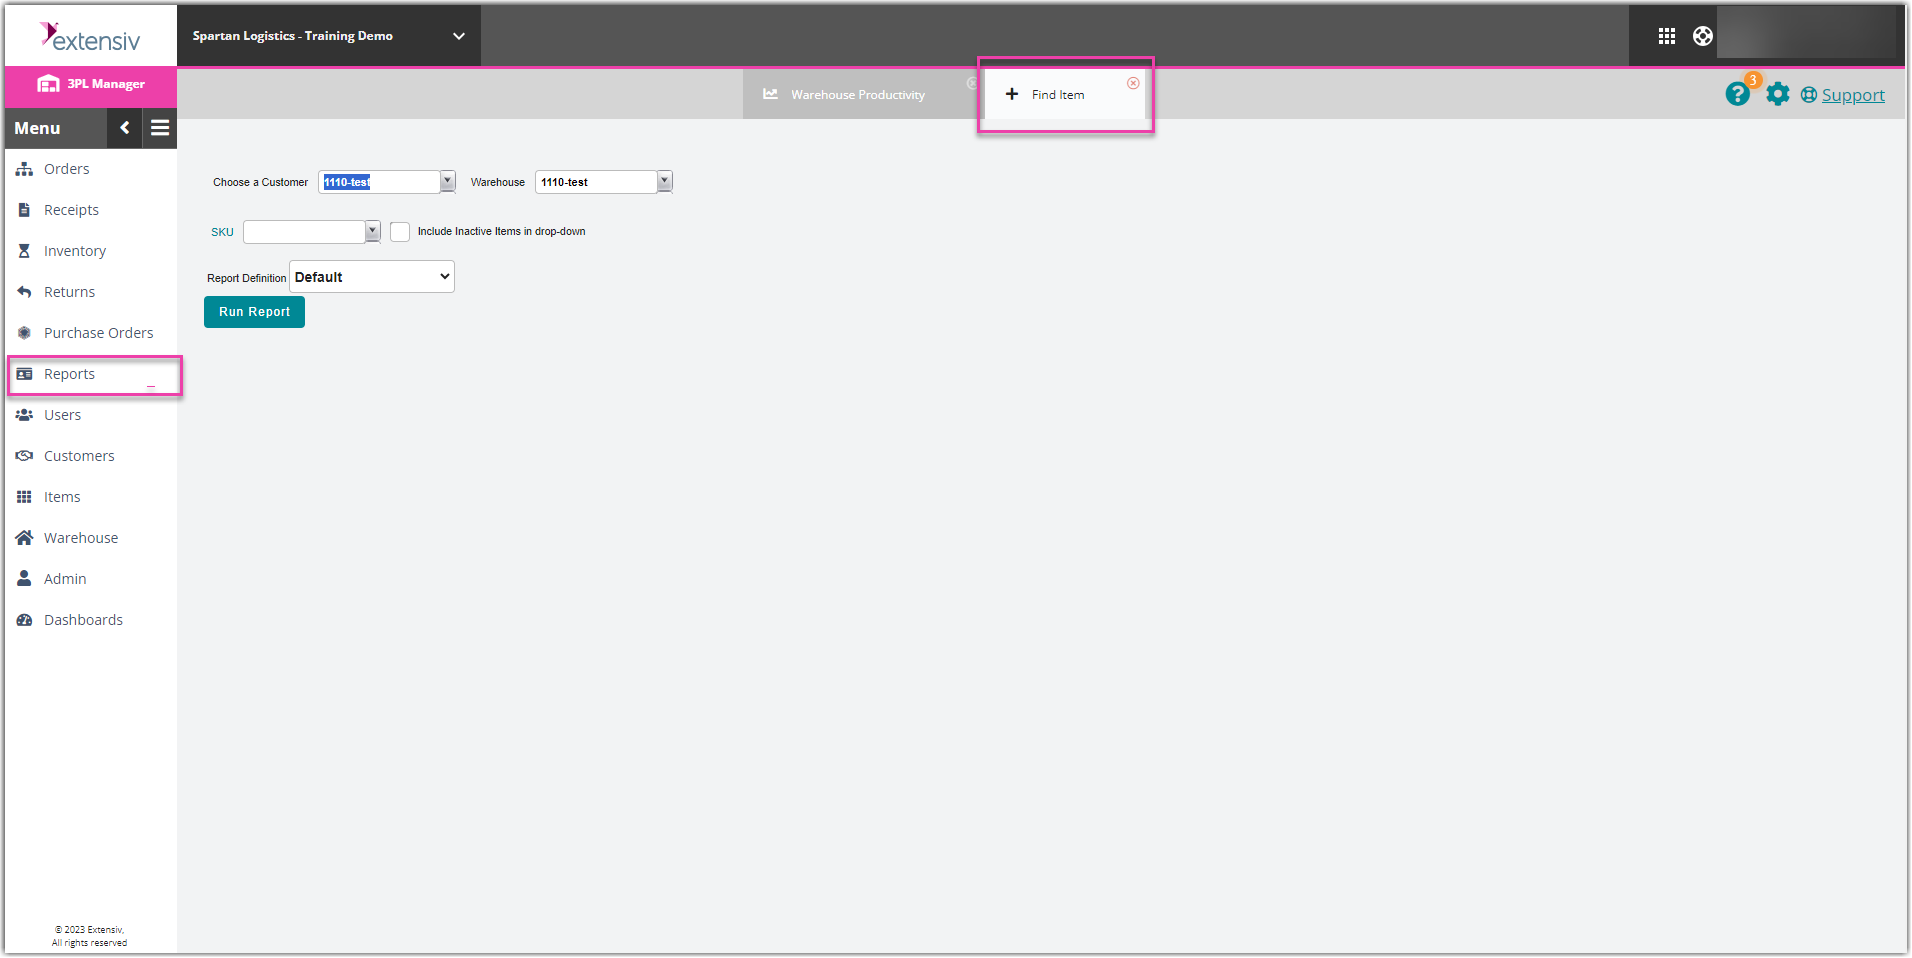
Find Item
The Find Item Report helps you locate an item or range of items by customer.
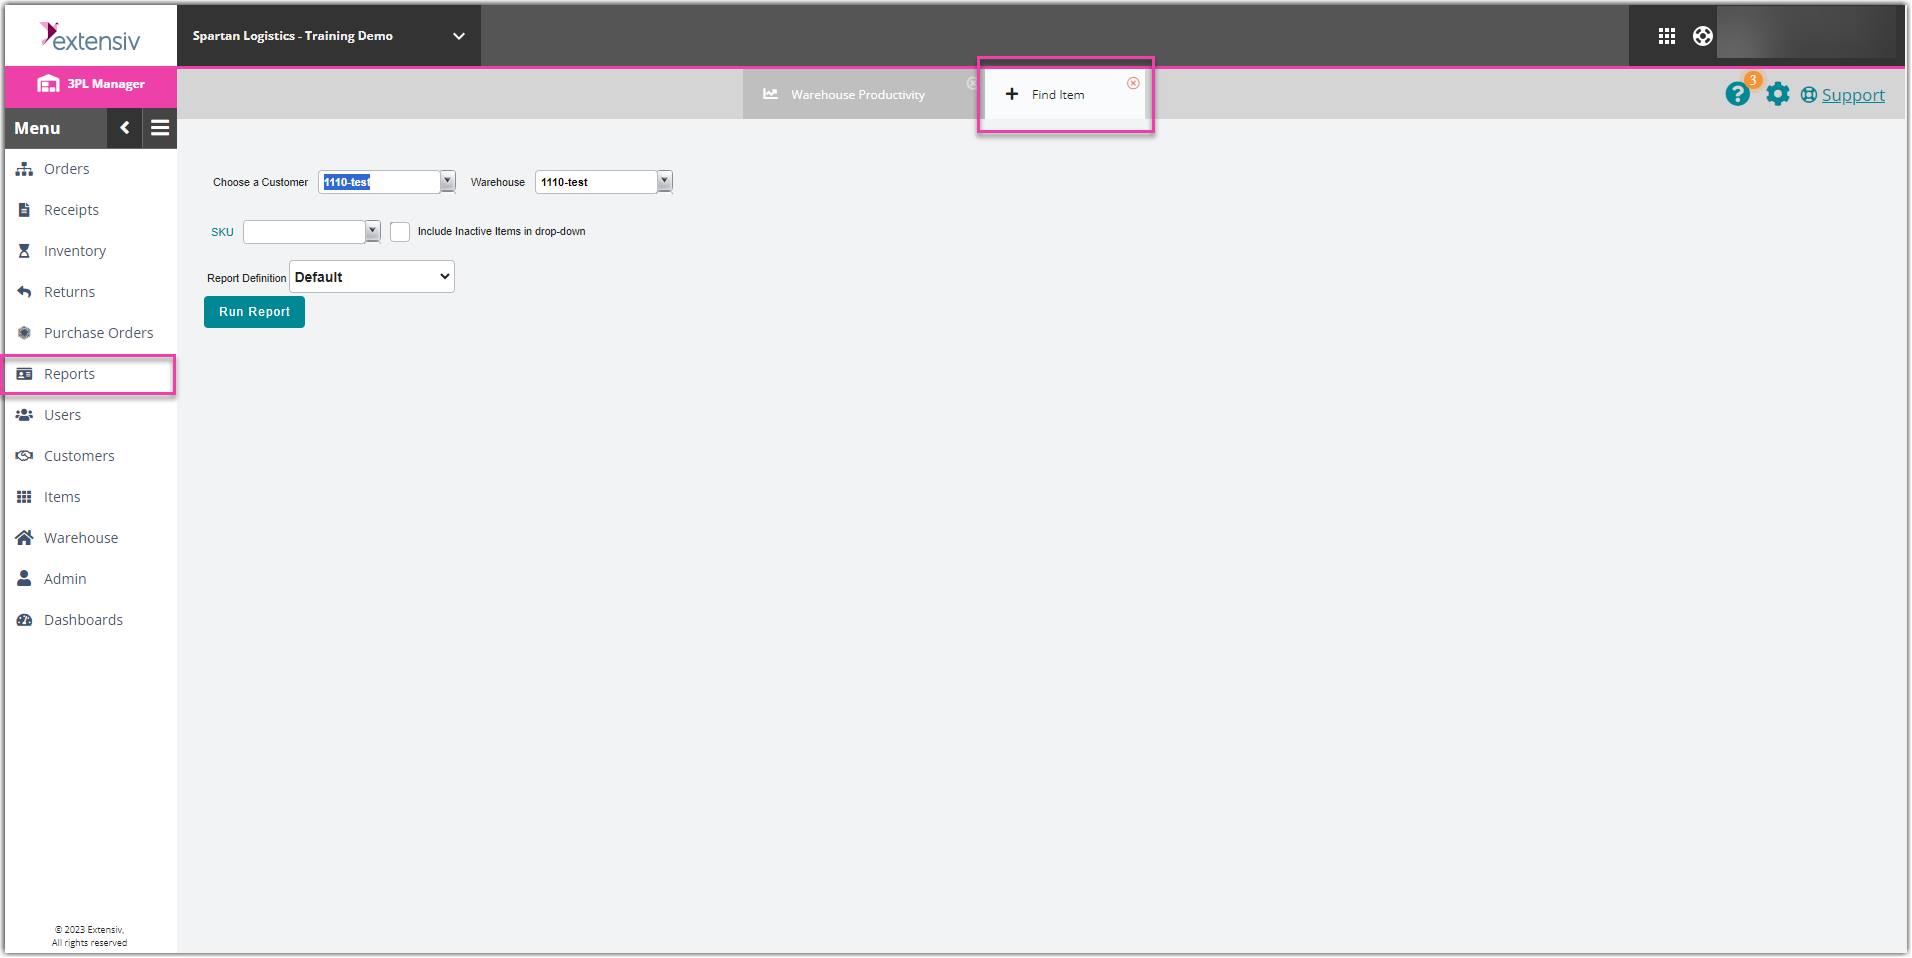
- Click Find Item.
- Select a relevant Customer, Warehouse, and SKU from the respective drop-down menus.
- Click Run Report.
The report generates with the following columns:
- Location: Current warehouse location
- OnHand: Number of primary units currently in the warehouse
-
Allocated: Number of primary units currently allocated to Open and Complete orders
- Quarantined: Number of primary units placed in a quarantined location
- Available: Number of primary units available for allocation
- Cartons: Number of packaging units available for allocation
- Packed: Number of primary units that are packed for shipment
- Cu Ft: Total default volume of primary units measured in cubic feet
- Lbs/Kgs: Total default weight of primary units measured in Imperial or Metric
Location List
The Location List Report provides a comprehensive list of all locations in the warehouse. You can run this report without item content to review the location setup.

- Click Location List.
- Select a relevant Warehouse from the grid. To select multiple warehouses, use < Ctrl > on your keyboard to multi-select.
- Specify whether you want to view the locations that are Empty, Not Empty, or Either.
- Click Run Report.
The report generates with the following columns—note that each of these values are based on location setup.
- Location Name: Name of warehouse location
- Location Type: Type of warehouse location
- Description: Description of warehouse location
Quarantine Location
The Quarantine Location Report is the same as the Location Identifier Report above except it applies to quarantined locations only.
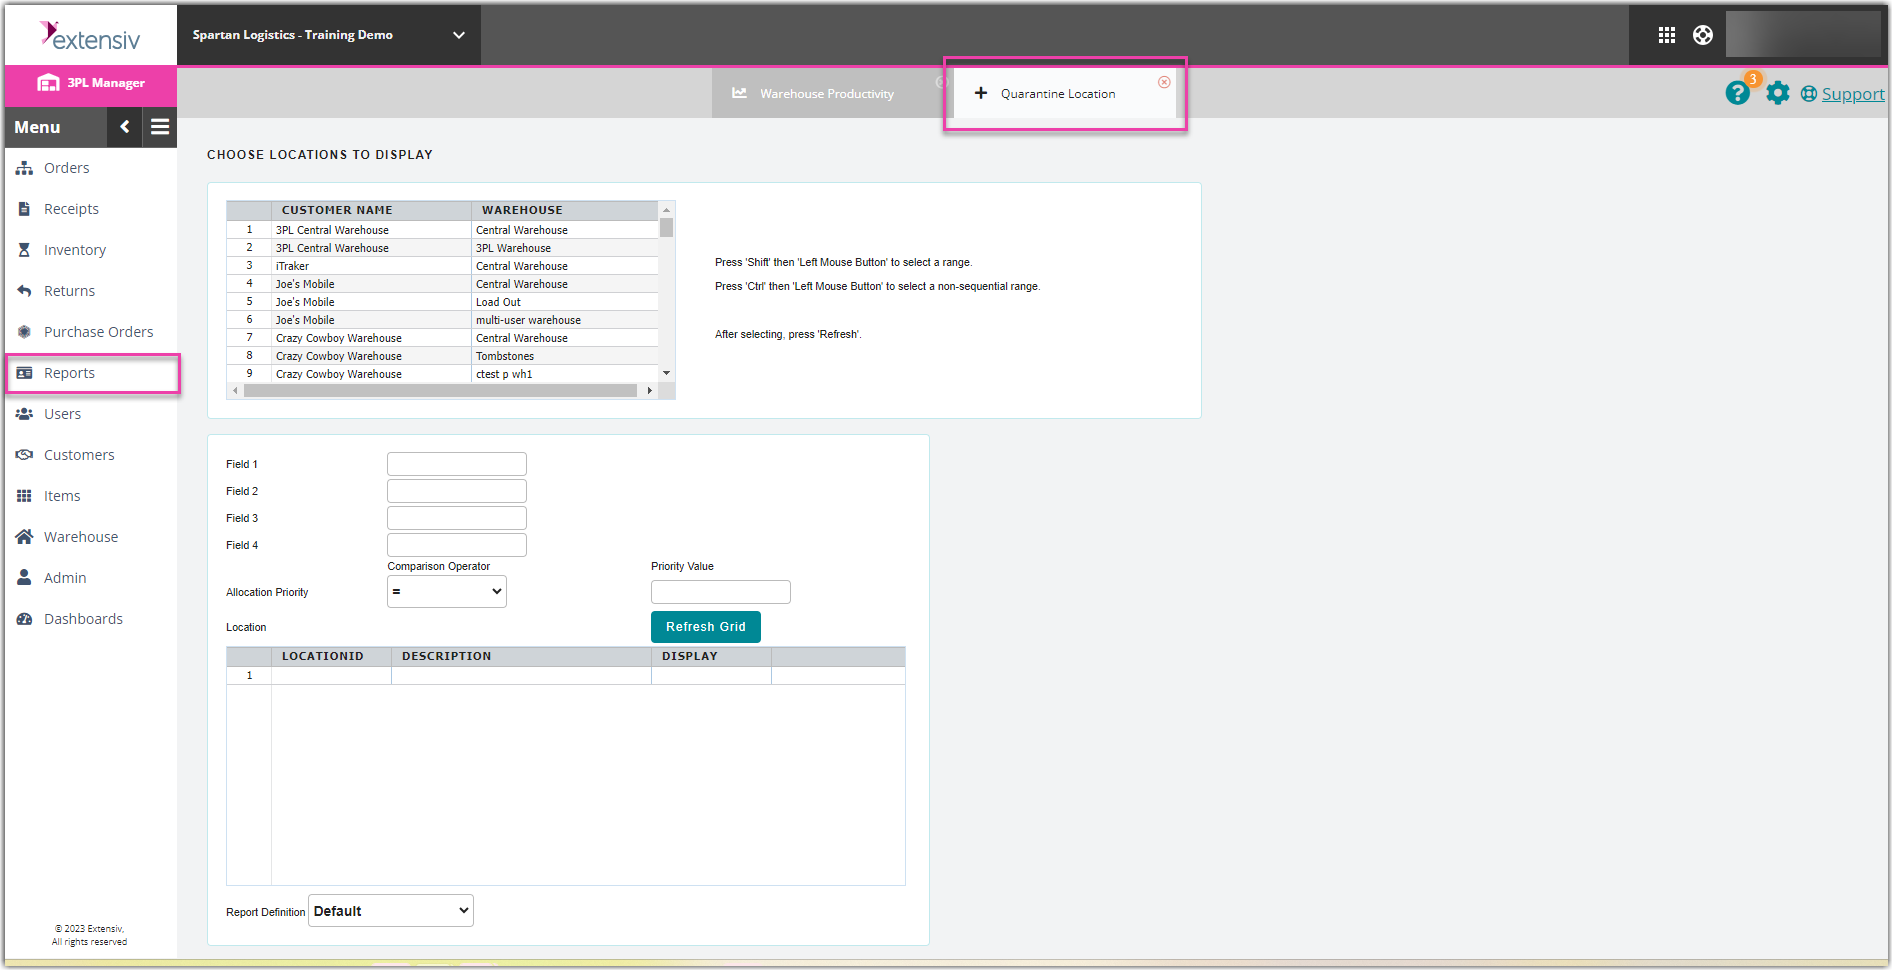
- Click Quarantine Location.
- Select the relevant Customer Name and Warehouse from the grid. To select multiple customers, use < Ctrl > on your keyboard to multi-select.
- To narrow the results of the locations that populate in the Location grid, complete the relevant search filters. For example, if "A" is entered in Field 1, only quarantine locations that contain "A" display.
- To narrow the results based on Allocation Priority, enter a Priority Value and select a Comparison Operator from the drop-down menu.
- Click Refresh Grid to populate the quarantine locations of the customer(s) selected.
- Select one or more locations from the grid (using < Ctrl > to multi-select), then click Run Report.
The report generates with the following columns:
- SKU: Primary identifier of an item
- Qualifier: Relevant item qualifier
- Description: Description of item
- Customer: Name of customer
- OnHand: Number of primary units currently stored in a quarantined location
- Allocated: Number of primary units currently allocated to Open and Complete orders
- Available: Number of primary units available for allocation (always 0)
- Cartons: Number of packaging units stored in a quarantined location
- Packed: Number of primary units that are packed for shipment
- Cu Ft: Total default volume of primary units measured in cubic feet
- Lbs/Kgs: Total default weight of primary units measured in Imperial or Metric
- Link To: Links to the Stock Status Report (currently not supported)
Replenishment
The Replenishment Report shows the on-hand quantities in all locations and any specified minimum quantities so that you understand which inventory items need to be replenished.
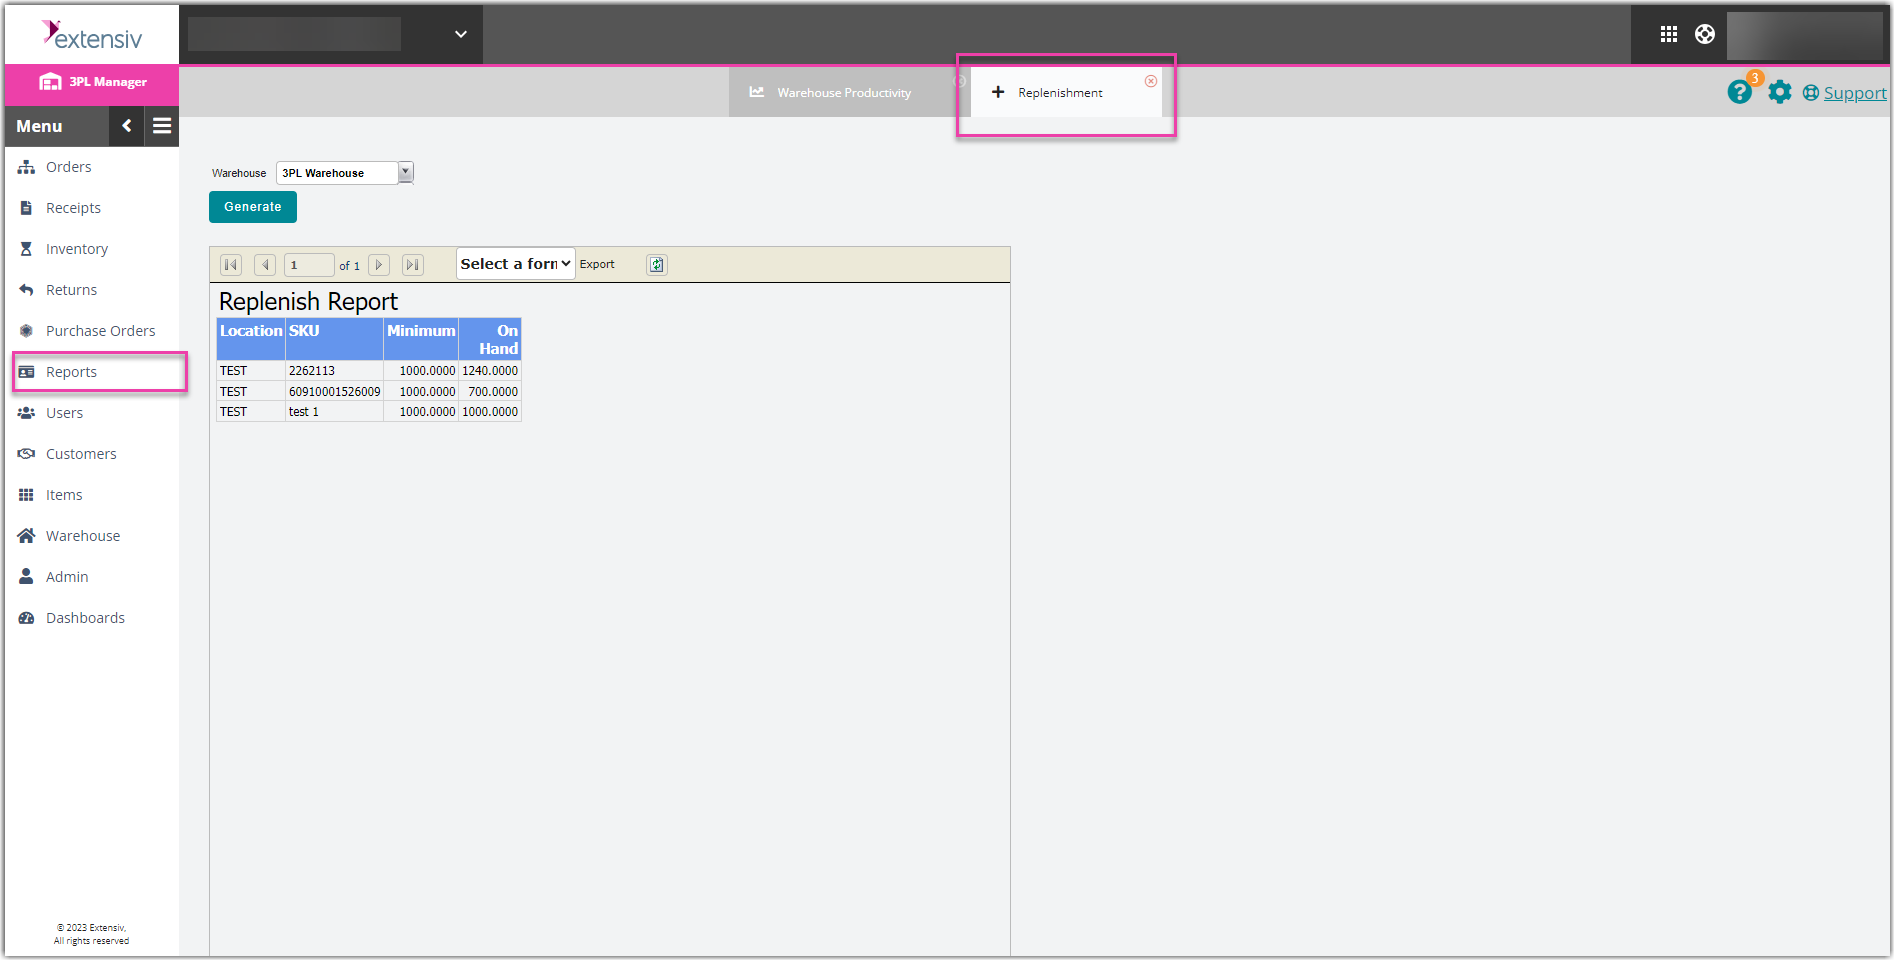
- Click Replenishment.
- Select the relevant Warehouse from the drop-down menu, then click Generate.
