Warehouse Management

Updated on October 9th, 2023

  • Extensiv Hub
    Popular Articles Getting Started Using Hub Technical Issues & FAQs Extensiv's Ideas Portal
  • 3PL Warehouse Manager
    Receiving Operations Inventory Management Shipping Operations System Configuration Scanning Operations Integrations Content Best Practice Resources Release Notes Popular Articles Troubleshooting Guides
  • Warehouse Management
    Getting Started Admin Console Shipping Order Picking & Packing Receiving Customer Portal Cycle Counting Kit Building Managing Users Barcode Scanner Import/Export Integrations Barcoding Wave Picking Bin Move Mobile Receiving and Picking Settings Popular Articles Reporting
  • Order Management
    Dashboard Orders Inventory Purchase Orders Shipments Customers Products Analytics Settings API API Integrations Accessing and Navigating Order Manager Error Messages Order Manager Popular Articles Accounting Integrations
  • Integration Management
    Getting Started with Integration Manager General Support Troubleshooting Extras & Addons API Documentation Popular Articles Order Sources Order Destinations
  • FAQs
  • Network Manager
    Getting Started Order Routing Management Technical Issues Shopping Carts Settings Settings, Products, and Orders
  • Billing Manager
    Getting Started Using Billing Manager
  • Release Notes
    Extensiv Sandbox Extensiv Extensiv Hub 3PL Warehouse Manager Integration Management Warehouse Management Order Management Billing Manager
  • Fulfillment Marketplace
    Getting Started
  • Sandbox
    Getting Started
+ More
  • Help Center
  • Warehouse Management
  • Customer Portal
  • Setting Up Customer Portal
  • Customer Portal
    • Customer Portal Info
        • Customer Portal Overview
        • Customer Portal Options
    • Setting Up Customer Portal
        • Setting up Customer Portal User
        • Locking User into Location
        • Using Client Parts
        • Customer Portal Permissions
    • Using Customer Portal
        • Logging into Customer Portal
        • Customer Portal Customization

Using Client Parts

Using Client Parts

The Client Parts option is used to assign specific Parts / SKU's to a client. This will limit their visibility to inventory related only to these SKU's in the customer portal. It will also only allow the user to add the Client Parts to Shipping and Receiving Orders.


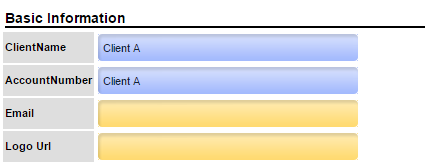
1.  First, you will create a Client and Location for the customer you wish to assign Client Parts to. Navigate to Create > Clients from the top navbar in the admin console.
 

Enter a client name and account number. Click Save


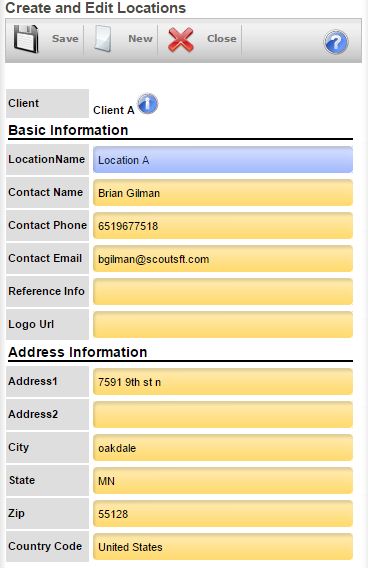
2. Next, Click the Locations button to create a location for this client. Click Add to add a location. Fill out the Location information as needed


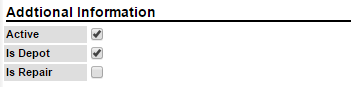
3. At the bottom of the Location creation screen, make sure to check the Active and Is Depot checkboxes.
 

Click Save at the top of the screen to complete the location creation


4. Now that we have the Client and Location created for your customer, now you will need to lock the user into this client/location. Navigate to Admin > Users and edit (or create) the user to be locked into this location. Keep in mind, this Client / Location will not hold inventory but will only be used to separate what inventory the Customer Portal user can see. See the Setting up Customer Portal User topic for details on how to lock a user into a client/location.


5. Navigate back to the Client page (Search > Clients). Under the previously created client record, you will see Client Parts and Client Vendors. Click the Add button under Client Parts section to add parts to this client.

Scroll through and add the parts as needed. The parts selected here will be the only parts the Customer Portal user will have visibility over. Additionally, the Customer Portal user will only be able to use these parts on Shipping / Receiving Orders created in the portal.

6. The same concept applies to Client Vendor'. You can specify which vendors are accessible to the Portal user by adding Client Vendors to their client record in Warehouse Manager. This will limit the vendor options when creating a Receiving Order in the portal.
 

parts usage client parts

Was this article helpful?

Yes
No
Share additional feedback about this article

Related Articles

  • Customer Portal Permissions
  • Locking User into Location
  • Setting up Customer Portal User

Not finding the help you need?

Contact Support
Solutions
  • Solutions for Brands
  • Solutions for 3PLs
  • Solutions for 4PLs
  • Solutions for B2B
Products
  • Extensiv 3PL Warehouse Manager
  • Extensiv Warehouse Manager
  • Extensiv Order Manager
  • Extensiv Integration Manager
  • Extensiv Network Manager
Products
  • Customer Success
  • Implementation
  • Consulting
Ecosystem
  • Fulfillment Marketplace
  • Integrations
  • Partners
  • Become a Partner
Resources
  • Resource Library
  • Blog
  • Market Insights
  • What is a 3PL?
  • What is a 4PL?
  • What is a WMS?
  • Why a Cloud-based WMS?
  • Glossary
Help
  • Help Center
  • API Documentation
  • Extensiv Univerisity
  • Community
  • System Status
  • Extensiv Logo
  • 100 N Pacific Coast Hwy, Suite 1100, El Segundo, CA 90245
  • |
  • Contact Us:
  • 83-EXTENSIV 888.375.2368 (main)
  • |
  • 310.844.7570 (local)
  • Copyright © 2023 Extensiv
  • |
  • All rights reserved.
  • Privacy Policy
  • |
  • Terms of Service
  • Follow Us:
Expand