Network Manager

Updated on March 19th, 2024

  • Extensiv Hub
    Popular Articles Getting Started Using Hub Technical Issues & FAQs Extensiv's Ideas Portal
  • 3PL Warehouse Manager
    Receiving Operations Inventory Management Shipping Operations System Configuration Scanning Operations Integrations Content Best Practice Resources Release Notes Popular Articles Troubleshooting Guides
  • Warehouse Management
    Getting Started Admin Console Shipping Order Picking & Packing Receiving Customer Portal Cycle Counting Kit Building Managing Users Barcode Scanner Import/Export Integrations Barcoding Wave Picking Bin Move Mobile Receiving and Picking Settings Popular Articles Reporting
  • Order Management
    Dashboard Orders Inventory Purchase Orders Shipments Customers Products Analytics Settings API API Integrations Accessing and Navigating Order Manager Error Messages Order Manager Popular Articles Accounting Integrations
  • Integration Management
    Getting Started with Integration Manager General Support Troubleshooting Extras & Addons API Documentation Popular Articles Order Sources Order Destinations
  • FAQs
  • Network Manager
    Getting Started Order Routing Management Technical Issues Shopping Carts Settings Settings, Products, and Orders
  • Billing Manager
    Getting Started Using Billing Manager
  • Release Notes
    Extensiv Sandbox Extensiv Extensiv Hub 3PL Warehouse Manager Integration Management Warehouse Management Order Management Billing Manager
  • Fulfillment Marketplace
    Getting Started
  • Sandbox
    Getting Started
+ More
  • Help Center
  • Network Manager
  • Order Routing Management
  • Settings
  • Warehouses
  • Settings
    • Sales Channel
        • Shopify Locations
        • Shopify Tags
        • Enable or Disable Extensiv Network Manager Email Notifications to Your Customers
        • Deactivating a Sales Channel
        • Adding Shopify as a Sales Channel
        • Viewing a Sales Channel's Edit History
        • Adding Amazon as a Sales Channel
        • Adding eBay as a Sales Channel
        • Adding Walmart as a Sales Channel
        • Editing Sales Channels
        • Adding a Manual Sales Channel
        • How to Exclude a Warehouse From Pushing Inventory to a Sales Channel
        • Adding Sales Channels
        • Reactivating Sales Channels
        • How to Enable Out of Stock Control for eBay Sales Channels
    • Webhooks
        • Order Payment Webhook
        • Shopify Auto-Subscribing Webhooks
        • Shopify Product Update / Product Edit Webhook
        • Order Creation Webhook
        • Shopify Cancellation Webhook
        • Shopify Fulfillment Webhook
        • Shopify Refund Webhook - POS Orders
        • Shopify Product Deletion Webhook
        • BigCommerce Webhook
    • Warehouses
        • Setting Up a Warehouse's International Rank
        • Set Up Field Mappings of Import/Export Files
        • FTP Inventory Import for a 3PL
        • Setting Up Domestic Backup Warehouses
        • Creating and Configuring Warehouses in Extensiv Network Manager
        • Deactivating a Warehouse in Extensiv Network Manager
        • Updating the Address/Return Address for Your Warehouse
        • Enabling Use Component Inventory Setting for Bundles and Kits
    • Orderbots
        • Creating an Orderbot
        • Deactivating an Orderbot in Extensiv Network Manager
        • Editing an Orderbot
        • Automate Orders to Fulfill from a Specific Warehouse
        • Postal Zones in Extensiv Network Manager
        • Orderbots filtered by zip code range
        • Support for Shopify's Additional Details
      • Reverify Shopify Connection

Creating and Configuring Warehouses in Extensiv Network Manager

Creating and configuring your warehouses in Extensiv Network Manager is one of the first – and most important – steps in getting your account ready to go live.

To create a new warehouse, follow the steps below:

  1. On Network Manager, click Order Routing on the left navigation menu. Confirm the company first by clicking the dropdown next to Currently Viewing field.
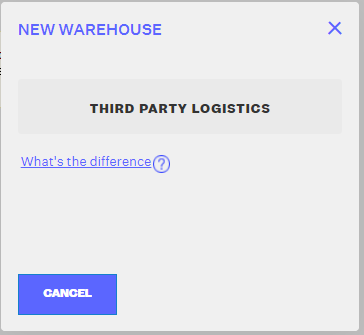
  2. Next, click Settings.  Then, click Warehouses. The New Warehouse window will open.
  3. Click Third Part Logistics. 

4. In the new window, you’ll have to complete several required fields, including:

  • Warehouses Name
  • Address
  • City
  • State
  • Zip Code
  • Country
  • Contact Phone
  • Fax Number
  • Contact eMail

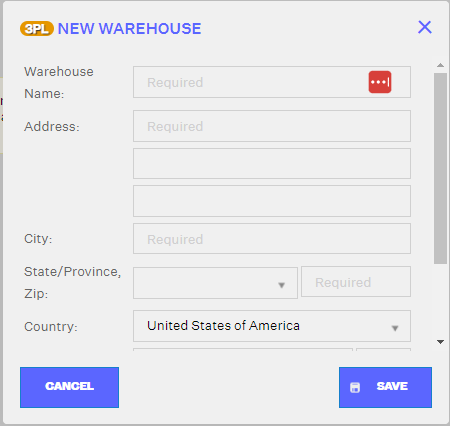
5. Review the details entered and click Save. 

If you’d like, you can also arrange domestic back-up warehouses, similar to the in-house set-up process.

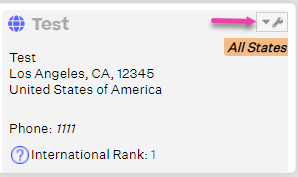
Once you’ve created the warehouse, you can click the wrench icon next to its name and select from a number of options, including:

  • Basic Info & I.D. Color: you can revise basic warehouse contact information here.
     
  • Returns Location: this is the location where returned items will go, assuming they were originally fulfilled by this factory. This does not have to match the original address of the warehouse itself.
     
  • Communication Print Settings: this is where you’d set up the FTP connection to your 3PL, assuming it uses FTP.

    There is a separate guide available regarding establishing an FTP connection.

     
  • International Rank: this is the order in which international orders should be fulfilled, and can be “activated” by creating an Orderbot.
     
  • Domestic Backup Order: helps you decide the order in which inventory is pulled from if this particular warehouse is out of stock.
     
  • Inventory Dependents: these are the warehouses that source new inventory from this Master (Parent) Warehouse.

    Setting up dependents will result in the merging of sales velocities, which will be reflected in Network Manager generated POs.

     
  • Deactivate: this will deactivate the warehouse.
     
  • History: this tracks the history of actions performed on the warehouse.


configuring warehouses

Was this article helpful?

Yes
No
Share additional feedback about this article

Related Articles

  • Set Up Field Mappings of Import/Export Files
  • Setting Up a Warehouse's International Rank
  • Setting Up Domestic Backup Warehouses
  • FTP Inventory Import for a 3PL

Not finding the help you need?

Contact Support
Solutions
  • Solutions for Brands
  • Solutions for 3PLs
  • Solutions for 4PLs
  • Solutions for B2B
Products
  • Extensiv 3PL Warehouse Manager
  • Extensiv Warehouse Manager
  • Extensiv Order Manager
  • Extensiv Integration Manager
  • Extensiv Network Manager
Products
  • Customer Success
  • Implementation
  • Consulting
Ecosystem
  • Fulfillment Marketplace
  • Integrations
  • Partners
  • Become a Partner
Resources
  • Resource Library
  • Blog
  • Market Insights
  • What is a 3PL?
  • What is a 4PL?
  • What is a WMS?
  • Why a Cloud-based WMS?
  • Glossary
Help
  • Help Center
  • API Documentation
  • Extensiv Univerisity
  • Community
  • System Status
  • Extensiv Logo
  • 100 N Pacific Coast Hwy, Suite 1100, El Segundo, CA 90245
  • |
  • Contact Us:
  • 83-EXTENSIV 888.375.2368 (main)
  • |
  • 310.844.7570 (local)
  • Copyright © 2023 Extensiv
  • |
  • All rights reserved.
  • Privacy Policy
  • |
  • Terms of Service
  • Follow Us:
Expand