3PL Warehouse Manager

Updated on May 31st, 2024

  • Extensiv Hub
    Popular Articles Getting Started Using Hub Technical Issues & FAQs Extensiv's Ideas Portal
  • 3PL Warehouse Manager
    Receiving Operations Inventory Management Shipping Operations System Configuration Scanning Operations Integrations Content Best Practice Resources Release Notes Popular Articles Troubleshooting Guides
  • Warehouse Management
    Getting Started Admin Console Shipping Order Picking & Packing Receiving Customer Portal Cycle Counting Kit Building Managing Users Barcode Scanner Import/Export Integrations Barcoding Wave Picking Bin Move Mobile Receiving and Picking Settings Popular Articles Reporting
  • Order Management
    Dashboard Orders Inventory Purchase Orders Shipments Customers Products Analytics Settings API API Integrations Accessing and Navigating Order Manager Error Messages Order Manager Popular Articles Accounting Integrations
  • Integration Management
    Getting Started with Integration Manager General Support Troubleshooting Extras & Addons API Documentation Popular Articles Order Sources Order Destinations
  • FAQs
  • Network Manager
    Getting Started Order Routing Management Technical Issues Shopping Carts Settings Settings, Products, and Orders
  • Billing Manager
    Getting Started Using Billing Manager
  • Release Notes
    Extensiv Sandbox Extensiv Extensiv Hub 3PL Warehouse Manager Integration Management Warehouse Management Order Management Billing Manager
  • Fulfillment Marketplace
    Getting Started
  • Sandbox
    Getting Started
+ More
  • Help Center
  • 3PL Warehouse Manager
  • System Configuration
  • User Setup
  • System Configuration
    • Warehouse Setup
        • Configuring 3PL Settings
        • Managing Warehouses
        • Creating Locations
        • Mass-Updating Locations
        • Using Custom Labels
        • Freezing Transactions
    • Customer Setup
        • Managing Customers
        • Managing Customer Notifies
        • Managing Suppliers
        • Ignoring SKUs
        • Understanding Custom Fields
        • Cloning Customers
        • Connecting to 3PL Warehouse Manager SFTP Service
    • User Setup
        • Managing User Roles
        • Managing Users
    • Billing Setup
        • Using the Billing Wizard
        • Per Transaction Receiving Scripts
        • Per Transaction Shipping Scripts
        • Understanding Recurring Storage Charges
        • Managing Invoices
        • Exporting Invoices to QuickBooks
        • Reviewing Recurring Storage Charges

Managing Users

Step 1 - Create a user account in Extensiv Hub


Only the owner or a user with the "create users" permission can create new accounts in Hub. To add another user to your account, follow the instructions below.

1. Login to Extensiv.

Note: If you have more than one organization in Hub, choose the one you want to add the new user to first. Check the image below for help.


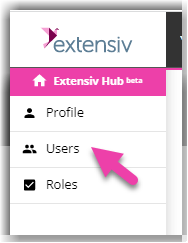
  2. Click Users on the left navigation menu.
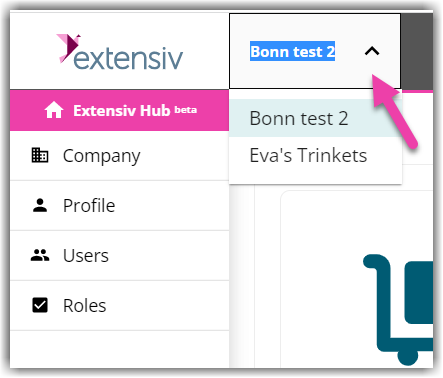
3. Click Create User. This action will open the Invite Users window. 

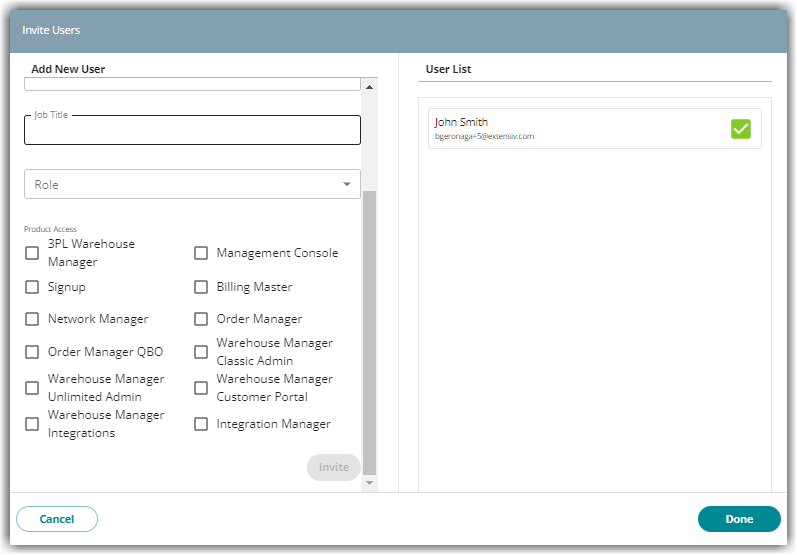
4. Fill in the new user details. Enter the first name, last name, email, and job title.

5. Select the appropriate role for this account. 

The user role defines the permissions of the access in Extensiv Hub. The permissions assigned to this role do not necessarily relate to the permissions they need to have for each product. You still need to manage the product permissions on the product itself. 

If you want to learn how to create user roles, see our article on Creating User Roles in Hub. 
 

6.  Select 3PL Warehouse Manager from the list of product access. 
 

7. Review and confirm the details are accurate. Then, click Invite. You should see the recently created account added to the User List column. Click Done if you’re finished creating user accounts.
 

If you have two or more organizations and the user needs to join one of them, make sure to create an account for that organization. To do this, click the menu next to the Extensiv logo, pick the right organization, and then follow Steps 1–7.


8. On the User Accounts page, you will find the status of the account as Pending. Inform the user that they will receive an email to join Extensiv Hub.


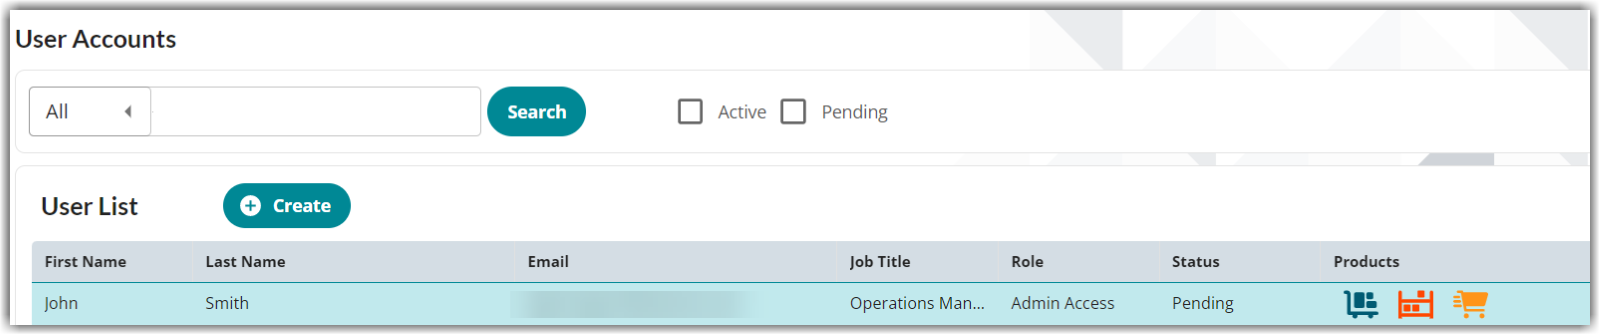
For steps on how to log in to Extensiv Hub for the first time, see this article Logging in to Extensiv Hub for the First Time.

Step 2 - Manager user permissions in 3PL Warehouse Manager
 

  1. Select the correct organization and launch 3PL Warehouse Manager from Extensiv Hub. 
  2. In 3PL Warehouse Manager, click Users on the left navigation menu. 
  3. Select the recently created user account. Then, click Manage at the top-right corner of the page.
  4. Select Edit from the dropdown.
  5. Choose between Warehouse and Customer for user access.

Warehouse vs Customer

Warehouse users are those who work in your facility, whereas Customer users are the customers for whom you receive and ship. 


6. Select a 'Role' from the drop-down menu, as well as a 'Classic View Access' role. For Classic View Access, we recommend granting Warehouse users ‘level0’ and Customer users ‘cust6’ access.

Failure to provide accurate Classic View access results in a user's inaccessibility to some pages, even if they are granted access under Users > Manage Roles. If you are not familiar with our legacy system, feel free to refer to our Classic View Access Roles file.
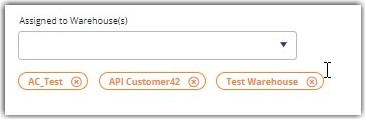


7. If you are setting up a warehouse user, open the 'Assigned to Warehouse(s)' drop-down and choose the warehouses where this person will work. The selected warehouses will show up below as yellow boxes.
 

If you are setting up customer users, open the 'Assigned to Customer(s)' drop-down and pick the customer accounts that the user should access. If you choose more than one customer, it's called a "customer group, allowing you to link multiple customer accounts to one user. The selected customers will show up below in yellow boxes.


8. Click Save once done.

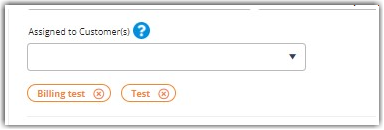
For customer users only, open the  'Assigned to Customer(s)' drop-down list to select each customer account the user is associated with. Selecting multiple customers creates a “customer group”, which is a feature that allows you to assign multiple customer accounts to a single customer user. Each customer selected displays below the field in a yellow chip.

handling users user management

Was this article helpful?

Yes
No
Share additional feedback about this article

Related Articles

  • Configuring a Drop Ship Address
  • Pallet In/Carton Out Workflow
  • Common Transactional Shipping Charges
  • January 3, 2020 – Minor Release Notes

Not finding the help you need?

Contact Support
Solutions
  • Solutions for Brands
  • Solutions for 3PLs
  • Solutions for 4PLs
  • Solutions for B2B
Products
  • Extensiv 3PL Warehouse Manager
  • Extensiv Warehouse Manager
  • Extensiv Order Manager
  • Extensiv Integration Manager
  • Extensiv Network Manager
Products
  • Customer Success
  • Implementation
  • Consulting
Ecosystem
  • Fulfillment Marketplace
  • Integrations
  • Partners
  • Become a Partner
Resources
  • Resource Library
  • Blog
  • Market Insights
  • What is a 3PL?
  • What is a 4PL?
  • What is a WMS?
  • Why a Cloud-based WMS?
  • Glossary
Help
  • Help Center
  • API Documentation
  • Extensiv Univerisity
  • Community
  • System Status
  • Extensiv Logo
  • 100 N Pacific Coast Hwy, Suite 1100, El Segundo, CA 90245
  • |
  • Contact Us:
  • 83-EXTENSIV 888.375.2368 (main)
  • |
  • 310.844.7570 (local)
  • Copyright © 2023 Extensiv
  • |
  • All rights reserved.
  • Privacy Policy
  • |
  • Terms of Service
  • Follow Us:
Expand