Managing Suppliers
Suppliers are those who supply your customers' inventory items. In the case that you need to know who produced an item, you can create supplier contacts to have their information readily available in 3PL Warehouse Manager. Once a supplier contact is created, you can select the supplier on a receipt line item and sort or filter by that information when adding order line items via the Mass Add tool.
This article reviews how to create and manage supplier contacts for your customers.
Guidelines
Navigate to Customers > Manage Suppliers in 3PL Warehouse Manager, then select a customer from the drop-down menu.
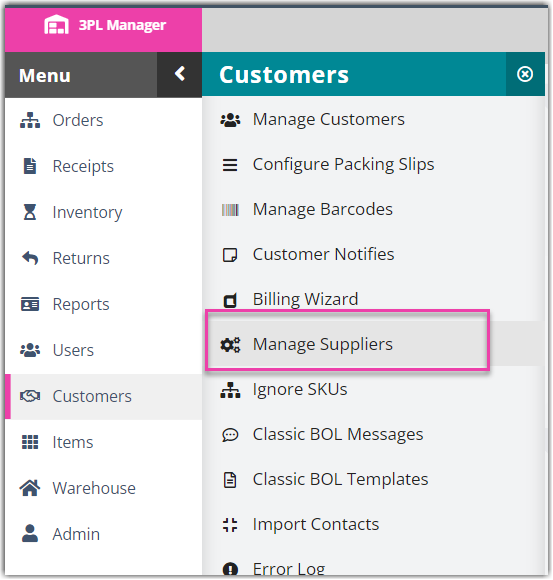
Continue reading below for instructions on how to add a new supplier and manage an existing supplier.
Add a new supplier
There are two options for creating a new supplier contact in 3PL Warehouse Manager: via manual entry or an import file. Instructions for both are listed below.
Create supplier contacts manually
- To create a supplier contact via manual entry, click Add.
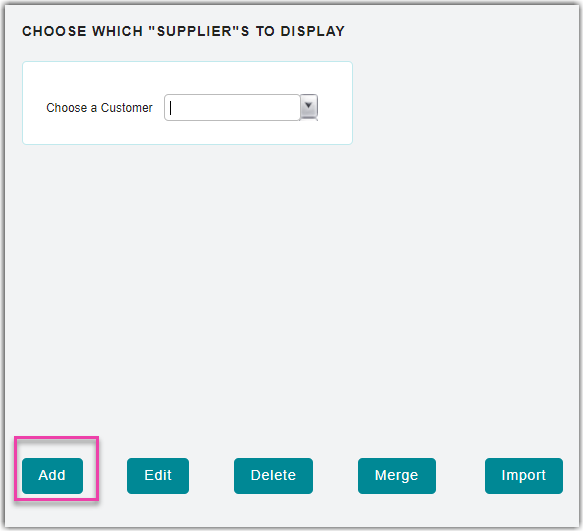
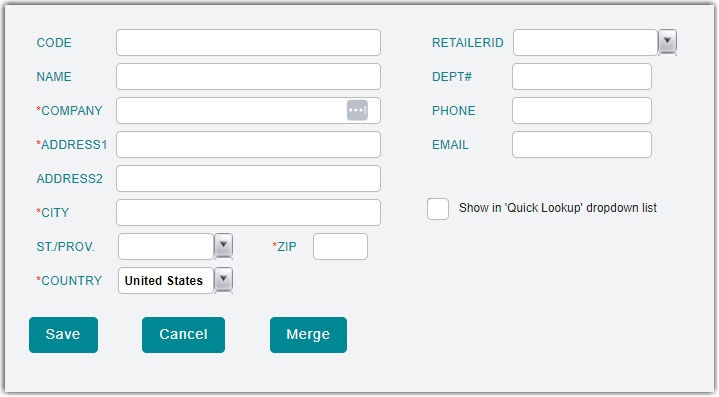
- Enter the supplier's contact information using the appropriate fields. Note that fields with a red asterisk (*) are required.
- Code: Value used to identify the contact in the Advanced Lookup tool when editing an order—e.g., You could use code HD1099 to identify Home Depot store 1099
- Retailer ID: Option to select a relevant existing retailer
- Show in 'Quick Lookup' dropdown list: When checked, it appears in 'Shipping Destination Favorites' drop-down menu when creating/editing an order
- Once complete, click Save. The new supplier populates in the grid and is available for the selection of online items for the associated customer.
Repeat Steps 1–3 for each supplier contact as needed. If you need to create new supplier contacts for additional customers, be sure to select the relevant customer from the drop-down menu.
Import supplier contacts
If you have multiple supplier contacts to create or you already have a spreadsheet that contains the supplier information, we recommend adding these contacts into the system via import file.
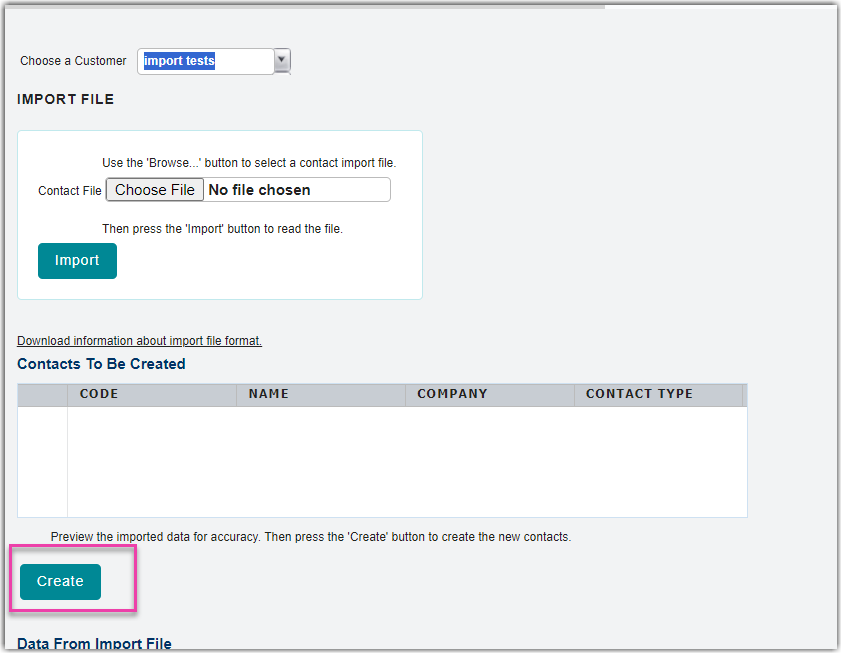
- Follow the instructions on the Contact Import Template—making sure that you enter Supplier in Column N for each supplier contact listed in the file, then click Import on the Manage Suppliers page.
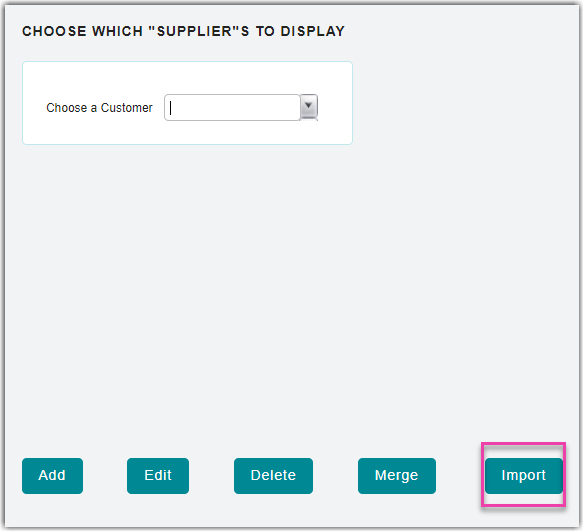
- Click Browse, then double-click the import file.
- Click Import. A preview of the contact data is displayed in the 'Contacts To Be Created' grid and the bottom two text boxes.
- Once you verify for accuracy, click Create to finalize the import. If successful, you can view each contact on the Manage Suppliers page.
Manage an existing supplier
There are three different options for managing an existing supplier.
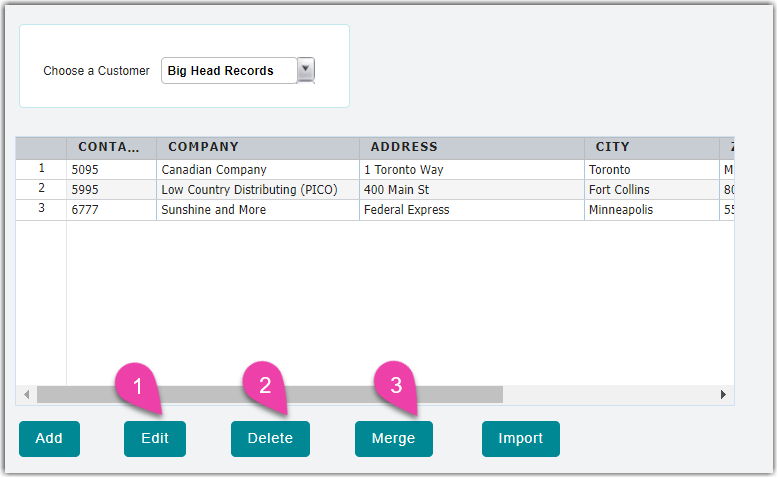
- Edit a supplier. Select a supplier from the grid, click Edit, make your changes, then click Save.
- Delete a supplier. Select a supplier from the grid, then click Delete.
Please note that you cannot delete a supplier that has been used on an existing transaction.
- Merge two or more suppliers into one contact. Use < Ctrl > or < Shift > on your keyboard to select the suppliers from the grid, then click Merge. Select the supplier whose contact information you wish to remain in the system, then click Merge.
Please note that you cannot reverse this action, and it results in the modification of all existing transactions where the merged supplier is present.
