Work Orders
2.7 min read
|Work Orders allow you to keep track of a specific task or translate component parts into a finished good.
If you have never created a Work Order, follow the link to know more about the following:
Then after that, you can proceed to setup the following:
- Creating a new order
- Finished Goods
- Work Order Detail
Creating a New Order
Once the required settings have been accomplished, you can start creating a new Work Order.
To create a new order,
- Go to Orders > Work Orders > select a View > New.
- Note the following criteria is required when creating a work order:
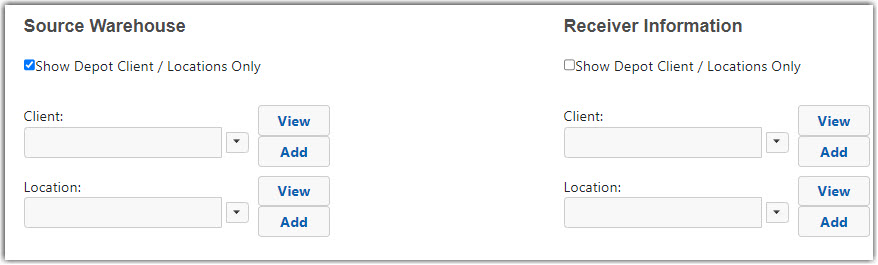
- Source Warehouse – Where the order will be coming from.
- Client
- Location
- Receiver Information – Where the order will be sent.
- Client
- Location
- Work Order Type – Select from the Work Orders that you have made.
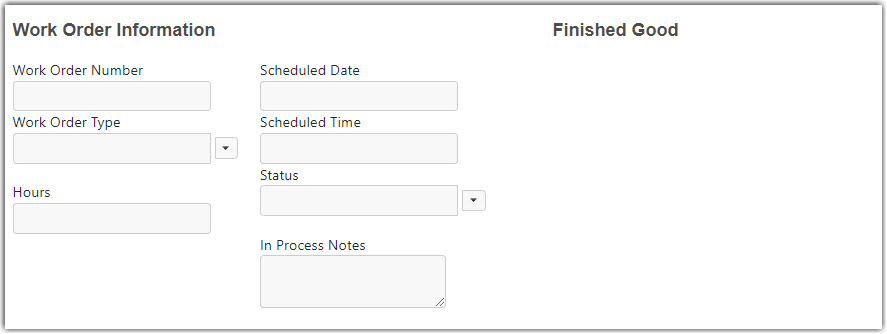
- Source Warehouse – Where the order will be coming from.
- Click Save when done.
Once saved, a Work Order number will be automatically assigned to the order. You will be able to finish filling out the kind of work to be done.
The following optional fields can be used, but do not enforce or drive functionality for you:
- Scheduled Date – The date work is expected to be completed.
- Scheduled Time – Time of day work is to be completed.
- In Process Notes – Notes regarding the work being done.
- Hours – Number of hours expected or allotted for specific work to be completed.
Finished Goods
Work Orders can be used to convert component parts into a finished good. This can be accomplished with Kit Building, but Work Orders allow you to create finished goods from any component part that exists in the system.
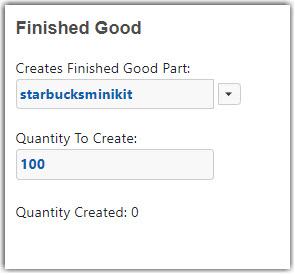
The following fields are available if producing finished goods from components:
- Creates Finished Good Part – Desired finished good SKU made up of components.
- Quantity to Create – Total quantity requested of finished good SKU to be assembled.
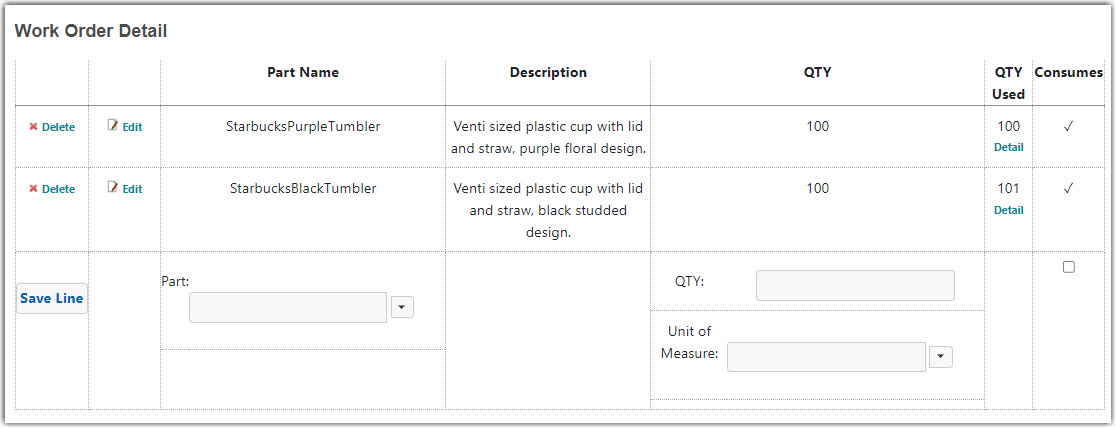
Work Order Detail
The Work Order Detail section is like a cooking recipe – this is where you can designate the child components to be used, or consumed as the Warehouse Manager calls it, when converting component parts into a finished good. After selecting an SKU and quantity, selecting the Consumes checkbox tells the system to decrease the quantity listed of the component when increasing the desired finished good inventory. Placing any SKU on a Work Order does not allocate inventory.
If you’re not creating finished goods, you can leave the Work Order Details and Finished Good sections blank.
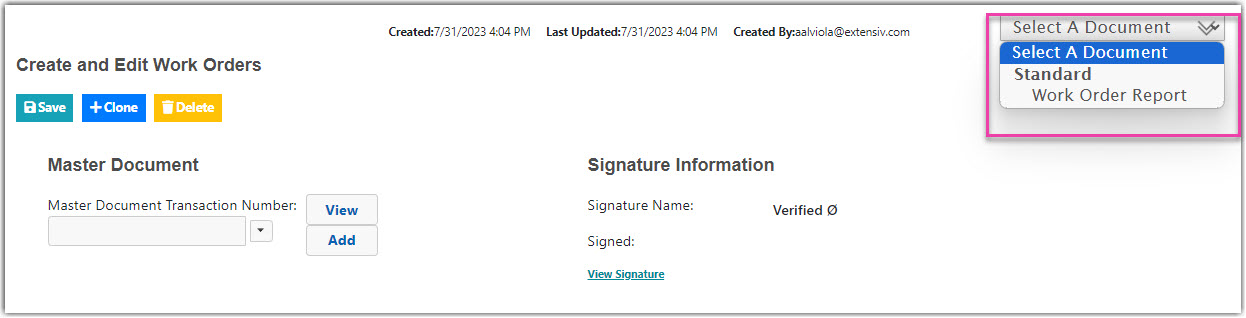
Once the details have been filled out, you must change the work order status to New before saving. Doing so will make the work order available for you to execute using a mobile device. If needed, you can print out a document for you to work from by clicking Select a Document at the top of the screen.
Fulfilling the Work Order
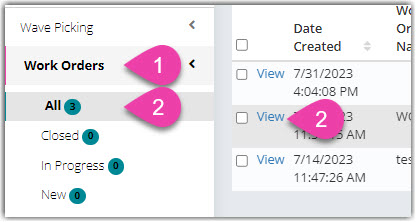
Newly created Work Orders can be found by navigating to:
Orders > select View > click View beside a Work Order
You have the option to pick component parts, change Work Order Status, set a Scheduled Date for completion, add work hours, add notes, and fill out any Custom fields set on the Work Order Type.
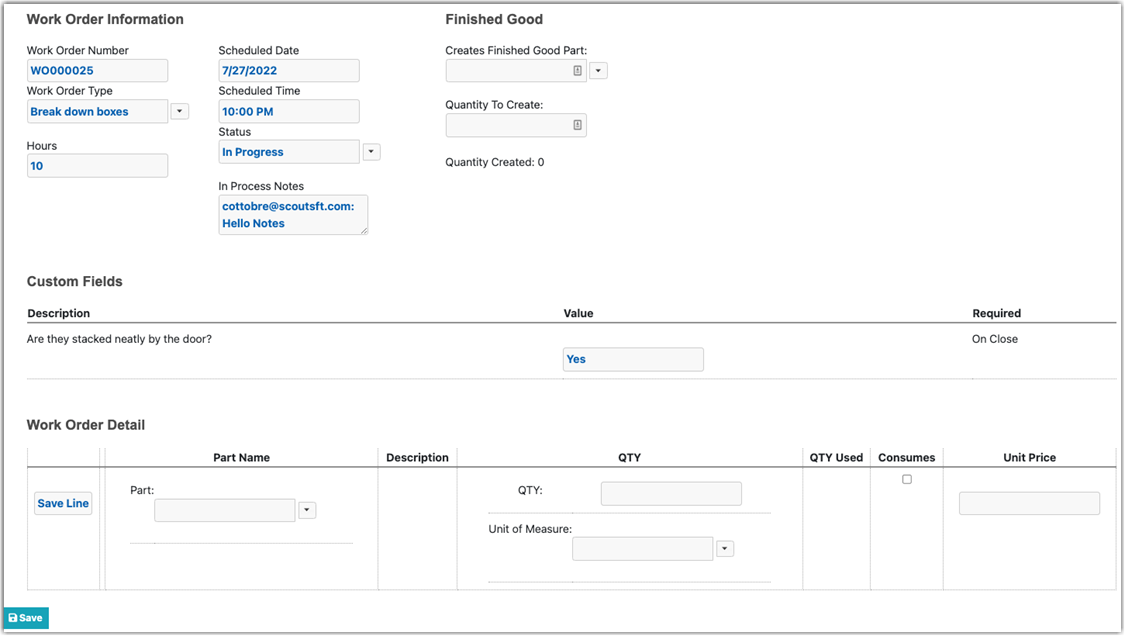
Example # 1: Non-Finished Goods Task
Create a Work Order Type for a non-finished good template that requires a custom field.

Once the Work Order is created, this is the result on the mobile device with input from you.
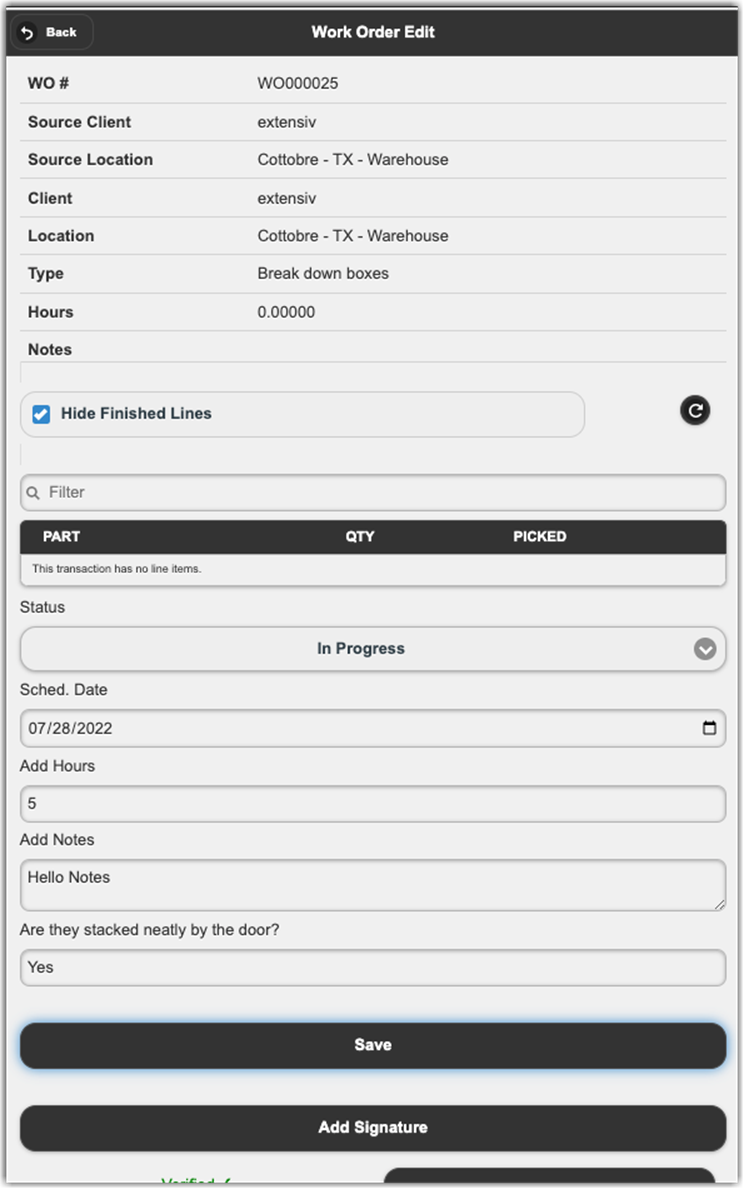
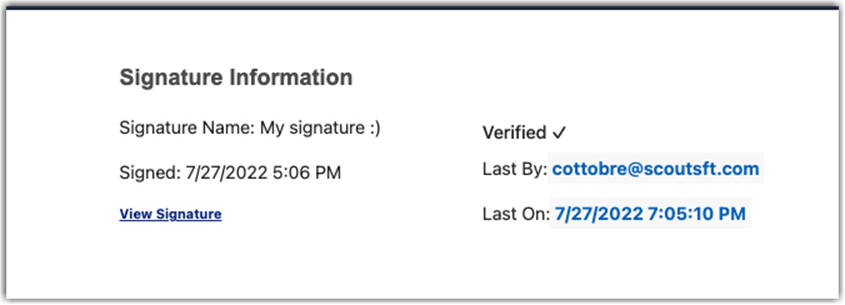
After saving the input, the original Work Order is updated with the responses, verification, and capture signature from you.
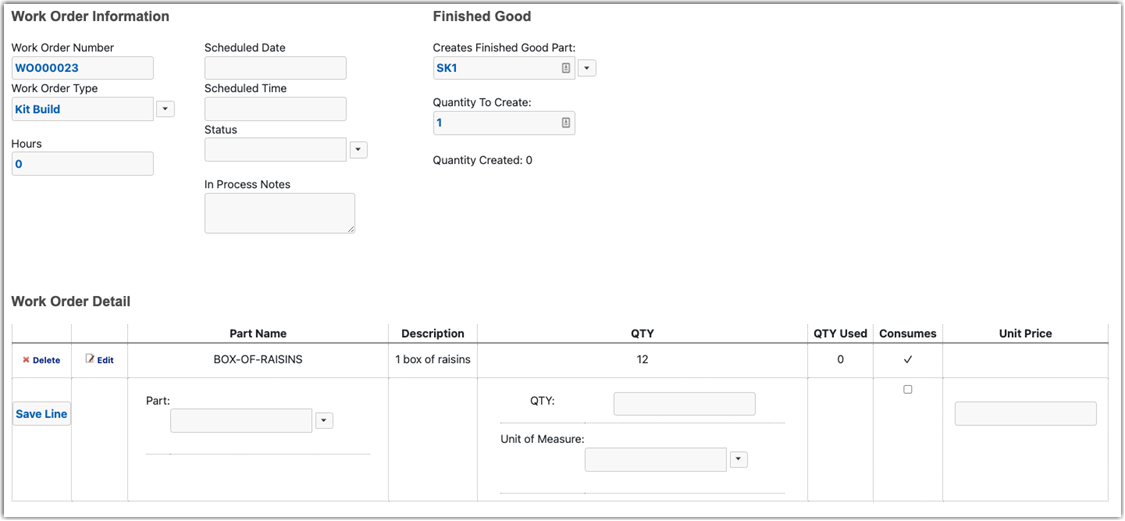
Example #2: Finished Goods Task
Create a Work Order, using a generic Work Order Type, to translate component parts into a finished good.
Once the Work Order is created, the following is the result on the mobile device:
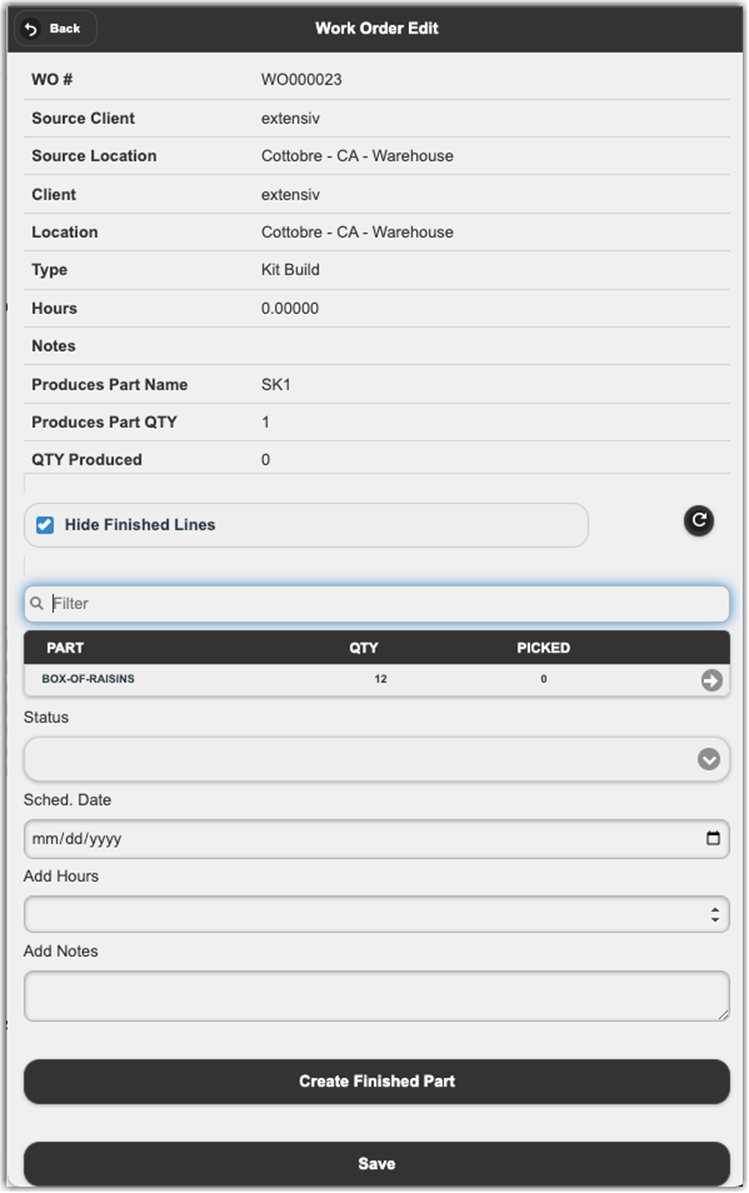
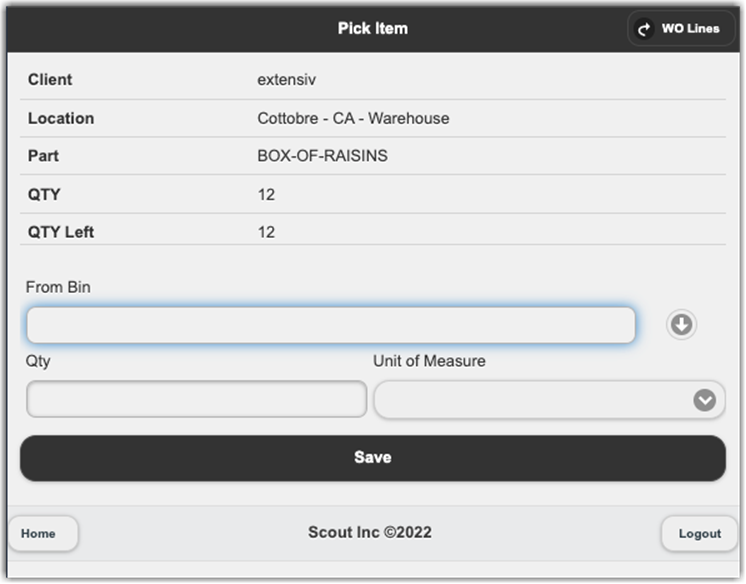
Selecting one of the listed component parts will send you to pick the items out of inventory. Unlike Order Pick, the Work Order will ask you which bin they are removing inventory from.
When enough inventory has been picked to build the requested quantity of finished goods, the Create Finished Part button will allow you to consume the component parts from inventory to inflate the finished goods inventory. This is accomplished by redirecting you to the Add Inventory function to confirm the addition of desired quantity to the desired warehouse location.
Additional Menu Options
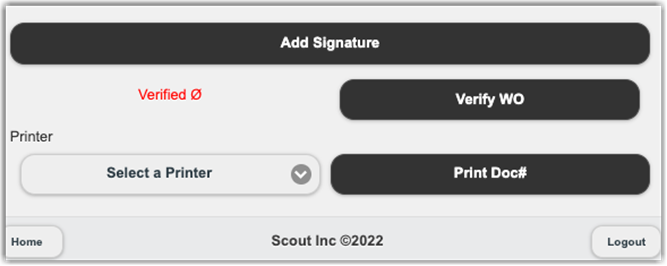
At the bottom of the screen on the mobile device there are additional options you can select while completing a Work Order:
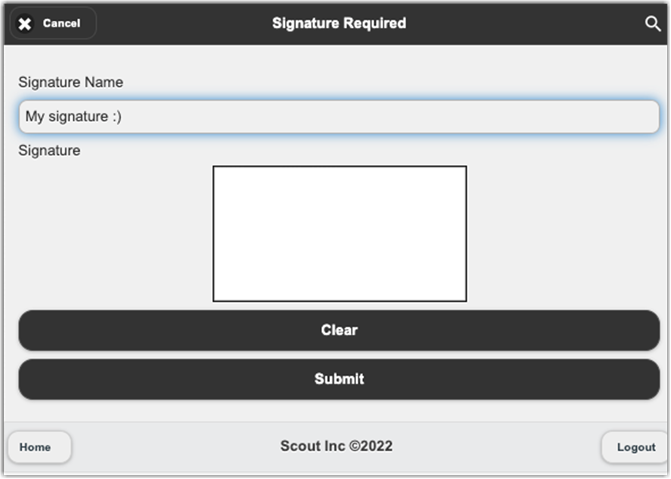
- Add signature captures a signature using the mobile device.
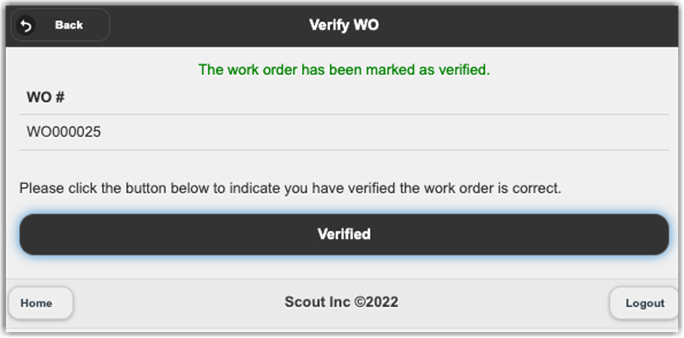
- Verify WO – verification is recorded on the WO transaction.
- Print Doc# – prints a barcode of the WO document number to the connected thermal printer.
When they have finished their task, changing the Work Order status from New or In Progress to Closed will mark the Work Order as Complete.