Connecting a QuickBooks Desktop Account
3.2 min read
|If you are a QuickBooks user, you can integrate your account with 3PL Warehouse Manager and export your customer invoices directly to your QuickBooks instance. This article reviews the necessary steps for connecting your QuickBooks Desktop account to 3PL Warehouse Manager and retrieving queued invoices.
Before proceeding, please ensure the following requirements have been met:
- QuickBooks Desktop is enabled via Admin > Settings in the WMS
- You are running QuickBooks 2008 or later
- You have administrative access to QuickBooks
- You have a general understanding of QuickBooks functionality
- If using a multi-hosted instance of QuickBooks, you are signed in using Single User mode
- If using a cloud-hosted instance of QuickBooks, the file is loaded to the server hosting the QuickBooks company file
- QuickBooks Web Connector is setup.
Example QuickBooks Desktop Invoice (Ultra-Detailed Version):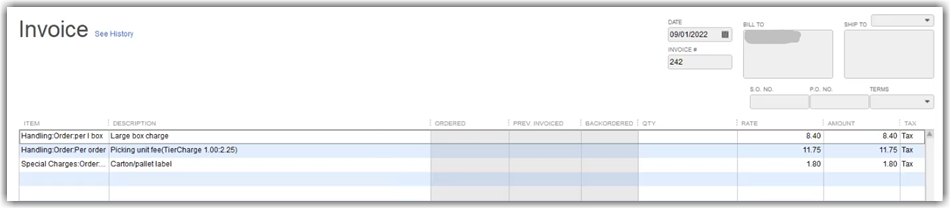
Guidelines
Our Professional Services team typically completes this authorization with you when you first integrate QuickBooks with 3PL Warehouse Manager. If you lose access to Extensiv's application in your QuickBooks client, you can reconnect using the steps below.
- A QWC Connector File will be provided by your Onboarding Manager or the Support Team.
- Save the file on the computer or the server that QBD is installed on. You can save this file anywhere on the PC. However, we recommend placing it on the local drive (typically the C drive), in a new folder titled “3PLCQuickbooks”.
- A new QBAdmin user and password will also be provided for you to be used at the time of connection
If your accounting personnel changes, this ensures that no changes will need to be made to the connector file. When creating this user, it is also important to keep a record of the QB user's password in 3PL Warehouse Manager to use when you establish the connection below in Step 1 within Step 3: Retrieve queued invoices from the 3PL Warehouse Manager section.
Step 1: Clear any existing integration preferences
If this is your company's first time establishing a QuickBooks Desktop connection to 3PL Warehouse Manager, continue to Step 2 in the next section below.
In the case that you need to update the WMS user data in the QuickBooks connector file or if you perform a QuickBooks software update and need to reload the connector file, you must first clear your existing integration preferences and remove any existing QWC files in your QuickBooks client. Follow the instructions below.
- Navigate to Edit > Preferences in QuickBooks Desktop.
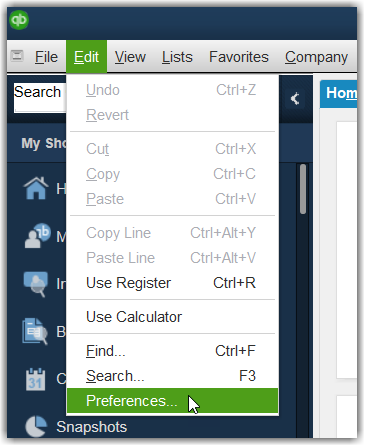
Note that you must sign in with administrative credentials using Single User mode. - Select Integrated Applications from the left menu, then click the Company Preferences tab.
- Select the 'Extensiv QB Connection' application from the grid, then click Remove.
- Click Yes to confirm the removal, then click OK. The file is now removed from your QuickBooks account.
- Contact Extensiv Technical Support to retrieve a new connector file. Once you have the file saved to your device, continue to the next section to learn how to upload the new file and authorize Extensiv access to your QuickBooks account.
Step 2: Connect your QuickBooks account to 3PL Warehouse Manager
If you are unable to access your original QuickBooks connector file or simply need to update the WMS user data in the file, contact Extensiv Technical Support to retrieve a new file and follow the steps in the previous section before attempting to connect with the steps below.
- Once you have the QuickBooks connector file saved to your device in QWC format, navigate to File > App Management > Update Web Services in QuickBooks Desktop to open the QuickBooks Web Connector.
Some customers do not have the 'Update Web Services' option available. Please confirm its availability in QBD as a prerequisite.

Note: If you're using a previous version of QuickBooks (2020 or earlier), you can find this option via File > Update Web Services. - Select Add an Application, then double-click the connector file on your device.
- Click OK to grant Extensiv access to QuickBooks.
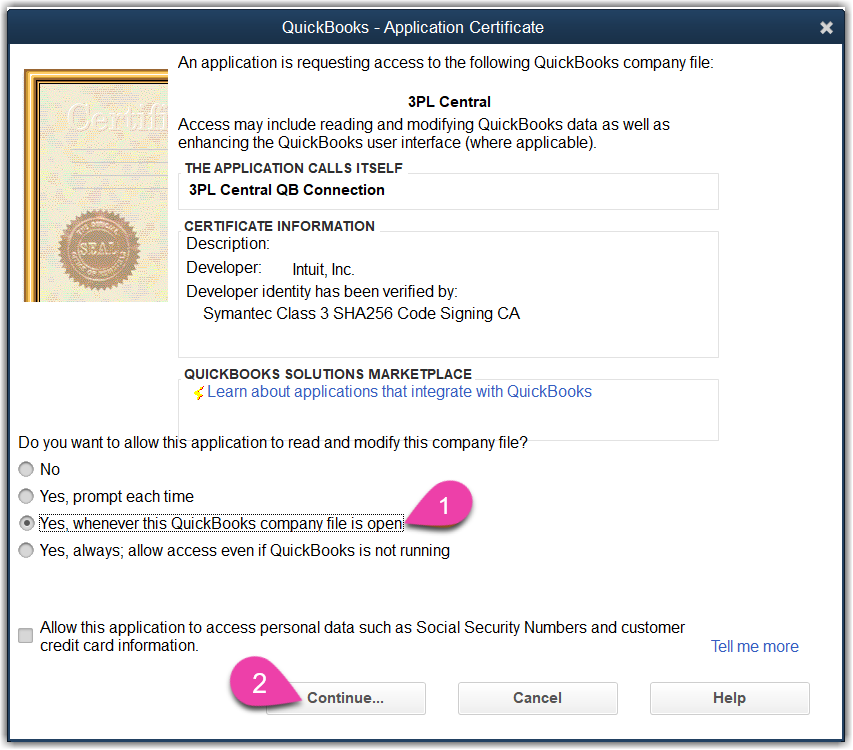
- Select Yes, whenever this QuickBooks company file is open, then click Continue.
- Click Done to confirm the authorization and return to the QuickBooks Web Connector dialog.
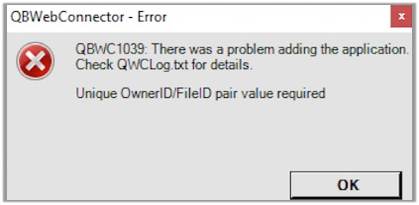
If you receive the following QBWC1039 error when trying to replace the QWC file, use these steps to resolve it:
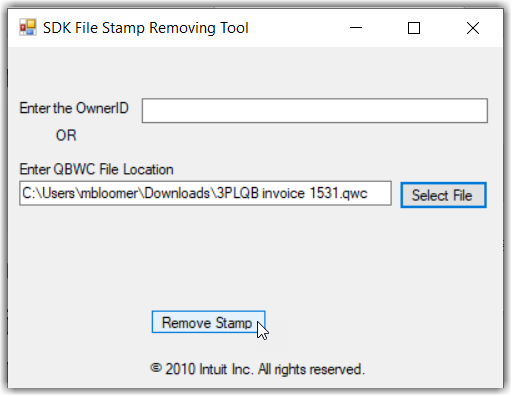
- Download Intuit's CP3 tool. Once installed on your device, open the tool.
- Click Select File, double-click your connector file, then select Remove Stamp to reopen the QuickBooks Application Certificate dialog.
- Select Yes, whenever this QuickBooks company file is open, then click Continue.
- Click Done, then click OK in the CP3 tool.
- A confirmation message displays to let you know the Owner ID has been removed. Click OK, close the CP3 tool, then repeat the connection steps above.
Step 3: Retrieve queued invoices from 3PL Warehouse Manager
Once you establish the connection between QuickBooks Desktop and 3PL Warehouse Manager, you can retrieve invoices from 3PL Warehouse Manager's QB Invoice Queue using the QuickBooks Web Connector.
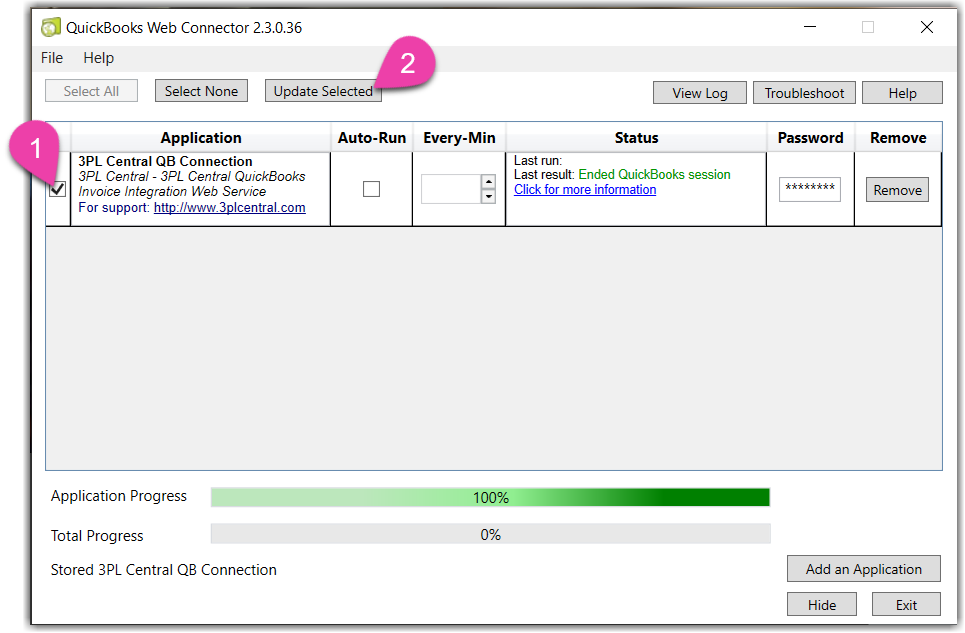
- To manually push pending invoices into QuickBooks, click the selection box to the left of the application, then click Update Selected. When prompted, enter the password that the user specified in the connector file uses to log into 3PL Warehouse Manager.
- To automate the invoice pull, select Auto-Run, then specify how often you want QuickBooks to pull queued invoices from 3PL Warehouse Manager (in minutes) under the 'Every-Min' column.
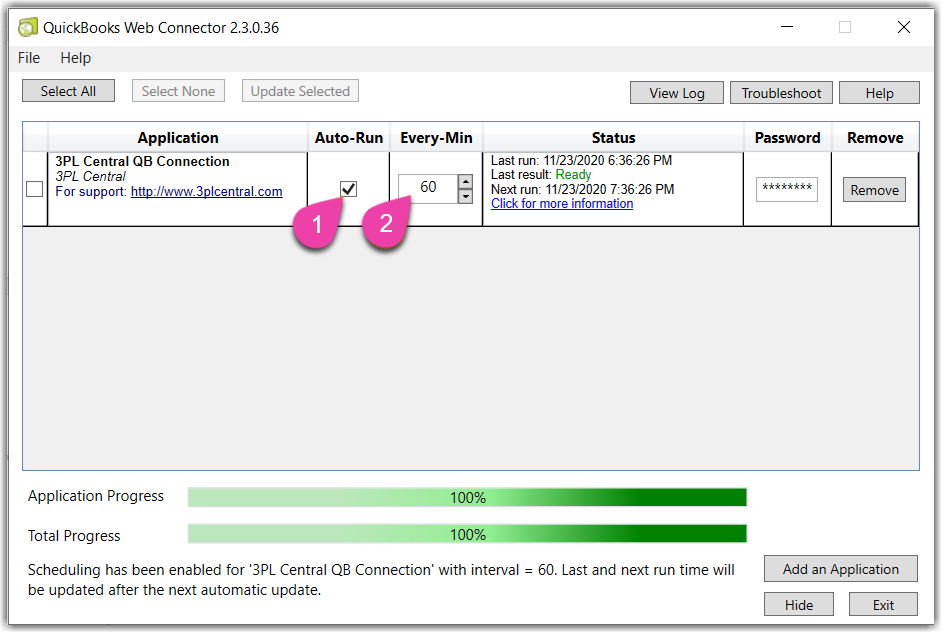
You must have the QuickBooks Web Connector dialog open in order for QuickBooks to complete each auto-run.
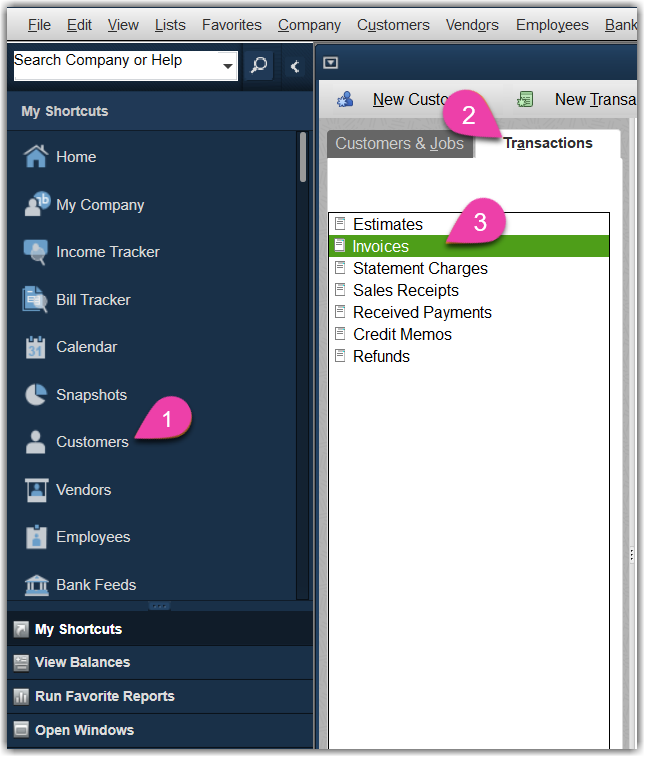
- Once your 'Total Progress' tracker reads 100%, navigate to Customers > Transactions > Invoices to view all invoices that were pulled in from 3PL Warehouse Manager's QB Invoice Queue.