3PL Warehouse Manager

Updated on June 25th, 2024

  • Extensiv Hub
    Popular Articles Getting Started Using Hub Technical Issues & FAQs Extensiv's Ideas Portal
  • 3PL Warehouse Manager
    Receiving Operations Inventory Management Shipping Operations System Configuration Scanning Operations Integrations Content Best Practice Resources Release Notes Popular Articles Troubleshooting Guides
  • Warehouse Management
    Getting Started Admin Console Shipping Order Picking & Packing Receiving Customer Portal Cycle Counting Kit Building Managing Users Barcode Scanner Import/Export Integrations Barcoding Wave Picking Bin Move Mobile Receiving and Picking Settings Popular Articles Reporting
  • Order Management
    Dashboard Orders Inventory Purchase Orders Shipments Customers Products Analytics Settings API API Integrations Accessing and Navigating Order Manager Error Messages Order Manager Popular Articles Accounting Integrations
  • Integration Management
    Getting Started with Integration Manager General Support Troubleshooting Extras & Addons API Documentation Popular Articles Order Sources Order Destinations
  • FAQs
  • Network Manager
    Getting Started Order Routing Management Technical Issues Shopping Carts Settings Settings, Products, and Orders
  • Billing Manager
    Getting Started Using Billing Manager
  • Release Notes
    Extensiv Sandbox Extensiv Extensiv Hub 3PL Warehouse Manager Integration Management Warehouse Management Order Management Billing Manager
  • Fulfillment Marketplace
    Getting Started
  • Sandbox
    Getting Started
+ More
  • Help Center
  • 3PL Warehouse Manager
  • Integrations Content
  • EDI Processes
  • Integrations Content
    • API Shopping Cart Integrations
        • Getting Started with Shopping Cart Integrations
        • ShipStation Integration
        • Shopify Shopping Cart Connection
        • WooCommerce Shopping Cart Connection
        • Amazon Shopping Cart Connection
        • Magento 2.x Shopping Cart Connection
        • Volusion Shopping Cart Connection
        • eBay Shopping Cart Connection
    • EDI Processes
        • Getting Started with an EDI Integration
        • Extensiv UCC Carton Label Library
        • EDI Processing
        • Setting Up FTP Email Notifications
        • Sending Receipt Advice
        • Printing UCC Labels
        • Sending an ASN
        • Troubleshooting ASN Errors
        • Using the Customer Error Log
        • Understanding Common EDI Errors
    • DataDocks
        • Understanding DataDocks
        • Using the 3PL Warehouse Manager and DataDocks Integration
    • General Information
        • Whitelisting IP Addresses
    • QuickBooks Desktop
        • Connecting a QuickBooks Desktop Account
        • Connecting Customers to QuickBooks Desktop
        • Understanding Class Tracking
        • Understanding QuickBooks Desktop Billing Setup
    • QuickBooks Online
        • Connecting a QuickBooks Online Account
        • Connecting Customers to QuickBooks Online
        • Configuring Invoice Settings
        • Defining International Tax Codes
        • Understanding QuickBooks Online Billing Setup
    • REST API
        • Getting Started with Credential Management
        • Providing REST API Access
        • Webhooks FAQs
        • Configuring Webhooks
        • Implementing Webhooks
    • Shopify
        • Changing your fulfillment settings in the Shopify app
        • Shopify App Write Fulfillment Permissions

Sending an ASN

An Advanced Shipping Notice (ASN) is used to let your customer know that their order has been shipped out of your facility. Once you close an order, you need to send the ASN to ensure that the necessary information is sent to the retailer so that each UCC label corresponds to specific picked and packed items.

This article reviews how to send an ASN.

A number of pre-checks can occur to ensure that specific fields have correct values before you send an ASN. One of these pre-checks is always performed, validating that you have a valid FTP connection configured for your account. All other pre-checks are defined in a customer's setup under Orders > ASN Settings.

 
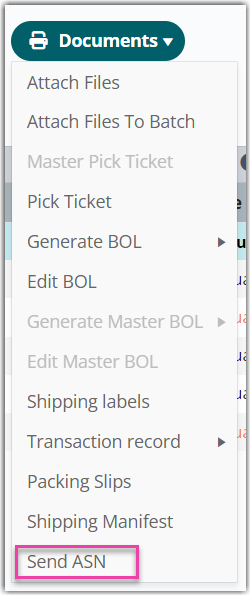
  1. Navigate to Orders > Find Orders, select one or more qualifying orders, click Documents > Send ASN, then select the appropriate file format from the drop-down menu.

    A note on package generation—the Send ASN functionality automatically generates packages to then apply them to the file that is sent to the FTP. If you do not have packages already assigned, then clicking Send ASN generates the default packages. If you do have packages added via SmartPack, Process Packages, or Consolidate Packages, then clicking Send ASN generates the file with those packages. To avoid unintended timeouts, please ensure the selected orders contain less than 10,000 packages.

     
  2. Optional: If you'd like to download the ASN, click Download.
  3. To send the ASN, click Send.
    • If no orders fail the pre-checks, a confirmation message appears notifying you that the ASN has been queued, which means that the system has marked the transaction ready to send.
       
    • If any pre-checks fail, an error message displays that lists all the failed orders with the checks that failed—you can then choose to send the non-failed orders or to cancel the action.

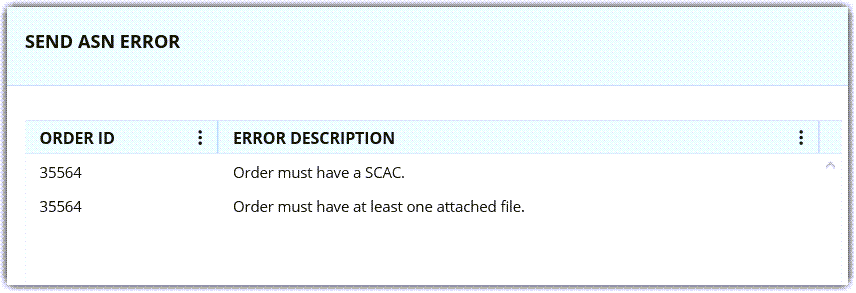
      To read more information on each error that can occur and how to troubleshoot, please see Troubleshooting ASN Errors.

       
  4. Once the ASN successfully processes in the background, the ASN Send Date populates in the Find Orders grid with the exact time our server transmitted the ASN.

You can view the user who triggered an ASN under Reports > Management > Transaction Review.


You can also configure your connection to automatically send an ASN for an order once it is closed. However, please note that this method is not recommended because it removes the ability to view who sent an ASN and when. If your operations do not need visibility into this data and you are interested in enabling this automation, please submit a support case to edi@extensiv.com with your request.


edi delivery asn sending

Was this article helpful?

Yes
No
Share additional feedback about this article

Related Articles

  • Shipping with FedEx One Rate®
  • Creating Orders
  • ShipStation Integration
  • Recalculating Packages

Not finding the help you need?

Contact Support
Solutions
  • Solutions for Brands
  • Solutions for 3PLs
  • Solutions for 4PLs
  • Solutions for B2B
Products
  • Extensiv 3PL Warehouse Manager
  • Extensiv Warehouse Manager
  • Extensiv Order Manager
  • Extensiv Integration Manager
  • Extensiv Network Manager
Products
  • Customer Success
  • Implementation
  • Consulting
Ecosystem
  • Fulfillment Marketplace
  • Integrations
  • Partners
  • Become a Partner
Resources
  • Resource Library
  • Blog
  • Market Insights
  • What is a 3PL?
  • What is a 4PL?
  • What is a WMS?
  • Why a Cloud-based WMS?
  • Glossary
Help
  • Help Center
  • API Documentation
  • Extensiv Univerisity
  • Community
  • System Status
  • Extensiv Logo
  • 100 N Pacific Coast Hwy, Suite 1100, El Segundo, CA 90245
  • |
  • Contact Us:
  • 83-EXTENSIV 888.375.2368 (main)
  • |
  • 310.844.7570 (local)
  • Copyright © 2023 Extensiv
  • |
  • All rights reserved.
  • Privacy Policy
  • |
  • Terms of Service
  • Follow Us:
Expand