3PL Warehouse Manager

Updated on June 19th, 2023

  • Extensiv Hub
    Popular Articles Getting Started Using Hub Technical Issues & FAQs Extensiv's Ideas Portal
  • 3PL Warehouse Manager
    Receiving Operations Inventory Management Shipping Operations System Configuration Scanning Operations Integrations Content Best Practice Resources Release Notes Popular Articles Troubleshooting Guides
  • Warehouse Management
    Getting Started Admin Console Shipping Order Picking & Packing Receiving Customer Portal Cycle Counting Kit Building Managing Users Barcode Scanner Import/Export Integrations Barcoding Wave Picking Bin Move Mobile Receiving and Picking Settings Popular Articles Reporting
  • Order Management
    Dashboard Orders Inventory Purchase Orders Shipments Customers Products Analytics Settings API API Integrations Accessing and Navigating Order Manager Error Messages Order Manager Popular Articles Accounting Integrations
  • Integration Management
    Getting Started with Integration Manager General Support Troubleshooting Extras & Addons API Documentation Popular Articles Order Sources Order Destinations
  • FAQs
  • Network Manager
    Getting Started Order Routing Management Technical Issues Shopping Carts Settings Settings, Products, and Orders
  • Billing Manager
    Getting Started Using Billing Manager
  • Release Notes
    Extensiv Sandbox Extensiv Extensiv Hub 3PL Warehouse Manager Integration Management Warehouse Management Order Management Billing Manager
  • Fulfillment Marketplace
    Getting Started
  • Sandbox
    Getting Started
+ More
  • Help Center
  • 3PL Warehouse Manager
  • Integrations Content
  • Shopify
  • Integrations Content
    • API Shopping Cart Integrations
        • Getting Started with Shopping Cart Integrations
        • ShipStation Integration
        • Shopify Shopping Cart Connection
        • WooCommerce Shopping Cart Connection
        • Amazon Shopping Cart Connection
        • Magento 2.x Shopping Cart Connection
        • Volusion Shopping Cart Connection
        • eBay Shopping Cart Connection
    • EDI Processes
        • Getting Started with an EDI Integration
        • Extensiv UCC Carton Label Library
        • EDI Processing
        • Setting Up FTP Email Notifications
        • Sending Receipt Advice
        • Printing UCC Labels
        • Sending an ASN
        • Troubleshooting ASN Errors
        • Using the Customer Error Log
        • Understanding Common EDI Errors
    • DataDocks
        • Understanding DataDocks
        • Using the 3PL Warehouse Manager and DataDocks Integration
    • General Information
        • Whitelisting IP Addresses
    • QuickBooks Desktop
        • Connecting a QuickBooks Desktop Account
        • Connecting Customers to QuickBooks Desktop
        • Understanding Class Tracking
        • Understanding QuickBooks Desktop Billing Setup
    • QuickBooks Online
        • Connecting a QuickBooks Online Account
        • Connecting Customers to QuickBooks Online
        • Configuring Invoice Settings
        • Defining International Tax Codes
        • Understanding QuickBooks Online Billing Setup
    • REST API
        • Getting Started with Credential Management
        • Providing REST API Access
        • Webhooks FAQs
        • Configuring Webhooks
        • Implementing Webhooks
    • Shopify
        • Changing your fulfillment settings in the Shopify app
        • Shopify App Write Fulfillment Permissions

Shopify App Write Fulfillment Permissions

Overview

This article shows how to add ‘write_fulfillments’ role on the Shopify portal.

A Fulfillment Service is a third-party warehouse that prepares and ships orders on behalf of the store owner. Fulfillment services charge a fee to package and ship items and update product inventory levels.

The Write Fulfillment Permission allows you to register a fulfillment service.

Requirements

You must have your 3PL Warehouse Manager integrated with Shopify. Ask your system admin for more information.


Steps

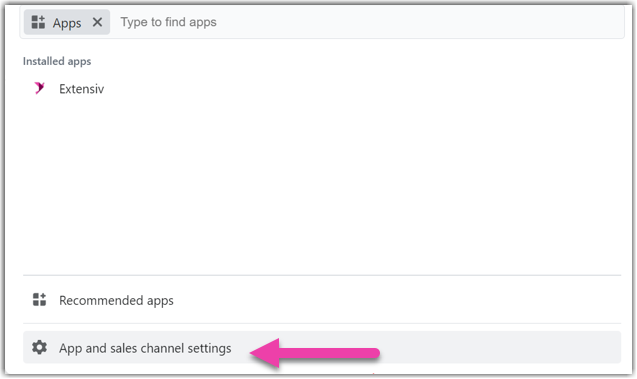
  1. Access the portal and click on Apps on the left menu.

     
  2. Click on App and sales channel settings.

     
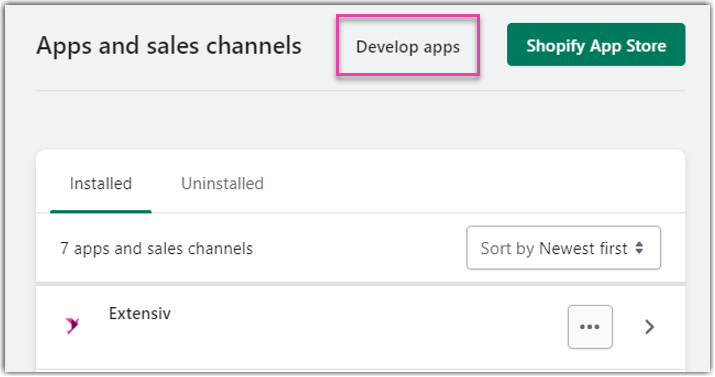
  3. Click on develop apps.
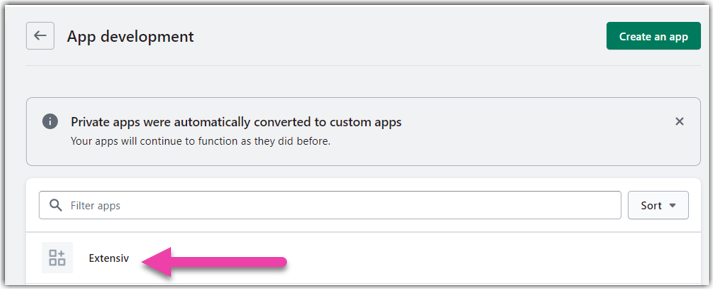
     
  4. Enter the app.

     
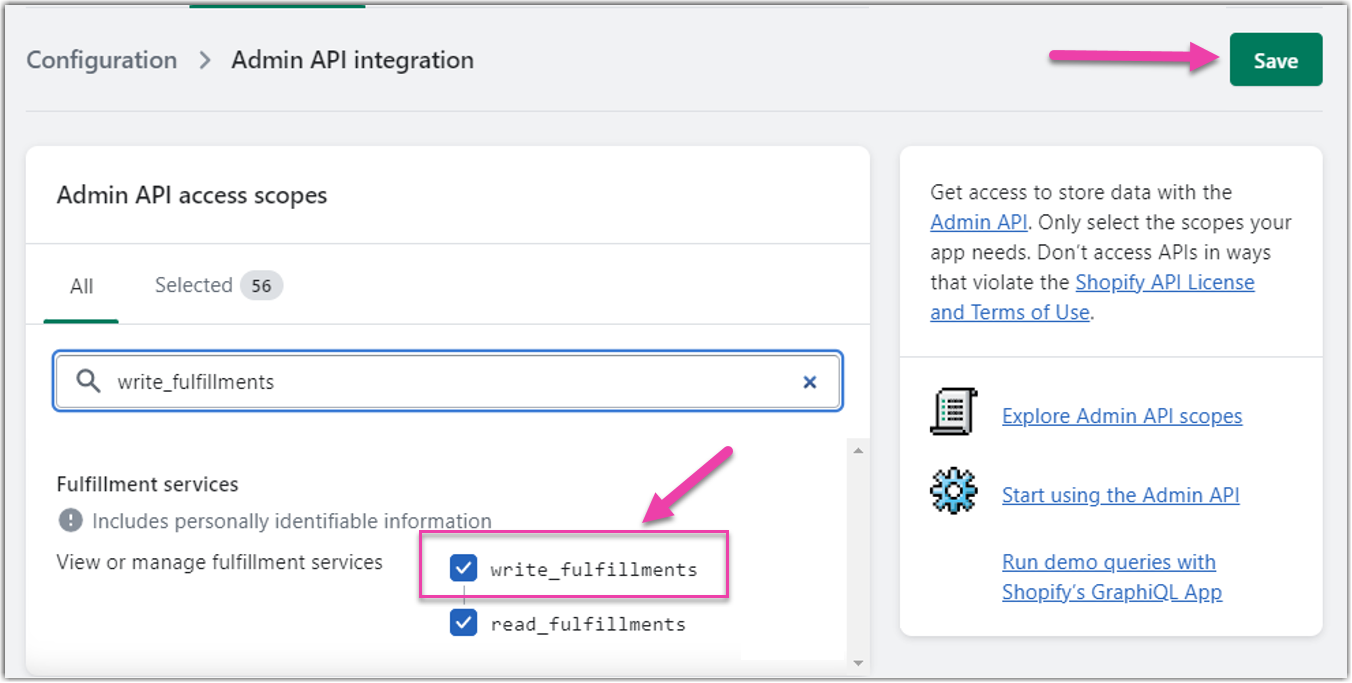
  5. Click on Configuration

     
  6. Click Edit on Admin API integration, search for ‘write_fulfillments’ check it and click Save.
 
 
fulfillment shopify

Was this article helpful?

Yes
No
Share additional feedback about this article

Related Articles

  • Changing your fulfillment settings in the Shopify app

Not finding the help you need?

Contact Support
Solutions
  • Solutions for Brands
  • Solutions for 3PLs
  • Solutions for 4PLs
  • Solutions for B2B
Products
  • Extensiv 3PL Warehouse Manager
  • Extensiv Warehouse Manager
  • Extensiv Order Manager
  • Extensiv Integration Manager
  • Extensiv Network Manager
Products
  • Customer Success
  • Implementation
  • Consulting
Ecosystem
  • Fulfillment Marketplace
  • Integrations
  • Partners
  • Become a Partner
Resources
  • Resource Library
  • Blog
  • Market Insights
  • What is a 3PL?
  • What is a 4PL?
  • What is a WMS?
  • Why a Cloud-based WMS?
  • Glossary
Help
  • Help Center
  • API Documentation
  • Extensiv Univerisity
  • Community
  • System Status
  • Extensiv Logo
  • 100 N Pacific Coast Hwy, Suite 1100, El Segundo, CA 90245
  • |
  • Contact Us:
  • 83-EXTENSIV 888.375.2368 (main)
  • |
  • 310.844.7570 (local)
  • Copyright © 2023 Extensiv
  • |
  • All rights reserved.
  • Privacy Policy
  • |
  • Terms of Service
  • Follow Us:
Expand