3PL Warehouse Manager

Updated on November 6th, 2023

  • Extensiv Hub
    Popular Articles Getting Started Using Hub Technical Issues & FAQs Extensiv's Ideas Portal
  • 3PL Warehouse Manager
    Receiving Operations Inventory Management Shipping Operations System Configuration Scanning Operations Integrations Content Best Practice Resources Release Notes Popular Articles Troubleshooting Guides
  • Warehouse Management
    Getting Started Admin Console Shipping Order Picking & Packing Receiving Customer Portal Cycle Counting Kit Building Managing Users Barcode Scanner Import/Export Integrations Barcoding Wave Picking Bin Move Mobile Receiving and Picking Settings Popular Articles Reporting
  • Order Management
    Dashboard Orders Inventory Purchase Orders Shipments Customers Products Analytics Settings API API Integrations Accessing and Navigating Order Manager Error Messages Order Manager Popular Articles Accounting Integrations
  • Integration Management
    Getting Started with Integration Manager General Support Troubleshooting Extras & Addons API Documentation Popular Articles Order Sources Order Destinations
  • FAQs
  • Network Manager
    Getting Started Order Routing Management Technical Issues Shopping Carts Settings Settings, Products, and Orders
  • Billing Manager
    Getting Started Using Billing Manager
  • Release Notes
    Extensiv Sandbox Extensiv Extensiv Hub 3PL Warehouse Manager Integration Management Warehouse Management Order Management Billing Manager
  • Fulfillment Marketplace
    Getting Started
  • Sandbox
    Getting Started
+ More
  • Help Center
  • 3PL Warehouse Manager
  • Receiving Operations
  • Receipt Management
  • Receiving Operations
    • Receipt Creation
        • Creating Receipts
        • Creating Receipts Manually
        • Importing Receipts
    • Receipt Management
        • Navigating the Find Receipts Page
        • Understanding Receipt Statuses
        • Generating Receipt Documents
        • Adjusting Receipt Charges
    • Returns + Purchase Orders
        • Creating Returns
        • Creating Purchase Orders
        • Entering Purchase Orders Manually
        • Importing Purchase Orders
        • Purchase Order Reporting Options
        • Managing Purchase Orders
    • Billing Best Practices for Receiving
        • Common Transactional Receiving Charges
        • Item-Based Handling Fees
        • Value-Added Service Fees
        • Initial Storage Charges

Adjusting Receipt Charges

Once a receipt is confirmed, you can modify the associated billing charges with an adjustment on the Adjust Receipt Charges page in the Receipts module—this article reviews that process.

To adjust receipt charges, you must have the following permission assigned to your user role: Receipts Module > Receipt Charges > Manage Charges.


There are a few cases in which you must make an adjustment to modify charges on a receipt:

  • You need to edit or delete a manual charge on a receipt that is marked as complete.
  • You need to modify automatic charges on a receipt.
  • You need to modify charges associated with a closed or cancelled receipt.
 

Guidelines

Navigate to Receipts > Adjust Receipt Charges.

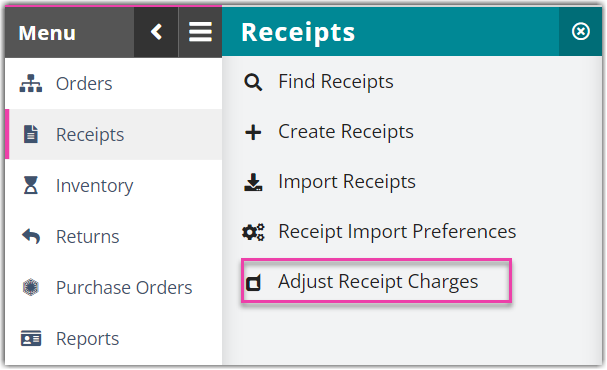
Enter the Transaction # of the receipt for which you'd like to adjust, then click Select.

Click Edit to modify the fields. A "Price" dialog box will display two grids.

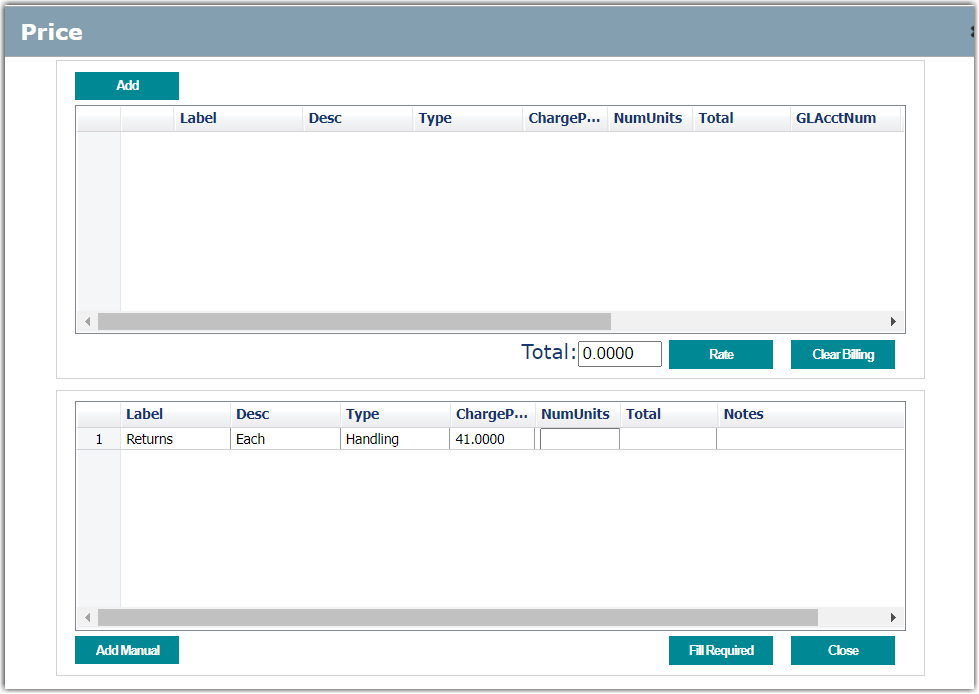
You have the following edit options:

  • Add a manual charge to the receipt. Click Add above the top grid, fill out each field as necessary, then click Save. The meaning of the fields are defined as follows:
    • ChargeLabel: the name of the charge—e.g., SqFt Handling, Overtime, Pallet Storage
    • UnitDescription: the unit for which this charge is billed—e.g., square foot, labor, pallet
    • ChargePerUnit: the dollar amount you wish to charge for each unit on this charge
    • NumUnits: the total number of units on the charge
    • CalcTotal: the calculated total of the charge, based on the preceding entries
    • PriceCalcFieldType: defines the type of charge based on selection made
    • The remaining fields are optional and only relevant if you are manually exporting this data into an external accounting platform besides QuickBooks.
  • Edit a charge on the receipt. Click the pencil icon on the charge, make your changes, then click Save.
  • Erase all charges associated with the receipt. Click Clear Billing.
  • Generate automatic charges that are not currently applied to the receipt. Click Rate.
  • Apply pre-configured manual charges to the receipt. Enter the 'NumUnits' value in the bottom grid, then click Add Manual.

Once you're finished making adjustments, click Close.

adjustment receipts

Was this article helpful?

Yes
No
Share additional feedback about this article

Related Articles

  • Understanding Custom Fields
  • Generating Order Documents
  • Entering Order Contact Details
  • January 29, 2020 – Minor Release Notes

Not finding the help you need?

Contact Support
Solutions
  • Solutions for Brands
  • Solutions for 3PLs
  • Solutions for 4PLs
  • Solutions for B2B
Products
  • Extensiv 3PL Warehouse Manager
  • Extensiv Warehouse Manager
  • Extensiv Order Manager
  • Extensiv Integration Manager
  • Extensiv Network Manager
Products
  • Customer Success
  • Implementation
  • Consulting
Ecosystem
  • Fulfillment Marketplace
  • Integrations
  • Partners
  • Become a Partner
Resources
  • Resource Library
  • Blog
  • Market Insights
  • What is a 3PL?
  • What is a 4PL?
  • What is a WMS?
  • Why a Cloud-based WMS?
  • Glossary
Help
  • Help Center
  • API Documentation
  • Extensiv Univerisity
  • Community
  • System Status
  • Extensiv Logo
  • 100 N Pacific Coast Hwy, Suite 1100, El Segundo, CA 90245
  • |
  • Contact Us:
  • 83-EXTENSIV 888.375.2368 (main)
  • |
  • 310.844.7570 (local)
  • Copyright © 2023 Extensiv
  • |
  • All rights reserved.
  • Privacy Policy
  • |
  • Terms of Service
  • Follow Us:
Expand