Generating Order Documents
5.9 min read
|There are a number of documents available to generate and attach to your orders from the Find Orders page. If you have a custom report set up in the system, it appears in the same drop-down as the 'Default' template for certain document options.
This article reviews each option available in the Documents menu. Note that you can also access many of these options from the Documents menu while editing an order, but these guidelines review the experience while on the Find Orders page.
To access the Documents menu on the Find Orders and Edit Order pages, you must have the following permission assigned to your user role: Orders Module > Generate Documents.
If you are working toward becoming a paperless warehouse, we recommend digital sharing of these documents when possible.
Guidelines
To access the Documents menu, navigate to Orders > Find Orders > Documents. This opens a sub-menu of document options to generate for one or more selected order(s). Continue reading below to learn more about each one.

If you hover over a grayed out option, a message displays at the top of the page that explains why it is unavailable for selection.
Attach Files
If you need to attach relevant files to an order, such as externally generated invoices or photos of a packaged shipment, you can do so from here. The maximum file size is 8MB.
To access this option, you must have Attach Files enabled for your database under Admin > Settings. Once enabled, you must also have the following permission assigned to your user role: Orders Module > Attach Files.
Select an order, then click Documents > Attach Files to open the Attach Files dialog.

To attach a file, click Add File, then double-click on the relevant file to populate the file in the grid. Repeat for each file relevant to the selected order.
If you need to remove an attached file, select the file from the grid, then click Remove File to remove the file and update the 'Status' and 'Added By' grid columns with the appropriate data. Repeat for each file as needed.
Once you have attached all necessary files to the order, click Close to exit.
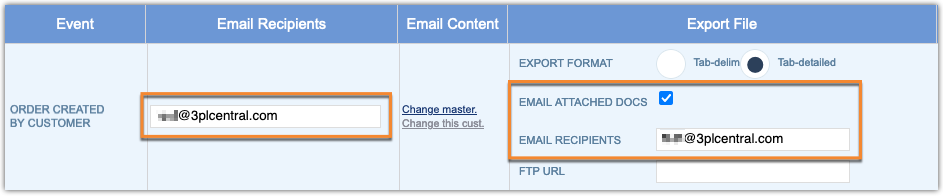
If you have event notifications configured to 'Email Attached Docs', the relevant files are sent as attachments once the relevant event is triggered for the individual transaction or batch of transactions. Note if you're using this functionality, an email address must be listed under both the 'Email Recipients' and 'Export File' columns.
Attach Files to Batch
If you need to attach relevant files to a batch of orders, you can do so from here. The maximum file size is 8MB.
To access this option, you must have Attach Files enabled for your database under Admin > Settings. Once enabled, you must also have the following permission assigned to your user role: Orders Module > Attach Files.
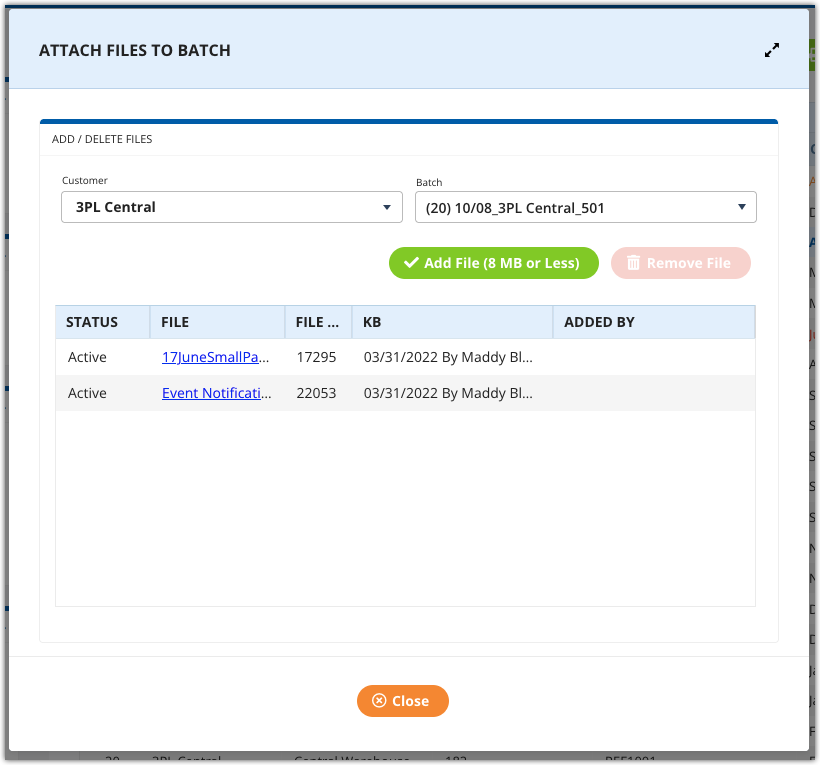
To attach files to a batch, select Documents > Attach Files to Batch to open the Attach Files to Batch dialog. Select the appropriate 'Batch' from the drop-down menu, click Add File, then double-click on the relevant file.
If you need to remove an attached file, select the file from the grid, then click Remove File to remove the file and update the 'Status' and 'Added By' grid columns with the appropriate data. Repeat for each file as needed.
Once you have attached all necessary files to the order, click Close to exit.
Pick Ticket
If you need to generate a pick ticket, select one or more orders, then click Documents > Pick Ticket to open the Pick Ticket dialog.
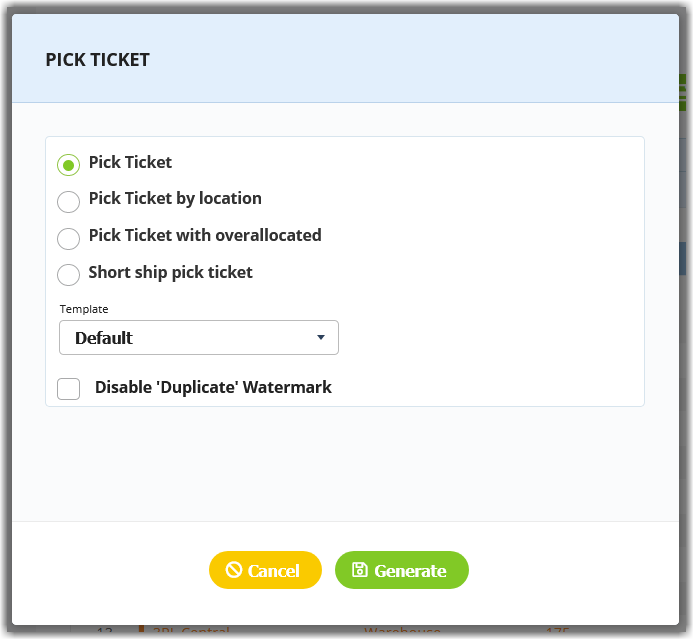
Select one of the following pick tickets to generate:
- Pick Ticket: sorts the order line items by SKU
- Pick Ticket by location: sorts the order line items by location
- Pick Ticket with overallocated: displays all items, including those that are overallocated
- Short ship pick ticket: only displays items in stock and available to ship
Once you've made the appropriate selections, click Generate. The pick ticket opens in PDF format in a new tab of your browser, and the 'Pick Ticket Print Date' grid column populates with the appropriate data.
Master Pick Ticket
You can generate a Master Pick Ticket for orders that are associated with the same customer, facility, and batch. To do so, select at least two qualifying orders, then click Documents > Master Pick Ticket to open the Master Pick Ticket dialog.

Make the appropriate selections, then click Generate. The Master Pick Ticket opens in a new tab of your browser, and the 'Pick Ticket Print Date' grid column populates with the appropriate data.
Bill of Lading (BOL)
Since it is best practice to create BOL numbers at the time of routing, we recommend generating a BOL prior to printing UCC labels. Otherwise, the label will not include the BOL number.
If you need to generate a BOL without making edits, select an order, then click Documents > Generate BOL. The BOL opens in PDF format in a new tab of your browser, and the relevant data populates in the 'Bill of Lading' grid column and the 'Bill of Lading Number' field on the order.
If you need to edit the information on a BOL before you generate it, select the relevant order, then click Documents > Edit BOL to open the BOL Editor page.
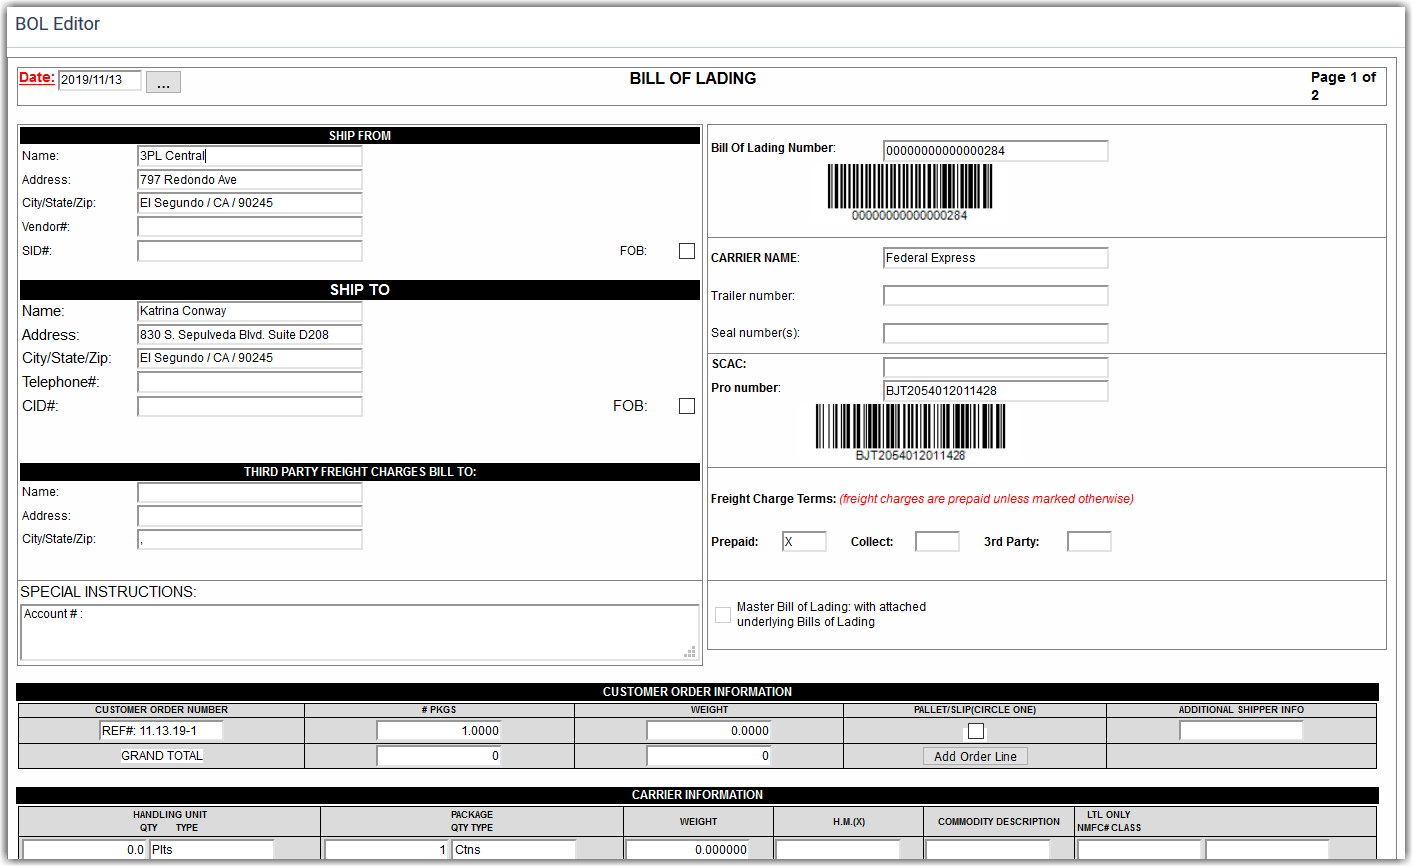
Make the necessary edits, then click Generate PDF at the bottom of the page. Please note that BOL changes are only reflected in the generated BOL and not on the order itself.
Once generated, the BOL opens in PDF format in a new tab of your browser, and the relevant data populates in the 'Bill of Lading' grid column and the 'Bill of Lading Number' field on the order.
By default, the BOL is numbered using the VICS standard. If you want to replace the VICS BOL number with the associated transaction number, you can do so using the following steps:
- Navigate to Customers > Classic BOL Templates.
- Select a customer from the drop-down menu, then click Add.
- Add an appropriate title in the 'Description' field, select Use Transaction Number for the 'Bill of Lading Number' option, then click Save.
The next time you generate or edit a BOL for the selected customer, the Bill of Lading # is formatted as such: "TPL-Transaction".
Master Bill of Lading (BOL)
You can generate a Master BOL for orders that are associated with the same customer and facility.
If you need to generate a Master BOL without making edits, select at least two qualifying orders, then click Documents > Generate Master BOL. The Master BOL opens in PDF format in a new tab of your browser, and the relevant data populates in the 'Bill of Lading' grid column and the 'Bill of Lading Number' field on the order.
If you need to edit the information on a Master BOL before you generate it, select at least two qualifying orders, then click Documents > Edit Master BOL to open the Edit Master BOL page.
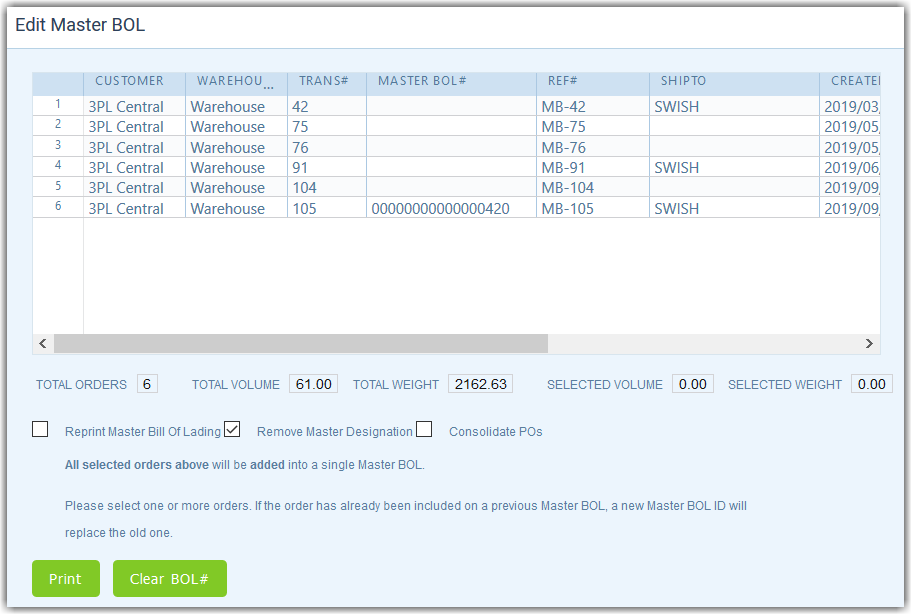
The Edit Master BOL grid populates each order selected from the Find Orders grid. You can then choose to generate one or multiple Master BOLs.
To generate one Master BOL that contains all orders, select the first row in the grid, then hold down < Shift > as you select the last row in the grid. If you want to split the orders into multiple Master BOLs, use < Ctrl > to select the relevant orders.
Before opening the BOL editor, there are a few available options to consider:
- If a Master BOL has been printed previously, click the selection box next to Reprint Master Bill of Lading. To remove the Master BOL # from the selected orders, click the selection box next to Remove Master Designation.
- To consolidate purchase orders, click the selection box next to Consolidate POs.
Once you've made the necessary selections, click Print. A new tab opens for you to edit the Master BOL. Make your changes, then click Generate PDF at the bottom of the page.
The Master BOL generates in PDF format, and the relevant data populates in the associated fields of the applicable orders. Please note that BOL changes are only reflected in the generated BOL and not on the order itself.
If you're splitting the originally selected orders into multiple Master BOLs, repeat the steps above.
Shipping labels
If you don't have SmartParcel enabled for your account, 3PL Warehouse Manager offers a basic shipping label option from the Documents menu.
To generate this shipping label, select one or more orders, then click Documents > Shipping labels to open the Shipping Labels dialog. Make the appropriate selections, then click Generate.
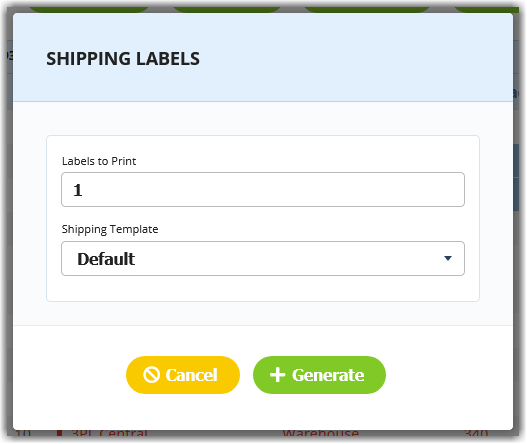
The shipping label(s) generate in PDF format in a new tab of your browser.
Transaction record
The View Transaction Report is also accessible from the Documents menu. To generate, select one or more orders, then click Documents > Transaction Record. The report(s) open in PDF format in a new tab of your browser.
![]()
Packing slips
To generate a packing slip, select one or more orders that are associated with the same customer, then click Documents > Packing Slips to open the Packing Slips dialog.
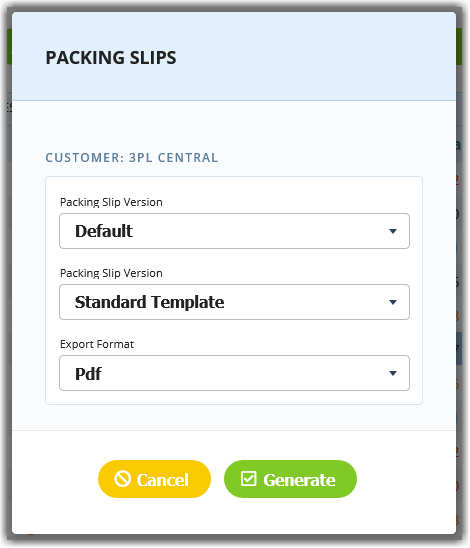
The first 'Packing Slip Version' drop-down list includes any custom reports that are uploaded to your database, while the second drop-down list includes any custom packing slip templates that have been created and authorized in 3PL Warehouse Manager.
Make the appropriate selections, then click Generate. A confirmation message appears, and the packing slip generates in the selected format.
The weight found in the default packing slip template is based on the weight value defined in an item's setup (under Units of Measure > Packaging Unit).
Shipping manifest
To generate a shipping manifest, select a fully allocated order, then click Documents > Shipping Manifest to open the Shipping Manifest page.
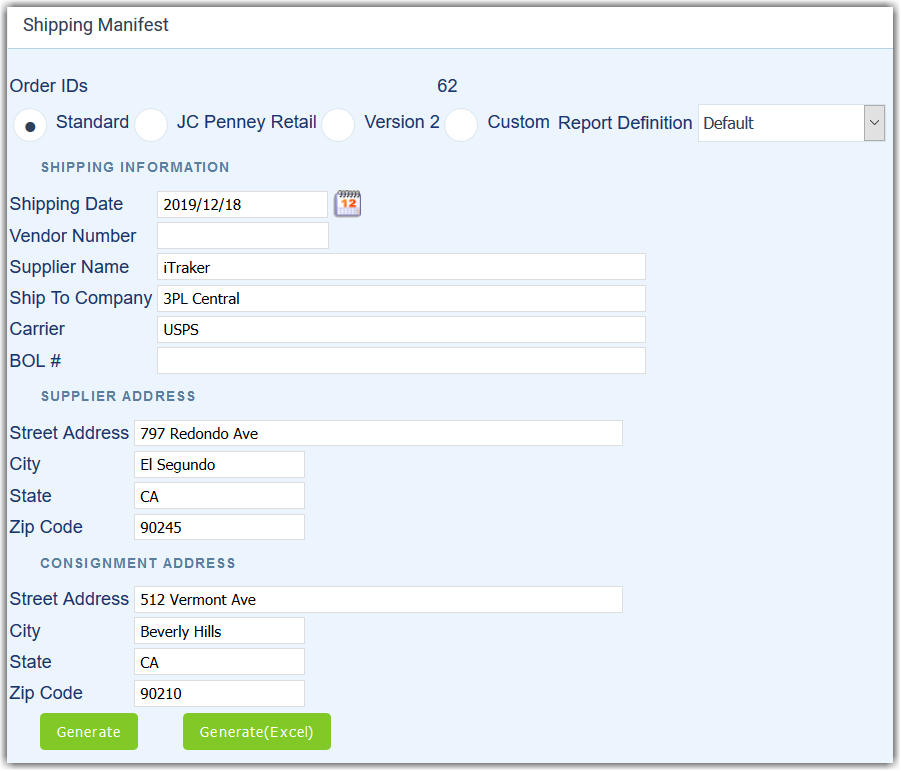
Once you enter the necessary information, click Generate. The shipping manifest generates in the selected format.
Send ASN
To send an ASN, select one or more orders, click Documents > Send ASN to open the Send ASN dialog.
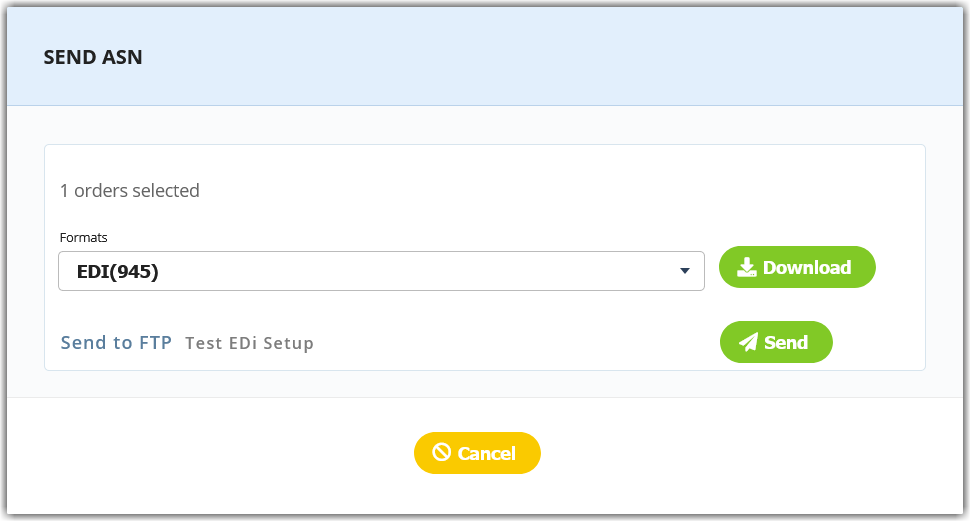
Optional: If you'd like to download the ASN, click Download.
To send the ASN, click Send. A confirmation message appears notifying you that the ASN has been queued, which means that the system has marked the transaction ready to send. Once it is processed in the background, the ASN Send Date populates on the order.
For further guidance, please see Sending an ASN.