3PL Warehouse Manager

Updated on August 11th, 2023

  • Extensiv Hub
    Popular Articles Getting Started Using Hub Technical Issues & FAQs Extensiv's Ideas Portal
  • 3PL Warehouse Manager
    Receiving Operations Inventory Management Shipping Operations System Configuration Scanning Operations Integrations Content Best Practice Resources Release Notes Popular Articles Troubleshooting Guides
  • Warehouse Management
    Getting Started Admin Console Shipping Order Picking & Packing Receiving Customer Portal Cycle Counting Kit Building Managing Users Barcode Scanner Import/Export Integrations Barcoding Wave Picking Bin Move Mobile Receiving and Picking Settings Popular Articles Reporting
  • Order Management
    Dashboard Orders Inventory Purchase Orders Shipments Customers Products Analytics Settings API API Integrations Accessing and Navigating Order Manager Error Messages Order Manager Popular Articles Accounting Integrations
  • Integration Management
    Getting Started with Integration Manager General Support Troubleshooting Extras & Addons API Documentation Popular Articles Order Sources Order Destinations
  • FAQs
  • Network Manager
    Getting Started Order Routing Management Technical Issues Shopping Carts Settings Settings, Products, and Orders
  • Billing Manager
    Getting Started Using Billing Manager
  • Release Notes
    Extensiv Sandbox Extensiv Extensiv Hub 3PL Warehouse Manager Integration Management Warehouse Management Order Management Billing Manager
  • Fulfillment Marketplace
    Getting Started
  • Sandbox
    Getting Started
+ More
  • Help Center
  • 3PL Warehouse Manager
  • Receiving Operations
  • Receipt Management
  • Receiving Operations
    • Receipt Creation
        • Creating Receipts
        • Creating Receipts Manually
        • Importing Receipts
    • Receipt Management
        • Navigating the Find Receipts Page
        • Understanding Receipt Statuses
        • Generating Receipt Documents
        • Adjusting Receipt Charges
    • Returns + Purchase Orders
        • Creating Returns
        • Creating Purchase Orders
        • Entering Purchase Orders Manually
        • Importing Purchase Orders
        • Purchase Order Reporting Options
        • Managing Purchase Orders
    • Billing Best Practices for Receiving
        • Common Transactional Receiving Charges
        • Item-Based Handling Fees
        • Value-Added Service Fees
        • Initial Storage Charges

Generating Receipt Documents

There are a number of documents available to generate and attach to your receipts from the Find Receipts page. If you have a custom report set up in the system, it displays in the same drop-down as the 'Default' template for certain document options.

This article reviews each option available in the Documents menu. Note that you can also access the Documents menu while editing a receipt, but these guidelines review the experience while on the Find Receipts page.

To access the Documents menu on the Find Receipts and Edit Receipt pages, you must have the following permission assigned to your user role: Receipts Module > Generate Documents.


If you are working toward becoming a paperless warehouse, we recommend digital sharing of these documents when possible.

Guidelines

To access the Documents menu, navigate to Receipts > Find Receipts > Select a Receipt > Documents. This opens a sub-menu of document options to generate for one or more selected receipt(s). Continue reading below to learn more about each one.

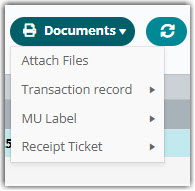
If you hover over a grayed out option, a message displays at the top of the page that explains why it is unavailable for selection.

Attach Files

If you need to attach relevant files to a receipt, such as driver documents or photos of received inventory, you can do so from here. The maximum file size is 8MB.

To access this option, you must have Attach Files enabled for your database under Admin > Settings. Once enabled, you must also have the following permission assigned to your user role: Orders Module > Attach Files.


Select a receipt, then click Documents > Attach Files to open the Attach Files dialog.

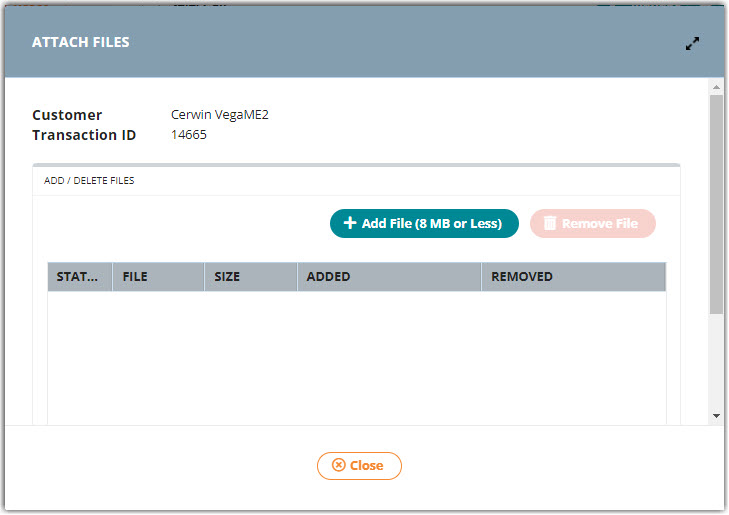
To attach a file, click Add File, then double-click on the relevant file to populate the file in the grid. Repeat for each file relevant to the selected receipt.

If you need to remove an attached file, select the file from the grid, then click Remove File to remove the file and update the 'Status' and 'Added By' grid columns with the appropriate data. Repeat for each file as needed.


Once you have attached all necessary files to the order, click Close to exit.

If you have event notifications configured to 'Email Attached Docs', the relevant files are sent as attachments once the relevant event is triggered for the individual transaction or batch of transactions. Note if you're using this functionality, an email address must be listed under both the 'Email Recipients' and 'Export File' columns.

Transaction record

If you want to generate a View Transaction Report for one or more receipts, you can do so directly on the Find Receipts page. To generate, select one or more receipts, then click Documents > Transaction Record. The report(s) open in PDF format in a new tab of your browser.

MU Label

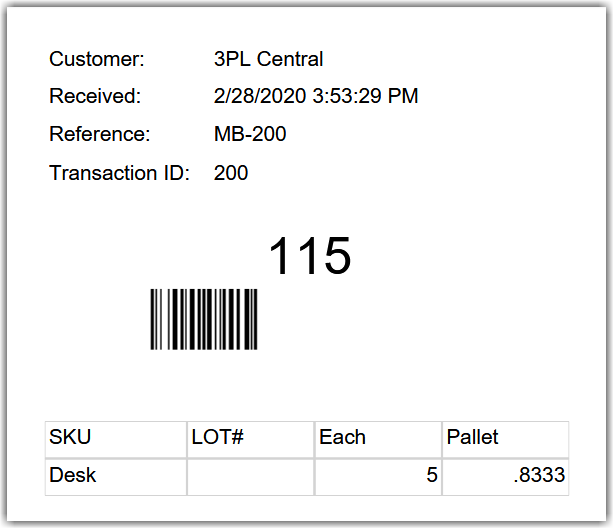
If you received a movable unit (MU) and chose for the system to assign an MU label, or you need to re-print an existing MU label, you can print the label out from the Find Receipts page.

Select the relevant receipt from the Find Receipts grid, then select Documents > MU Label. The label generates as a PDF in a new browser tab for you to print and attach to the MU.
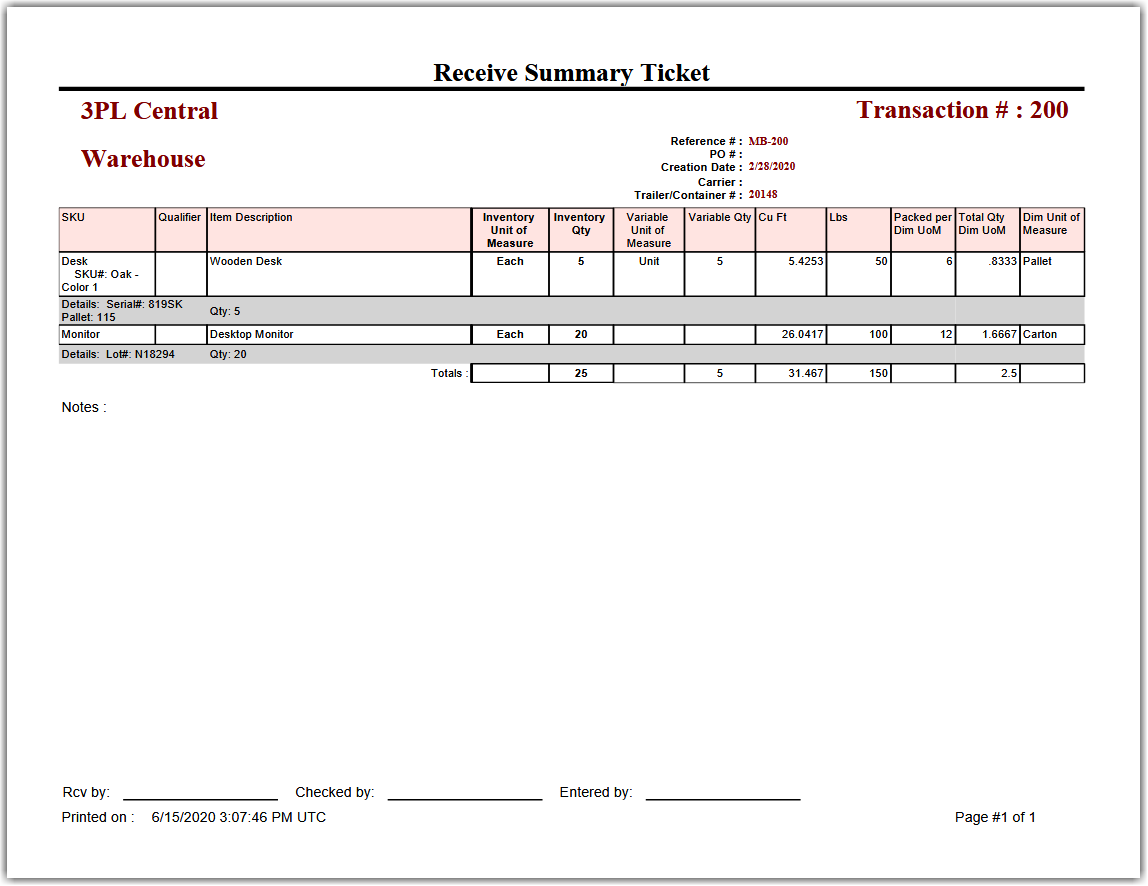
Receipt Ticket

A receipt ticket, also known as a Receive Summary Ticket, contains a summary of received items, their attributes, putaway locations, and additional transactional notes. To generate a receipt ticket, select a receipt from the grid, then click Documents > Receipt Ticket. The report opens in PDF format in a new tab of your browser.

Extensiv University

Gain deeper insights and learn more about 3PL Warehouse Manager with our online course at Extensiv University.
printing invoicing

Was this article helpful?

Yes
No
Share additional feedback about this article

Related Articles

  • June 3, 2020 – Minor Release Notes
  • EDI Processing
  • Entering Purchase Orders Manually
  • Entering Order Contact Details

Not finding the help you need?

Contact Support
Solutions
  • Solutions for Brands
  • Solutions for 3PLs
  • Solutions for 4PLs
  • Solutions for B2B
Products
  • Extensiv 3PL Warehouse Manager
  • Extensiv Warehouse Manager
  • Extensiv Order Manager
  • Extensiv Integration Manager
  • Extensiv Network Manager
Products
  • Customer Success
  • Implementation
  • Consulting
Ecosystem
  • Fulfillment Marketplace
  • Integrations
  • Partners
  • Become a Partner
Resources
  • Resource Library
  • Blog
  • Market Insights
  • What is a 3PL?
  • What is a 4PL?
  • What is a WMS?
  • Why a Cloud-based WMS?
  • Glossary
Help
  • Help Center
  • API Documentation
  • Extensiv Univerisity
  • Community
  • System Status
  • Extensiv Logo
  • 100 N Pacific Coast Hwy, Suite 1100, El Segundo, CA 90245
  • |
  • Contact Us:
  • 83-EXTENSIV 888.375.2368 (main)
  • |
  • 310.844.7570 (local)
  • Copyright © 2023 Extensiv
  • |
  • All rights reserved.
  • Privacy Policy
  • |
  • Terms of Service
  • Follow Us:
Expand