Navigating the Find Receipts Page
2.6 min read
|The Find Receipts page allows you to view, edit, import, and export receipts for your customers within the Receipts module. This article reviews the basic components of the Find Receipts page.
To access the Find Receipts page, you must have the following permission assigned to your user role: Receipts Module > Manage Receipts > Find Receipts.
Find Receipts Components
Navigate to Receipts > Find Receipts in 3PL Warehouse Manager, then continue reading below to learn about each main component of the Find Receipts page.
Search filters
In the left pane on the Find Receipts page, you can find various search filters to help you quickly find what you're looking for in the Find Receipts grid.
- You can search for specific receipts based on the relevant Customer, Date Search, Receipt Details, or Transaction Number.
- Once you find the search filters that work best for you, you can minimize the filters that take up space, as well as drag-and-drop the filter containers to your preference.
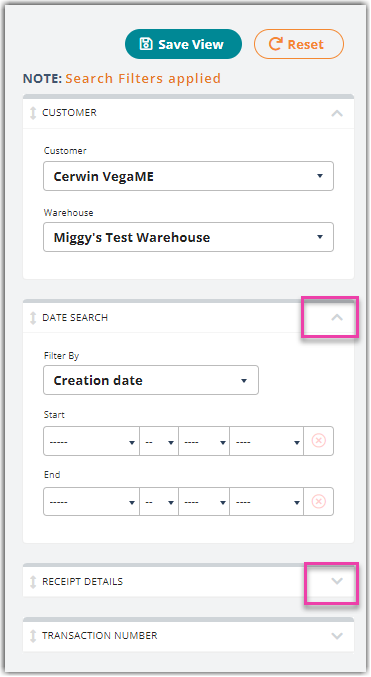
- You can easily Reset your applied search filters, as well as Save [your customized] View to quickly apply that specific search criteria the next time you access this page.
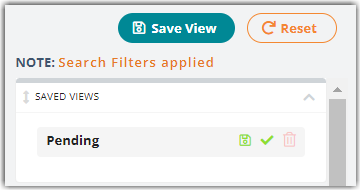
To apply a saved view, click the green check icon, and if you make changes to the view, click the save icon to save your changes. To delete a saved view, click the trash icon.
- You can also click the arrow icon in the top-right corner to collapse the search filters and maximize viewing space for the data grid.
Data grid
In the main pane, you can find the customizable Find Receipts grid.
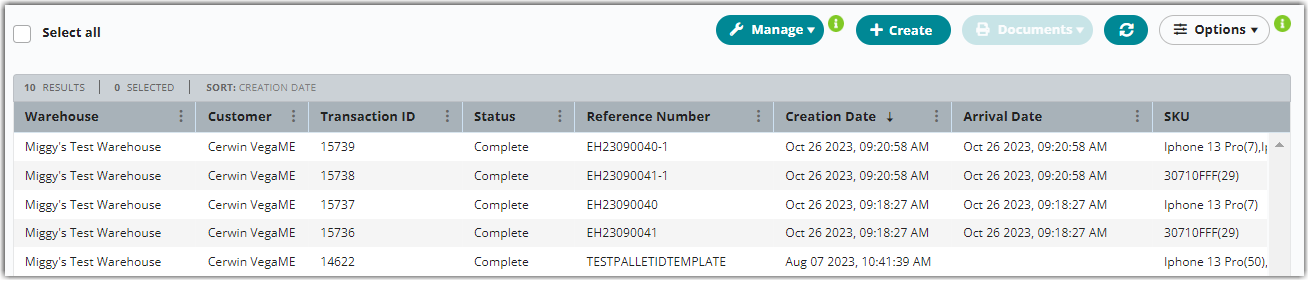
Listed below are a few of its customizing capabilities.
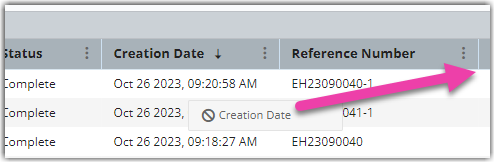
- Wish the grid was sorted differently? You can sort columns to your preference by dragging/dropping them, as well as sort your data by a specific column header, with the click of a button.
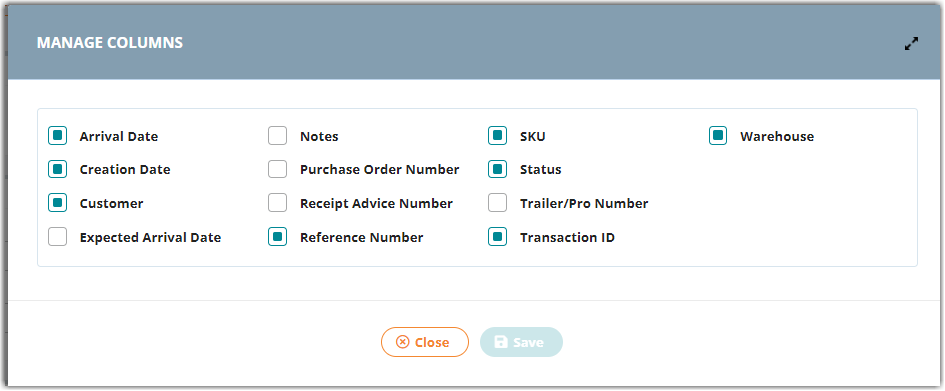
Smart User Tip: Use < Ctrl > on your keyboard as you click on the column headers to sort by two headers at once. - By selecting Options > Columns, you can select which columns you'd like to display in the grid.
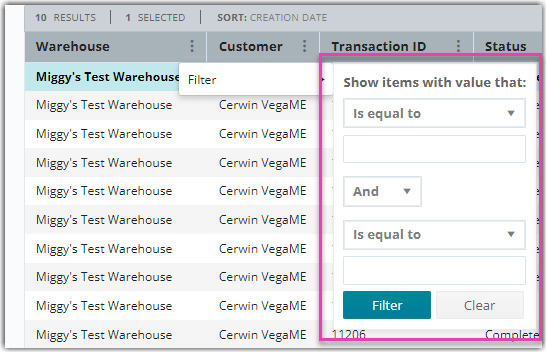
- Need more search filters than what's provided in the left pane? Click the ellipsis next to a column header to filter the data in that column.
- Just like the ability to save your search filter configurations, you can Save [the] View of your grid customizations from the left pane, as well as revert to the default column data by clicking Options and selecting one of the Reset/Clear options.

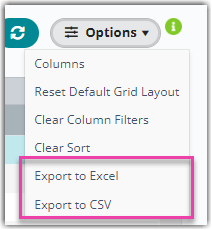
- Do you need to use this data elsewhere? You can export all data displayed in the grid to an Excel or CSV file by clicking Options and selecting one of the Export options.
 One method of avoiding this in Excel is saving the file, converting it to a .txt file, then importing into Excel. To do this, open a blank worksheet, select the Data tab, then specify to import 'From Text/CSV'. For further guidance on this, please refer to Microsoft's help article here.
Exporting from our system normally gives a 1-to-1 representation of the data from the grid. However, when numerical values contain leading zeroes or exceed 11 characters, those values automatically convert to scientific notation upon opening the file.
Action options
You also have several options to interact with your receipts. Once you select one or more receipts from the grid, you can click any of the buttons outlined below.
Smart User Tip: You can also access many of these actions by right-clicking on a receipt.
The Manage drop-down menu gives you a range of options to manage one or more receipts.

- Edit Receipt: opens the receipt for viewing/editing purposes
- Confirm Receipt: assigns a receipt the Closed status to indicate that the associated inventory is properly stored in your facility
- Cancel Receipt: cancels a receipt and removes all associated inventory from the system—note that the associated inventory cannot be currently allocated to a transaction and Customer Users can only cancel open receipts
- Reopen Receipt: reopens a closed receipt—note that the associated inventory cannot be currently allocated to a transaction
- Receipt Advice: allows you to send confirmation to an external system that the associated inventory has been received by your warehouse
If an option is disabled, you can hover over the option to populate a message at the top of the page that explains why it is unavailable for selection.
The Create button allows you to create a receipt. For more information on creating receipts, please see Creating Receipts.

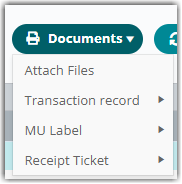
The Documents drop-down menu allows you to attach file(s) to a receipt and generate various documentation. For more information on these documentation options, please see Generating Receipt Documents.