Creating Vendor Products in Bulk (Via Spreadsheet)
Setting up vendor products is a necessary step to utilize the Purchase Orders and Analytics modules within Extensiv Order Manager. Vendor SKUs establish a cost per SKU, which forms the foundation of profitability reporting within Analytics. Cost of Goods Sold (COGS) within Extensiv Order Manager is ultimately calculated by the landed cost of a product on a purchase order, which starts as the cost of a Vendor SKU.
Like Listing SKUs are to Master SKUs for customer orders, Vendor SKUs serve as the bridge between a Master SKU to a supplier for reordering inventory. Products sourced from multiple vendors, there can be a different Vendor SKU value for each vendor, but there needs to be a Vendor Product in order to create a Purchase Order from a given vendor.
NOTE
When using the build by spreadsheet method, be careful and take time to review all entries, because the Extensiv Order Manager system cannot delete products or information after it has been imported or brought into the system. Extensiv Order Manager can deactivate or edit product information including the vendor products. We highly suggest that you first export out your current product catalog before making bulk edits.
When creating or editing products in Extensiv Order Manager, you can choose between two methods: manual creation in the UI or import via spreadsheet. To create vendor products in bulk, follow the steps outlined below:
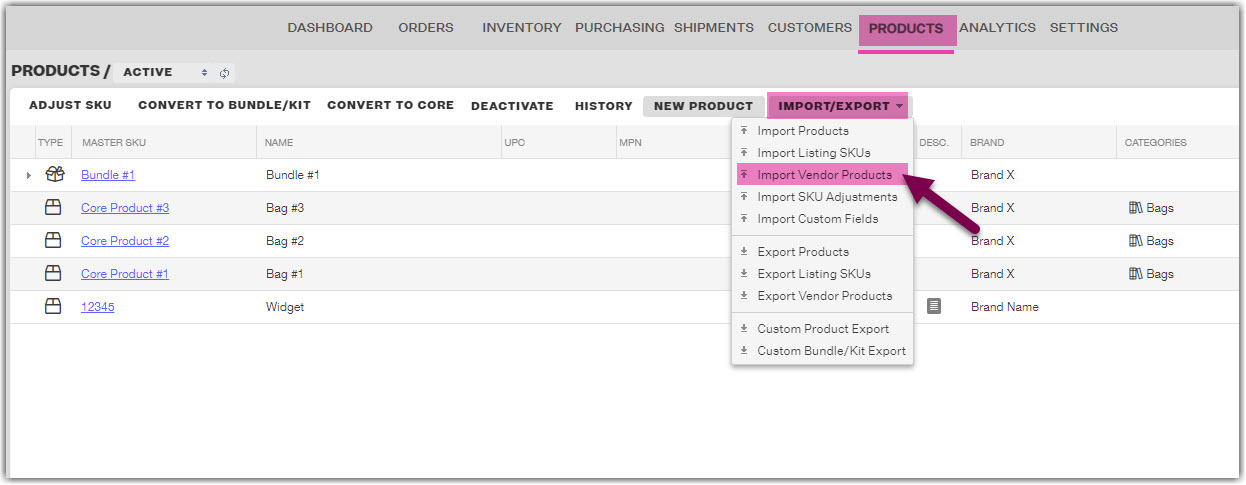
- Go to the Products Module.
- Click on the Import/Export button and select Import Vendor Products.
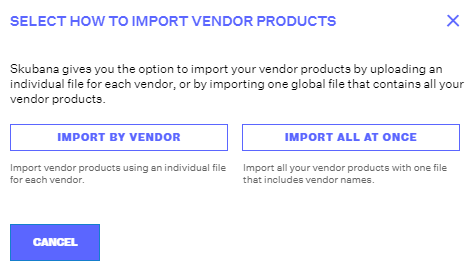
3. Extensiv Order Manager gives you an option between uploading an individual file for each vendor, or by importing one global file that contains vendor products for any/all vendors at once that will require you to specify which vendor a vendor product is for.
4. The window that pops up will allow you to download the required Excel template to import the Vendors. Click the link to Download the Excel Template.
Import By Vendor
Global Vendor Import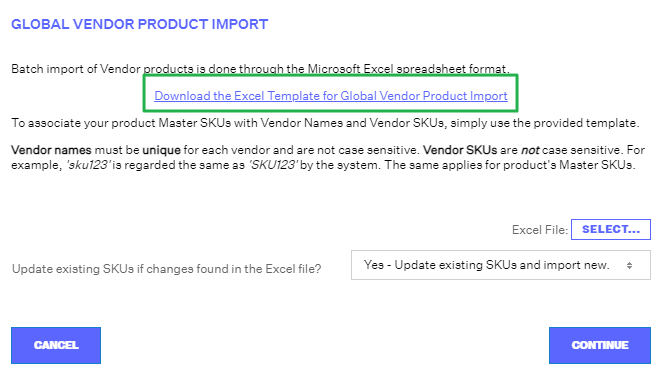
5. The required columns for the Excel sheet are similar to the required fields in the UI creation method. Regardless of which method you chose, the same columns are required with one exception - the "Vendor Name" column is required for the Global Vendor Template, while the single vendor import option does not have this column and it is therefore not required.
By Vendor Template
Global Vendor Template
The file will error out when attempting to upload if there are any blanks in the required columns. Do not delete or add columns or sheets or attempt to edit the sheet in any way whatsoever outside of adding/typing in data in Row 2 and higher row numbers. Pay close attention to the required format of each column described below. Examples are provided in the default example rows that come with each spreadsheet download. The content of these rows can be deleted once you no longer need them for reference, otherwise, they will be attempted to create as real vendor products upon upload.
- Vendor Name (only in the Global Vendor Template)–Select the vendor that the Vendor SKU is associated with. The list of Vendors you can choose from here is pulled from the Settings Module, Vendors tab. ex: Sweater Weather
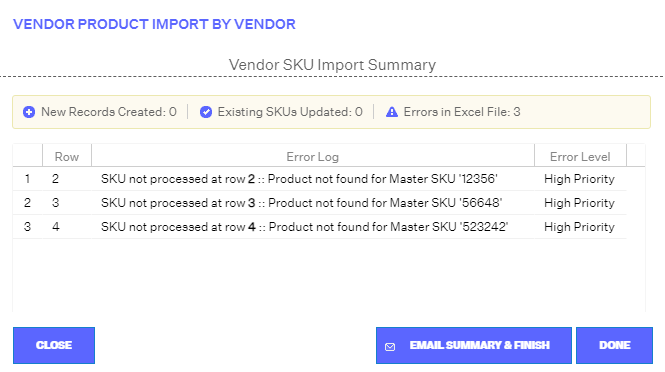
- Master SKU–The existing Master SKU in Extensiv Order Manager that you want to create this vendor product for. If the Master SKU does not already exist, you will receive an error upon import stating: SKU not processed at row # :: Product not found for Master SKU 'exampleSKU'.
-
Vendor SKU – How the product ordered is identified by the supplier. These values should be pre-established with the vendor. Remember that this SKU will appear on a purchase order. ex: greenwoolsweaterlarge
NOTE
The same Vendor SKU cannot be repeated under the same vendor. You can, however, use the same Vendor SKU for different vendors. An error will result if you attempt to reuse an existing Vendor SKU under the same vendor, even if it's inactive: Vendor SKU 'X' belongs to Master SKU exampleSKU.
-
Active– Indicates whether your vendor product will be created in an active or inactive status. Set this to TRUE to allow Extensiv Order Manager to calculate/create purchase orders for this product, otherwise, set this to FALSE. You can always activate an inactive vendor product in the future.
NOTE
If you leave this column blank, Extensiv Order Manager will use the default entry: FALSE. Extensiv Order Manager can create the vendor product without a value in this column but the vendor product that is created will be inactive as a result.
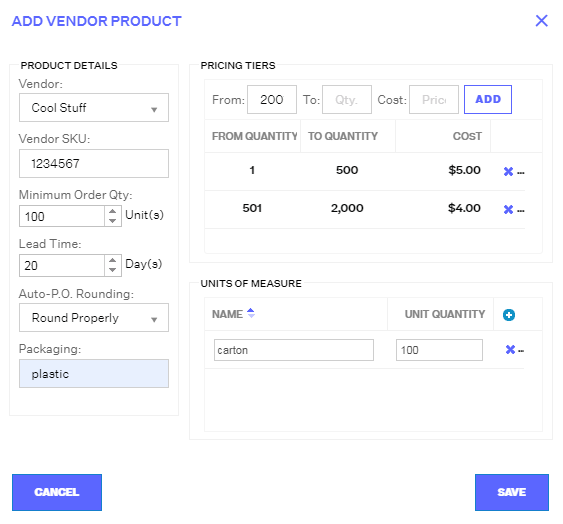
- Minimum Order Qty – The fewest amount of whole units that can be purchased from the vendor to qualify for reorder. ex: 100
- Lead Time – The typical amount of time in calendar days it takes for the vendor to deliver the product to your warehouse once the purchase order has been authorized by your team. ex: 20
- Pricing Tiers – Take extra care with the formatting here. You'll need to set up at least one pricing tier. If your vendor sells you stock at a flat rate regardless of how many units you order, simply set only one pricing tier in a single set of parentheses. However, if the vendor provides you with multiple pricing tiers depending on how many units you order, create additional pricing tiers accordingly. The base pricing tier will serve as the default source of Inventory Value for your analytics. Pricing tiers must start at 1. ex: Pricing Tier for a vendor who sells their product at a flat rate of $5/unit: (1-10000|5.00) ex: Pricing Tier for a vendor who sells their product at $5/unit until you purchase over 300 units, which they then sell at $4/unit: (1-300|5.00)(301-10000|4.00)
- Units of Measure– If your vendor sells to you in any specific quantities, then list them here. These UoM are incorporated into Auto PO calculations according to the option you selected as your Auto-P.O. Rounding choice. ex: dozen = 12 units. An Auto PO can determine that you should order 50 units from your vendor, and when Rounded Properly, the Auto PO will determine you should order 4 dozens, since 50 units rounded properly rounds down to 48 units. This column can be left blank for vendors that ship individual units. For vendors with multiple UoM, indicate the measure with the units in brackets and do not separate the measurements with any additional characters (don't add spacing or commas). ex: Box{4}Crate{2}
- Is Default – If you only have one Vendor Product for a Master SKU, Extensiv Order Manager will automatically set it as the Default Vendor Product when you import it. The Default Vendor Product is indicated by a checkmark icon next to the vendor name in the UI. You can only have one Default Vendor Product, so make sure that only one is indicated per Master SKU. ex: TRUE or FALSE
- Auto-P.O. Rounding– This column requires one of three input options detailed below. For more details on Auto-P.O. Rounding, see the blurb on Units of Measure above.
- EXACT – Will direct an Auto PO to order the exact number of units calculated from Reorder Rules.
- ROUND UP – Rounds up to the nearest Unit of Measure -- ex: if the UOM is a case consisting of 50 units and 53 units need to be ordered, Extensiv Order Manager orders 2 cases for a total of 100 units.
- ROUND PROPERLY – Rounds up or down to the nearest UoM depending on how close the exact quantity is. With ROUND PROPERLY, if the UoM is a case of 50 units and 53 units need to be ordered, Extensiv Order Manager will order 1 case for 50 units (rounded down). If 75 units need to be ordered, Extensiv Order Manager will round up to order 2 cases for a total of 100 units (rounded up).
-
Packaging – If your products require special packaging, you can specify that here. ex: plastic or cardboard box.
6. Once your spreadsheet is completed, save your edits.
7. Return to Extensiv Order Manager's Vendor Product Import window and select the Vendor you are uploading vendor products for from the Vendor dropdown menu. Only active vendors will be shown in this menu. Skip this step if you selected "Import All At Once" in Step 3.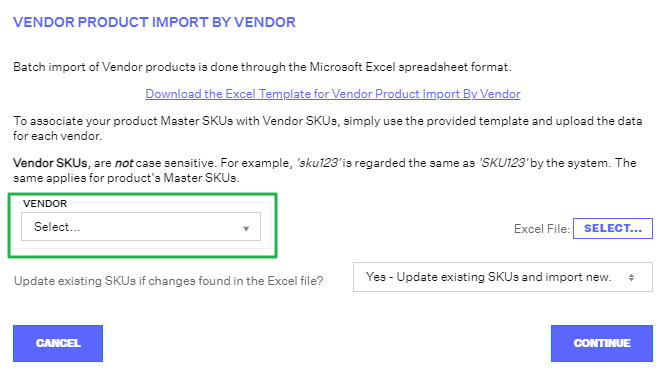
8. Select the Excel File you are uploading by choosing the Select button. Then decide how Extensiv Order Manager should read the file by clicking the Update existing SKUs if changes found in the Excel file? dropdown menu.
- Choosing “Yes” will make all relevant updates to existing SKUs and add the new Vendor SKUs included. This is ideal if you are changing the current set-up for existing Vendor SKUs.
- Choosing “No” will only upload new Vendor SKUs and ignore changes made to any existing SKUs. This is ideal if you are only creating new SKUs with your import.
9. Click Continue.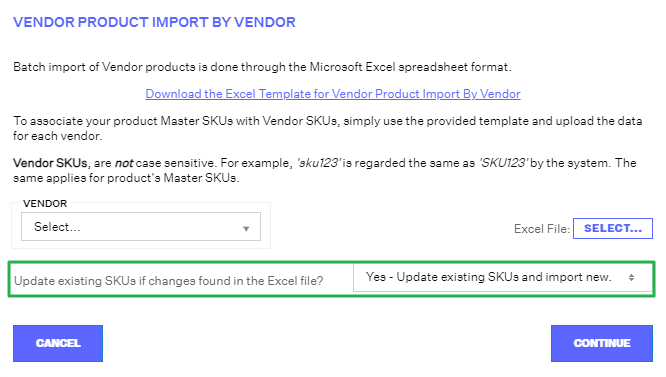
10. Extensiv Order Manager will read the file and report how many new Vendor SKUs were created, existing SKUs updated, and how many errors were processed in the Excel File. Errors in the file will be captured in the Error Log. A summary of the results can also be e-mailed so you can fully see which rows had which errors. At this point, any button you select will close the Summary window.
11. If desired, you can search the Products Module for a vendor product you created or updated to ensure your inputs were applied as anticipated.

