Importing Receipts and Returns
1.5 min read
|If your customer is providing a spreadsheet or flat file of all receipts that are expected in your facility, those receipts can be imported to create into 3PL Warehouse Manager. Click here to access all 3PL Warehouse Manager import templates.
Before you can begin importing receipts, you must have the following completed:
- Have a user role that includes the following permission: Receipts Module > Manage ASN Imports > Import Receipt (ASN)
- Receipt import preferences defined under Receipts > Receipt ImportPreferences (requires you to have the following permission assigned to your user role: Receipts Module > Manage ASN Imports > Import Receipt Preferences)
- Spreadsheet from your customer filled with accurate data and formatting
This article reviews how to import a receipt into the system. For FAQs and general troubleshooting, please see Import Template FAQs and Troubleshooting Import Template Errors.
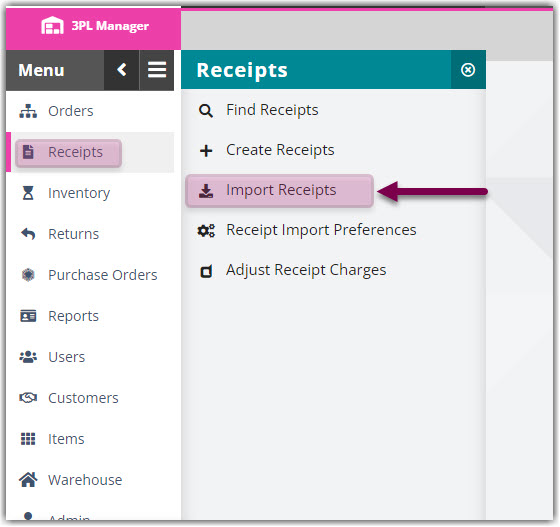
- Navigate to Receipts > Import Receipts.
2. From the drop-down menus, select the appropriate Customer and Warehouse, then select the appropriate Format.
3. To inspect the receipt(s) before they are imported, click the selection box next to View list of ASNs after file validation.
4. Click Select File.
5. Double-click the file you want to import. You can check the status of the import using the gear icon in the top-right corner of the page.
6. If you opted to view the data in Step 3, verify for accuracy, then click Import.
Once imported, you can find the receipt in the Find Receipts grid in a Complete status. Thus, if you need to make any changes to the receipt, the modifications must be completed by a Warehouse User.
Importing Return Transactions
To import a return transaction into 3PL Warehouse Manager, you can use one of two supported templates:
- Return Import Template
- Receipt Import Template with MU and Catch Weight
Both templates require you to mark the receipt as a return by including a specific saved element in the file. Follow the steps below based on the template you're using.
Using the Return Import Template
- Locate column z.
- In the first row of the transaction, enter the following value: IsReturn:True
- Import the file using the steps above for importing a receipt.
Using the Receipt Import Template with MU and Catch Weight
- Locate column z.
- In the first row of the transaction, enter the following value: IsReturn:True
- If the transaction has multiple rows, include this value only in the first row. Do not repeat it in the remaining lines of the transaction.
- Import the file using the steps above for importing a receipt.

Extensiv University
Was this article helpful?
Share additional feedback about this article