Warehouse Management

Updated on January 7th, 2025

  • Extensiv Hub
    Popular Articles Getting Started Using Hub Technical Issues & FAQs Extensiv's Ideas Portal
  • 3PL Warehouse Manager
    Receiving Operations Inventory Management Shipping Operations System Configuration Scanning Operations Integrations Content Best Practice Resources Release Notes Popular Articles Troubleshooting Guides
  • Warehouse Management
    Getting Started Admin Console Shipping Order Picking & Packing Receiving Customer Portal Cycle Counting Kit Building Managing Users Barcode Scanner Import/Export Integrations Barcoding Wave Picking Bin Move Mobile Receiving and Picking Settings Popular Articles Reporting
  • Order Management
    Dashboard Orders Inventory Purchase Orders Shipments Customers Products Analytics Settings API API Integrations Accessing and Navigating Order Manager Error Messages Order Manager Popular Articles Accounting Integrations
  • Integration Management
    Getting Started with Integration Manager General Support Troubleshooting Extras & Addons API Documentation Popular Articles Order Sources Order Destinations
  • FAQs
  • Network Manager
    Getting Started Order Routing Management Technical Issues Shopping Carts Settings Settings, Products, and Orders
  • Billing Manager
    Getting Started Using Billing Manager
  • Release Notes
    Extensiv Sandbox Extensiv Extensiv Hub 3PL Warehouse Manager Integration Management Warehouse Management Order Management Billing Manager
  • Fulfillment Marketplace
    Getting Started
  • Sandbox
    Getting Started
+ More
  • Help Center
  • Warehouse Management
  • Barcoding
  • Label Printing
  • Barcoding
    • Barcoding 101
        • What is a Barcode?
        • Barcode Types
    • Label Printing
        • Label Printer Hardware
        • Selecting Barcode Label Media
        • How to Configure Zebra WiFi Printer
        • Setting up your label printer
    • Printing Labels in Warehouse Manager
        • Label Templates
        • Printing In The Mobile App
        • Google Chrome Printing Addon

How to Configure Zebra WiFi Printer

The following article outlines how to set up your Zebra WiFi enabled printer such as a GX420t or QLN420 plus.

  1. Before getting started: Download and install Zebra Setup utilities from the web or the CD that came with your printer. The Zebra setup utilities program is used to configure settings on the printer via USB.
  2. Plug the printer into your PC via the provided USB cable. Your Windows PC should automatically start installing the printer. You should see your printer in the printers window in Zebra Setup Utilities.


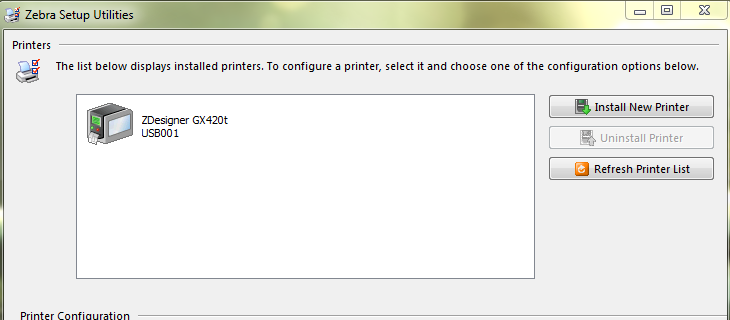
  3. Next, highlight the printer in the upper window, and press the 'Configure Printer Connectivity' button 


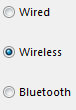
  4. Select 'Wireless' from the Connectivity Type window 

     
  5. Next, you will be prompted to select either DHCP or Static IP address.

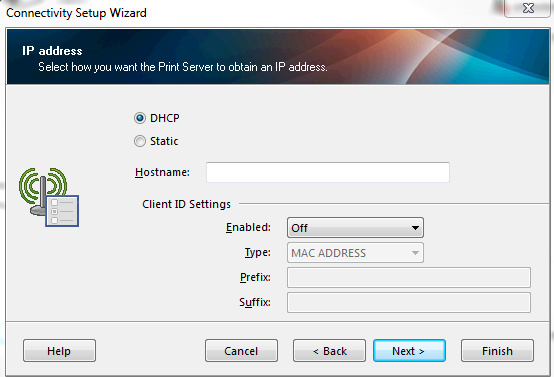
    • DHCP - This means an IP address will automatically be assigned by your network to the device.
    • Static - Select this option if you want to assign a specific IP address to the printer. You will also need your Subnet Mask and Default Gateway information.
      Hostname and the Client ID settings can typically be left blank. Click Next when you've made your selection.


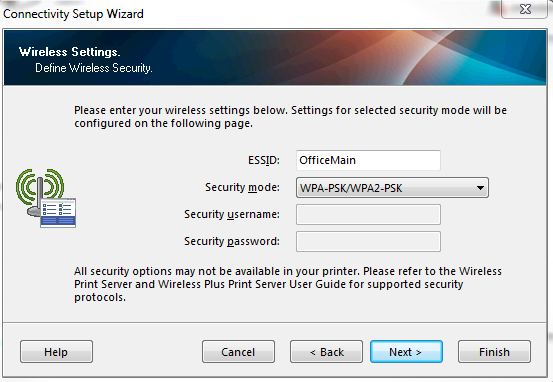
  6. Now you will enter in your ESSID and Security Mode. The ESSID is the WiFi network name that is broadcast, much like when picking a WiFi network from your smartphone.
    • The ESSID must be typed exactly, including caps and special characters
    • Security Mode - The most common security mode is WPA-PSK/WPA2-PSK. Speak to your network admin if you are unsure about this setting.
       
  7. Select String and enter your PSK name (WiFi Password) Make sure the password is entered exactly.

     
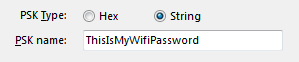
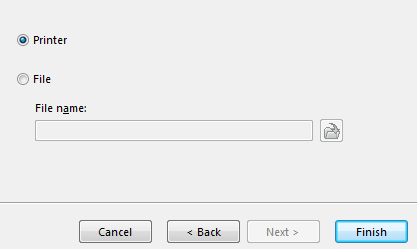
  8. Now click Next until the Next button is grayed out. Make sure the 'Printer' selection is active and click Finish. This will send the configuration to your printer.


  9. Now, when you look at the printer you should see an IP address.


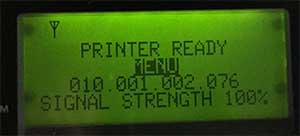
    If you are still not getting an IP address after completing these steps, review your network configuration and repeat the above steps. You may need to speak to your network administrator to get the correct configuration settings for your specific network.


wifi printer configure zebra zebra setup essid printer connectivity usb gx420t qln420

Was this article helpful?

Yes
No
Share additional feedback about this article

Related Articles

  • Selecting Barcode Label Media
  • Label Printer Hardware
  • Setting up your label printer

Not finding the help you need?

Contact Support
Solutions
  • Solutions for Brands
  • Solutions for 3PLs
  • Solutions for 4PLs
  • Solutions for B2B
Products
  • Extensiv 3PL Warehouse Manager
  • Extensiv Warehouse Manager
  • Extensiv Order Manager
  • Extensiv Integration Manager
  • Extensiv Network Manager
Products
  • Customer Success
  • Implementation
  • Consulting
Ecosystem
  • Fulfillment Marketplace
  • Integrations
  • Partners
  • Become a Partner
Resources
  • Resource Library
  • Blog
  • Market Insights
  • What is a 3PL?
  • What is a 4PL?
  • What is a WMS?
  • Why a Cloud-based WMS?
  • Glossary
Help
  • Help Center
  • API Documentation
  • Extensiv Univerisity
  • Community
  • System Status
  • Extensiv Logo
  • 100 N Pacific Coast Hwy, Suite 1100, El Segundo, CA 90245
  • |
  • Contact Us:
  • 83-EXTENSIV 888.375.2368 (main)
  • |
  • 310.844.7570 (local)
  • Copyright © 2023 Extensiv
  • |
  • All rights reserved.
  • Privacy Policy
  • |
  • Terms of Service
  • Follow Us:
Expand