3PL Warehouse Manager

Updated on November 6th, 2023

  • Extensiv Hub
    Popular Articles Getting Started Using Hub Technical Issues & FAQs Extensiv's Ideas Portal
  • 3PL Warehouse Manager
    Receiving Operations Inventory Management Shipping Operations System Configuration Scanning Operations Integrations Content Best Practice Resources Release Notes Popular Articles Troubleshooting Guides
  • Warehouse Management
    Getting Started Admin Console Shipping Order Picking & Packing Receiving Customer Portal Cycle Counting Kit Building Managing Users Barcode Scanner Import/Export Integrations Barcoding Wave Picking Bin Move Mobile Receiving and Picking Settings Popular Articles Reporting
  • Order Management
    Dashboard Orders Inventory Purchase Orders Shipments Customers Products Analytics Settings API API Integrations Accessing and Navigating Order Manager Error Messages Order Manager Popular Articles Accounting Integrations
  • Integration Management
    Getting Started with Integration Manager General Support Troubleshooting Extras & Addons API Documentation Popular Articles Order Sources Order Destinations
  • FAQs
  • Network Manager
    Getting Started Order Routing Management Technical Issues Shopping Carts Settings Settings, Products, and Orders
  • Billing Manager
    Getting Started Using Billing Manager
  • Release Notes
    Extensiv Sandbox Extensiv Extensiv Hub 3PL Warehouse Manager Integration Management Warehouse Management Order Management Billing Manager
  • Fulfillment Marketplace
    Getting Started
  • Sandbox
    Getting Started
+ More
  • Help Center
  • 3PL Warehouse Manager
  • Receiving Operations
  • Returns + Purchase Orders
  • Receiving Operations
    • Receipt Creation
        • Creating Receipts
        • Creating Receipts Manually
        • Importing Receipts
    • Receipt Management
        • Navigating the Find Receipts Page
        • Understanding Receipt Statuses
        • Generating Receipt Documents
        • Adjusting Receipt Charges
    • Returns + Purchase Orders
        • Creating Returns
        • Creating Purchase Orders
        • Entering Purchase Orders Manually
        • Importing Purchase Orders
        • Purchase Order Reporting Options
        • Managing Purchase Orders
    • Billing Best Practices for Receiving
        • Common Transactional Receiving Charges
        • Item-Based Handling Fees
        • Value-Added Service Fees
        • Initial Storage Charges

Purchase Order Reporting Options

Purchase order reports are used to keep track of open and closed POs for each of your customers. There are three types of PO reporting options: the Find Purchase Orders feature, the Purchase Order report, and the Purchase Order Progress report.

This article reviews the guidelines for each of these PO reporting options.

Guidelines

Navigate to Purchase Orders > Purchase Order Reports to access each PO reporting option.

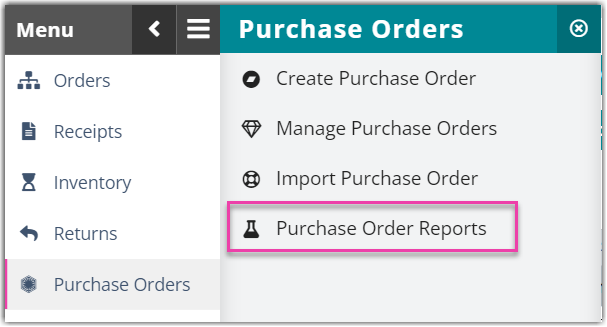
Once selected, find the respective guidelines below.

Find Purchase Orders feature

The Find Purchase Orders feature allows you to find both open and closed POs.

  1. Click Find Purchase Orders.
  2. Select a customer from the grid. Use < Ctrl > or < Shift > on your keyboard to select multiple customers, or select All to run a global report.
  3. Specify whether to 'Filter by Date Range', 'Filter by PO Number', or 'Filter by Status'.
  4. Click Refresh Grid.
  5. To generate a report or re-open a PO, select the PO from the grid and click the appropriate button below the grid.
  6. Click Close to return to the main Purchase Order Reports page.

Purchase Order report

The Purchase Order report is typically generated and sent to the supplier. In order for the necessary data to populate on the PO Report, items received into the warehouse must have a PO number associated with them.

  1. From the "Purchase Order Reports" page, click Purchase Order Report.
  2. In the appropriate text box, enter the ID or number associated with a PO.
  3. Click Run Report.
  4. To export the report, select a method from the drop-down menu, then click Export.
  5. Click Close to return to the main Purchase Order Reports page.

Purchase Order Progress report

The Purchase Order Progress report shows the current progress of a PO, including quantities received, quantities remaining, and expected dates. In order for the necessary data to populate on the PO Progress Report, items received into the warehouse must have a PO number associated with them.

Note that the PO Progress Report is usually generated after items have been received against the PO.

 
  1. From the "Purchase Order Reports" page, click Purchase Order Progress Report.
  2. In the appropriate text box, enter the ID or number associated with a PO.
  3. Click Run Report.
  4. To export the report, select a method from the drop-down menu, then click Export.
  5. Click Close to return to the main Purchase Order Reports page.
tracking ordering

Was this article helpful?

Yes
No
Share additional feedback about this article

Related Articles

  • Entering Order Line Items
  • Configuring a Drop Ship Address
  • Entering Order Charges
  • Entering Custom Order Info

Not finding the help you need?

Contact Support
Solutions
  • Solutions for Brands
  • Solutions for 3PLs
  • Solutions for 4PLs
  • Solutions for B2B
Products
  • Extensiv 3PL Warehouse Manager
  • Extensiv Warehouse Manager
  • Extensiv Order Manager
  • Extensiv Integration Manager
  • Extensiv Network Manager
Products
  • Customer Success
  • Implementation
  • Consulting
Ecosystem
  • Fulfillment Marketplace
  • Integrations
  • Partners
  • Become a Partner
Resources
  • Resource Library
  • Blog
  • Market Insights
  • What is a 3PL?
  • What is a 4PL?
  • What is a WMS?
  • Why a Cloud-based WMS?
  • Glossary
Help
  • Help Center
  • API Documentation
  • Extensiv Univerisity
  • Community
  • System Status
  • Extensiv Logo
  • 100 N Pacific Coast Hwy, Suite 1100, El Segundo, CA 90245
  • |
  • Contact Us:
  • 83-EXTENSIV 888.375.2368 (main)
  • |
  • 310.844.7570 (local)
  • Copyright © 2023 Extensiv
  • |
  • All rights reserved.
  • Privacy Policy
  • |
  • Terms of Service
  • Follow Us:
Expand