3PL Warehouse Manager

Updated on August 22nd, 2023

  • Extensiv Hub
    Popular Articles Getting Started Using Hub Technical Issues & FAQs Extensiv's Ideas Portal
  • 3PL Warehouse Manager
    Receiving Operations Inventory Management Shipping Operations System Configuration Scanning Operations Integrations Content Best Practice Resources Release Notes Popular Articles Troubleshooting Guides
  • Warehouse Management
    Getting Started Admin Console Shipping Order Picking & Packing Receiving Customer Portal Cycle Counting Kit Building Managing Users Barcode Scanner Import/Export Integrations Barcoding Wave Picking Bin Move Mobile Receiving and Picking Settings Popular Articles Reporting
  • Order Management
    Dashboard Orders Inventory Purchase Orders Shipments Customers Products Analytics Settings API API Integrations Accessing and Navigating Order Manager Error Messages Order Manager Popular Articles Accounting Integrations
  • Integration Management
    Getting Started with Integration Manager General Support Troubleshooting Extras & Addons API Documentation Popular Articles Order Sources Order Destinations
  • FAQs
  • Network Manager
    Getting Started Order Routing Management Technical Issues Shopping Carts Settings Settings, Products, and Orders
  • Billing Manager
    Getting Started Using Billing Manager
  • Release Notes
    Extensiv Sandbox Extensiv Extensiv Hub 3PL Warehouse Manager Integration Management Warehouse Management Order Management Billing Manager
  • Fulfillment Marketplace
    Getting Started
  • Sandbox
    Getting Started
+ More
  • Help Center
  • 3PL Warehouse Manager
  • Shipping Operations
  • Shipping Setups
  • Shipping Operations
    • Order Creation
        • Creating Orders
        • Importing Orders
        • Entering Order Contact Details
        • Entering Order Line Items
        • Entering Carrier and Routing Information
        • Entering Custom Order Info
        • Entering Order Charges
        • Cloning an Order
    • Order Management
        • Understanding Order Statuses
        • Navigating the Find Orders Page
        • Generating Order Documents
        • Batch Order Processing
        • Adjusting Order Charges
    • Shipping Setups
        • Understanding the Parcel API
        • Connecting Carriers to Providers
        • Understanding Carrier Account Logic
        • Configuring Zebra Browser Print
        • Configuring Small Parcel Settings
        • Using Address Validation
        • Connecting Multiple Accounts for the Same Carrier
        • Managing Carrier Accounts
        • Configuring Fulfillment Invoicing
        • Using a Flat File Carrier Integration
        • Managing Shipping Carriers
        • Configuring a Drop Ship Address
        • Managing Ship-to Contacts
        • Managing Retailers
        • Importing Ship-to Contacts
        • Managing Ship Method Mappings
        • Managing 3rd-Party-Billing Contacts
        • Shipping Hazardous Materials
    • Small Parcel Carriers
        • Shipping in Small Parcel Suite
        • Shipping with Amazon Buy
        • Shipping with APC
        • Shipping with Australia Post
        • Shipping with Canada Post
        • Shipping with Canpar
        • Shipping with DHL eCommerce
        • Shipping with DHL Express (AU)
        • Shipping with DHL Express (US)
        • Shipping with ePost Global
        • Shipping with FedEx
        • Shipping with FirstMile
        • Shipping With Flexport
        • Shipping with Globegistics
        • Shipping with Landmark
        • Shipping with OnTrac
        • Shipping with PARCLL
        • Shipping with Passport
        • Shipping with Pitney Bowes Cross-Border Delivery
        • Shipping with Pitney Bowes Standard
        • Shipping with Purolator
        • Shipping with RR Donnelley
        • Shipping with SEKO Ecommerce
        • Shipping with Sendle
        • Shipping with Stallion Express
        • Shipping with Tusk Logistics
        • Shipping with UPS
        • Shipping with USPS (BUKU Ship)
        • Shipping with USPS (Endicia)
        • Shipping with USPS (Stamps.com)
        • Shipping with UPS Mail Innovations®
        • Shipping with FedEx One Rate®
        • Shipping with USPS (Pitney Bowes Expedited)
        • Connecting Small Parcel to UPS
    • Packing Basics
        • Packing Orders
        • Managing Packing Materials
        • Configuring Scales for SmartPack
        • Creating Packing Slip Templates
        • Processing Packages
        • Understanding Automatic Package Generation
        • Consolidating Packages
        • Recalculating Packages
        • Using Packing Materials
        • Understanding Multi-Tier Packing in Process Packages
    • Order Processing
        • Navigating the Small Parcel Homepage
        • Packing in the Small Parcel Space
        • Shipping in the Small Parcel Space
        • Using High Volume Processing (HVP) with SmartParcel
        • Printing Return Labels
        • Printing Combo Labels
        • Voiding Shipping Labels
        • Troubleshooting Blank Shipping Labels
        • Creating End of Day Requests (Manifesting)
    • Billing Best Practices for Shipping
        • Common Transactional Shipping Charges
        • Flat Order Processing Fees
        • Item-Based Handling Fees
        • Freight Fees
    • International Shipping
        • Shipping Internationally with SmartParcel
        • Capturing Digital Assets for FedEx ETD
        • Tax Identifiers in Small Parcel Suite
        • Package Description for Mexico Shipments
      • Enabling Integrated Packing Slip

Configuring a Drop Ship Address

Drop shipping allows you to populate a ship-from or return-to address that is different from your warehouse on the shipping and return labels. This is typically used when your customer wants to display a different address for different retailers on their labels.

This article reviews how to define the drop ship address for a customer.

Before you can begin drop shipping, you must have SmartParcel enabled for your account and retailers set up in 3PL Warehouse Manager.


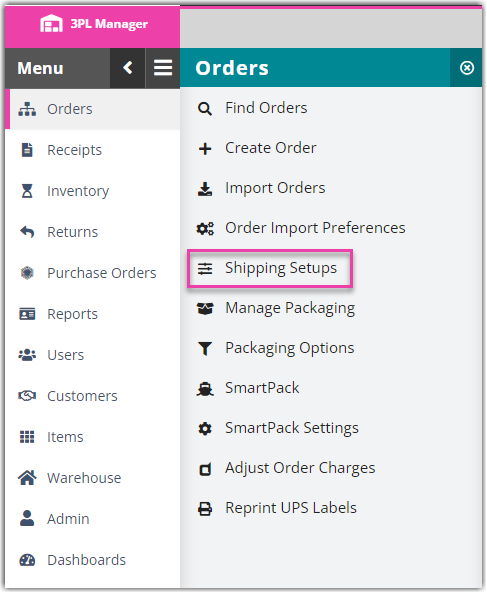
  1. Navigate to Orders > Shipping Setups > Manage Retailers.


3PL Warehouse Manager Shipping Setups navigation option


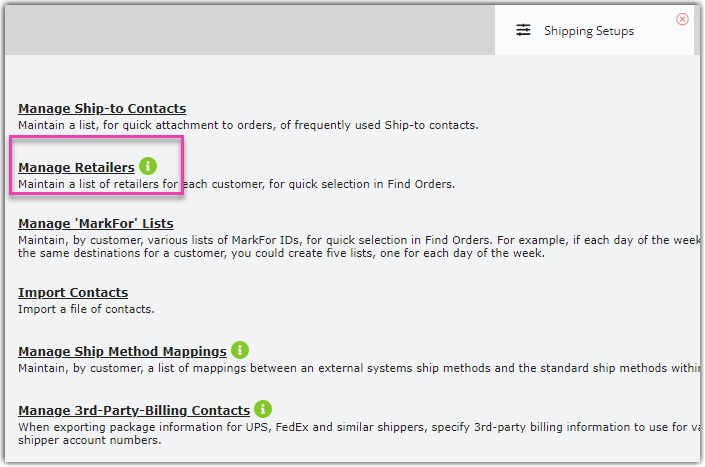
  1. This will open a grid that displays existing retailers per customer. If necessary, select a customer from the drop-down menu.
  2. If the retailer already exists in the system, select it from the grid, then click Edit. If not, click Add and fill out the general fields.
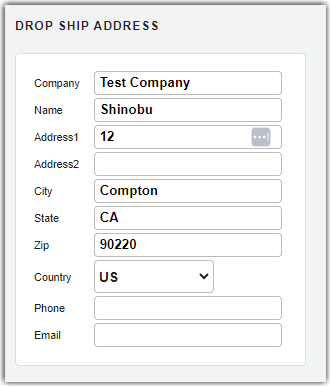
  3. Locate the 'Drop Ship Address' section, then enter the address that you wish to appear as the ship-from and return-to addresses on the appropriate labels.


  4. If you need to populate specific reference fields on the shipping label when drop shipping with this retailer, locate the 'SmartParcel Reference' section and make the appropriate selections for each needed 'Reference' field.


    When the associated Retailer ID is present on an order, any reference fields defined here will override the reference fields defined under Customers > SmartParcel Settings. 

     
  5. Click Save. Repeat these steps for each retailer and customer as necessary.

Once the drop ship address is defined for a retailer, this information will populate on an order that has the associated Retailer ID selected under Order Contact Details > Shipping Destination > Contact Information. Please note that the Retailer ID also populates for imported orders when the respective field is present in the imported file—see Managing Retailers for more information.

The defined drop ship address will also appear as the ship-from address on shipping labels generated for any order that has the associated retailer ID shipping labels, as well as the return-to address on the order's return label.

configure drop ship

Was this article helpful?

Yes
No
Share additional feedback about this article

Related Articles

  • Importing Orders
  • Creating End of Day Requests (Manifesting)
  • Navigating the Find Orders Page
  • Shipping Internationally with SmartParcel

Not finding the help you need?

Contact Support
Solutions
  • Solutions for Brands
  • Solutions for 3PLs
  • Solutions for 4PLs
  • Solutions for B2B
Products
  • Extensiv 3PL Warehouse Manager
  • Extensiv Warehouse Manager
  • Extensiv Order Manager
  • Extensiv Integration Manager
  • Extensiv Network Manager
Products
  • Customer Success
  • Implementation
  • Consulting
Ecosystem
  • Fulfillment Marketplace
  • Integrations
  • Partners
  • Become a Partner
Resources
  • Resource Library
  • Blog
  • Market Insights
  • What is a 3PL?
  • What is a 4PL?
  • What is a WMS?
  • Why a Cloud-based WMS?
  • Glossary
Help
  • Help Center
  • API Documentation
  • Extensiv Univerisity
  • Community
  • System Status
  • Extensiv Logo
  • 100 N Pacific Coast Hwy, Suite 1100, El Segundo, CA 90245
  • |
  • Contact Us:
  • 83-EXTENSIV 888.375.2368 (main)
  • |
  • 310.844.7570 (local)
  • Copyright © 2023 Extensiv
  • |
  • All rights reserved.
  • Privacy Policy
  • |
  • Terms of Service
  • Follow Us:
Expand