Configuring Item-Level Recurring Storage Charges
2.3 min read
|When creating or editing an item, you use the Recurring Storage section to add recurring storage charges at the item-level. This article reviews how to set up recurring storage charges for one or more items.
Recurring Storage is the only configuration section that allows editing multiple items at once. Please note that no previously configured recurring storage configurations populate when editing multiple items.

- To get started, select an inventory Counting Mechanism from the drop-down menu. Each option is defined as follows:
-
Storage UOM: Set a rate based on a ratio between the item's unit of measure (UOM) and the storage UOM (e.g., This item's UOM may be classified as Each, but you bill by the Carton)
- Select the 'Storage UOM' from the drop-down menu, then specify the number of primary units per storage unit.
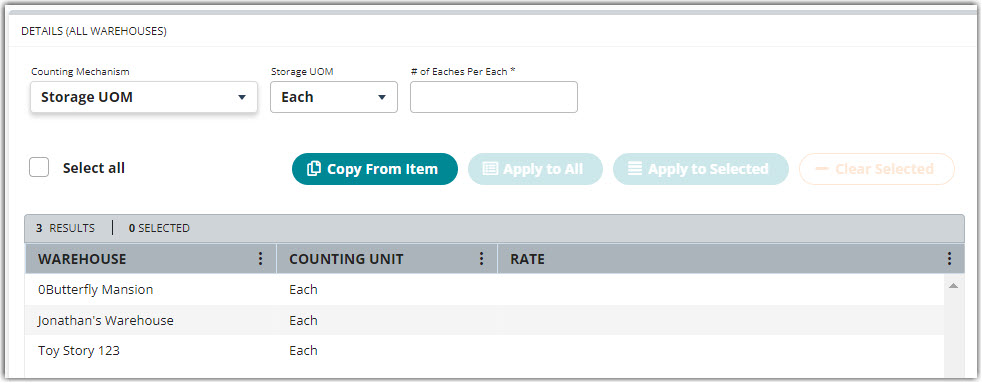
- Select the 'Storage UOM' from the drop-down menu, then specify the number of primary units per storage unit.
-
Movable Units: Set a rate for each MU type (defined under Admin > Movable Units) per warehouse
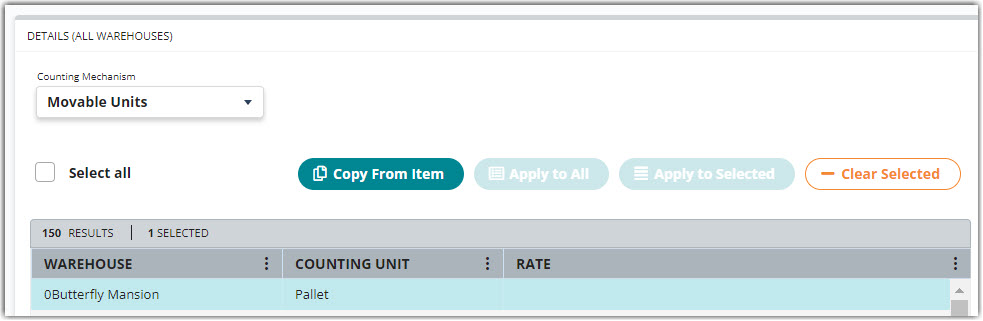
Please note the importance of receiving the product on the correct movable unit type. If you receive this item using an MU type that does not have a defined rate here, it will not be properly billed for.
-
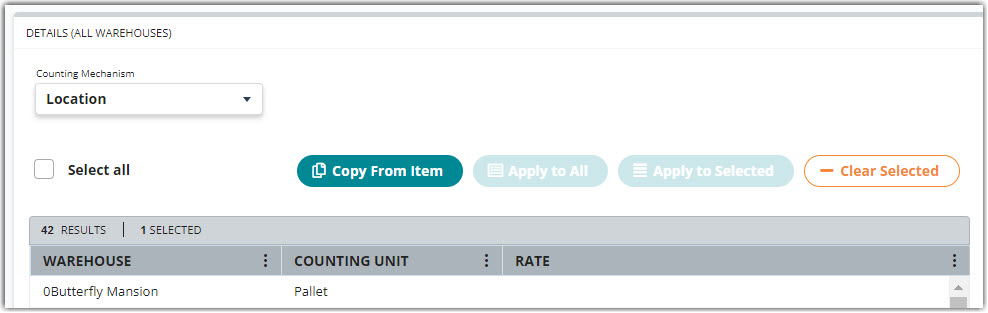
Location: Set a rate for a location-based billing type (configured under Admin > Location Billing Type)
-
Rounding Storage UOM: Same as Storage UOM except partial values will round up to the next whole number (e.g., If you have an item configured as 20 eaches per pallet and receive 15 eaches, the storage UOM will round up to 20 instead of charging you a percentage of the rate)
- Select the 'Storage UOM' from the drop-down menu, then specify the number of primary units per storage unit.
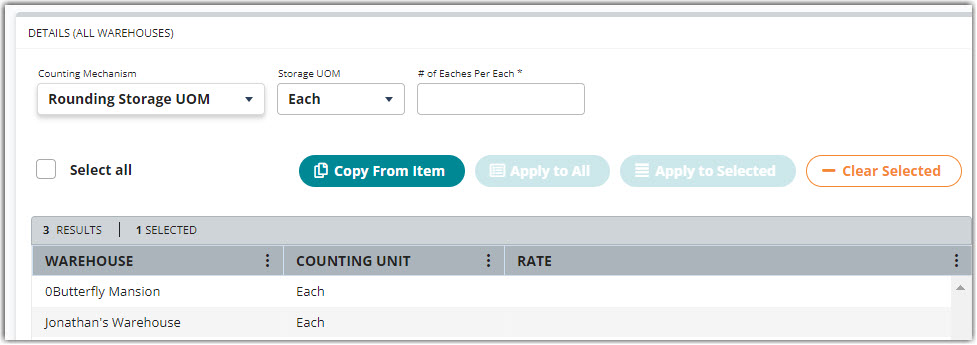
- Select the 'Storage UOM' from the drop-down menu, then specify the number of primary units per storage unit.
-
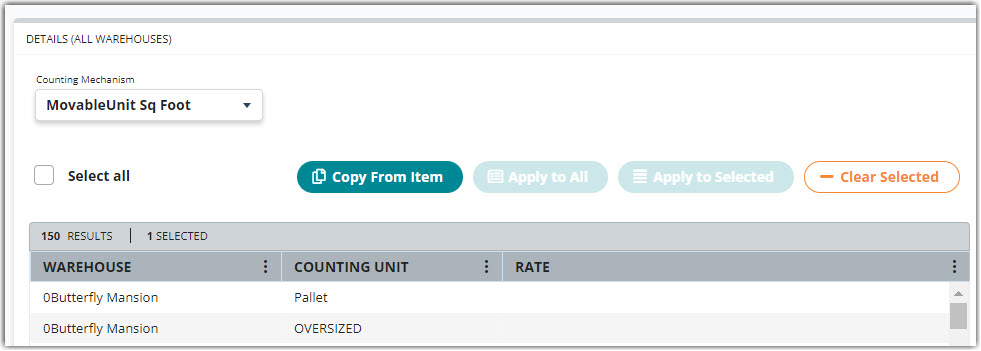
MovableUnit Sq Foot: Set a rate based on the square footage per MU (uses pallet dimensions configured under Admin > Movable Units to charge per square foot)
-
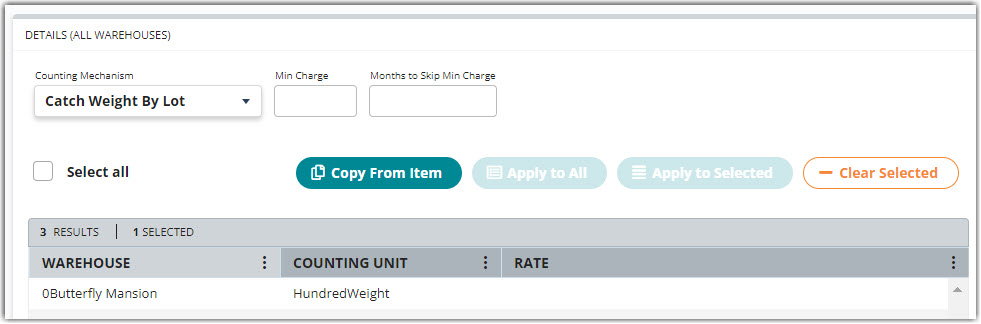
Catch Weight by Lot: Set a rate based on the hundred weight of the unit and choose to include a minimum charge per lot and free months before the charges apply (breaks down charge by lot number)
-
Optional: Enter a minimum charge per lot, as well as enter the number of free months. For example, if you entered 1 for 'Months to Skip Min Charge', the system would wait 1 month after receiving the product before applying the minimum charge.
-
Optional: Enter a minimum charge per lot, as well as enter the number of free months. For example, if you entered 1 for 'Months to Skip Min Charge', the system would wait 1 month after receiving the product before applying the minimum charge.
-
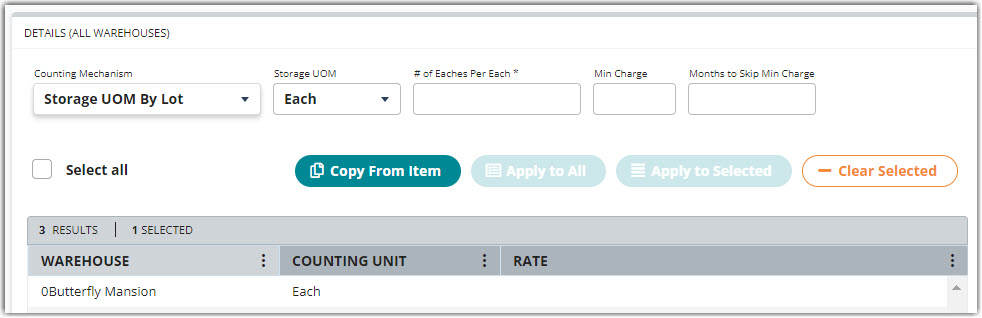
Storage UOM By Lot: Same as Storage UOM with an option to specify a minimum charge per lot and free months before the charges apply (breaks down charge by lot number)
- Select the 'Storage UOM' from the drop-down menu, then specify the number of primary units per storage unit.
- Enter a minimum charge per lot, then enter the number of free months (optional).
-
Storage UOM: Set a rate based on a ratio between the item's unit of measure (UOM) and the storage UOM (e.g., This item's UOM may be classified as Each, but you bill by the Carton)
- Optional: To copy charge rates from an existing item, click Copy Item, select the relevant rate, then click Add. Proceed to Step 8 if no edits need to be made.
- Specify a value in each provided field—field options vary depending on the selected counting mechanism.
- Set a new charge rate by clicking in the relevant grid row under the 'Rate' column and entering the rate.
To apply a rate to multiple warehouses/counting units, use < Ctrl > on your keyboard to multi-select before you enter a charge rate.
- To apply the rate to the selected row(s), click Apply to Selected. To apply the rate to every row, click Apply to All.
- To clear one or more existing rates, select the relevant rates, then click Clear Selected.
- Click Save to save the recurring storage charges. The configured rates automatically apply to available inventory and are generated on the associated invoices under Admin > Manage Invoices.
Once you establish an initial rate for item-level recurring storage charges, you can batch update these rates via Items > Manage Storage Rates. To learn more, please see Managing Storage Rates.
After you configure recurring storage charges for an item, you can continue to the next configuration section—Configuring Item-Level Storage and Handling Charges. Please note that this section does not populate until you save an item for the first time.