3PL Warehouse Manager

Updated on July 17th, 2023

  • Extensiv Hub
    Popular Articles Getting Started Using Hub Technical Issues & FAQs Extensiv's Ideas Portal
  • 3PL Warehouse Manager
    Receiving Operations Inventory Management Shipping Operations System Configuration Scanning Operations Integrations Content Best Practice Resources Release Notes Popular Articles Troubleshooting Guides
  • Warehouse Management
    Getting Started Admin Console Shipping Order Picking & Packing Receiving Customer Portal Cycle Counting Kit Building Managing Users Barcode Scanner Import/Export Integrations Barcoding Wave Picking Bin Move Mobile Receiving and Picking Settings Popular Articles Reporting
  • Order Management
    Dashboard Orders Inventory Purchase Orders Shipments Customers Products Analytics Settings API API Integrations Accessing and Navigating Order Manager Error Messages Order Manager Popular Articles Accounting Integrations
  • Integration Management
    Getting Started with Integration Manager General Support Troubleshooting Extras & Addons API Documentation Popular Articles Order Sources Order Destinations
  • FAQs
  • Network Manager
    Getting Started Order Routing Management Technical Issues Shopping Carts Settings Settings, Products, and Orders
  • Billing Manager
    Getting Started Using Billing Manager
  • Release Notes
    Extensiv Sandbox Extensiv Extensiv Hub 3PL Warehouse Manager Integration Management Warehouse Management Order Management Billing Manager
  • Fulfillment Marketplace
    Getting Started
  • Sandbox
    Getting Started
+ More
  • Help Center
  • 3PL Warehouse Manager
  • Inventory Management
  • Movable Units
  • Inventory Management
    • Item Creation
        • Creating Items
        • Understanding Units of Measure
        • Entering Basic Item Details
        • Defining Units of Measure
        • Creating Item Assemblies
        • Configuring Item-Level Recurring Storage Charges
        • Configuring Item-Level Storage and Handling Charges
    • Inventory Management
        • Using the Manage Inventory Page
        • Understanding Allocation Logic
        • Making Adjustments
        • Transferring Inventory
        • Editing Track-By Values
        • Getting Started with Directed Putaway
        • Understanding Directed Putaway Logic
        • Understanding Replenishments
        • Counting Inventory
        • Performing Item-Based Audits
    • Movable Units
        • Understanding Movable Units
        • Enabling Movable Units for Customers
        • Defining Movable Unit Types
        • Specifying an Item's Movable Unit Type
        • Receiving Movable Units
        • Moving Movable Units
        • Reconfiguring Movable Units
    • Item Control
        • Managing Assembly Transactions
        • Moving Items
        • Batch-Updating Items
        • Managing Item Aliases
        • Managing Commodities
        • Managing Classifications
        • Managing Pricing
        • Managing Item Images
        • Managing Storage Rates
        • Uploading Import Templates
        • Understanding Item Alias

Receiving Movable Units

Whether you are receiving in 3PL Warehouse Manager or with SmartScan, there are several options available for specifying a movable unit. This article reviews each MU option available when receiving with 3PL Warehouse Manager and SmartScan, as well as how to print MU labels from the Find Receipts page.

If you're utilizing your own MU labels, we recommend using alphanumeric formatting for the license plate name. Special characters are not supported.


Receiving in 3PL Warehouse Manager

Manual receipt entry

When adding or editing a receipt line item in 3PL Warehouse Manager, there is a section specifically for identifying a movable unit. These fields are available if you have MUs enabled in the customer setup options, and they are required if you have specified MUs as a requirement for the customer.

  1. In the Movable Unit field, indicate an MU label, commonly referred to as the MU's unique license plate.
    • If you have a predefined MU label, enter the license plate or select an MU label that you've already defined on the receipt.
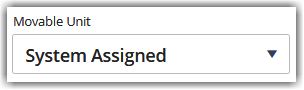
    • If you do not have a predefined MU label, you can select System Assigned from the Movable Unit drop-down menu to let the system assign a MU label instead.
  2. In the Movable Unit Type field, the MU type defined in the item's setup auto-populates the MU type and associated dimensions. (Modify if needed.)
  3. If the total number of primary units is greater than 1 MU, select Split Movable Unit to split each MU into individual line items. (This option can be enabled by default in the customer setup.)

Receipt import

If you or your customers are entering receipts via import template, you can specify a movable unit using the Receipt (with MU and Catch Weight) Import Template. The relevant fields for MUs include MULabel, MUType, MULength, MUWidth, MUHeight, MUWeight (Columns S–X), and CreateMultipleMUs (Column Z).

Each of these fields are further defined in the notes of each column header. To view the note, hover over the column header—if the full note does not display, right-click the cell, select Show/Hide Note, then re-size as needed.

Receiving with SmartScan

When scanning a receipt line item upon arrival, you specify the SKU, quantity, and any relevant track-by's. Once you click Next, you're presented with the Storage Detail page before officially adding the line item.

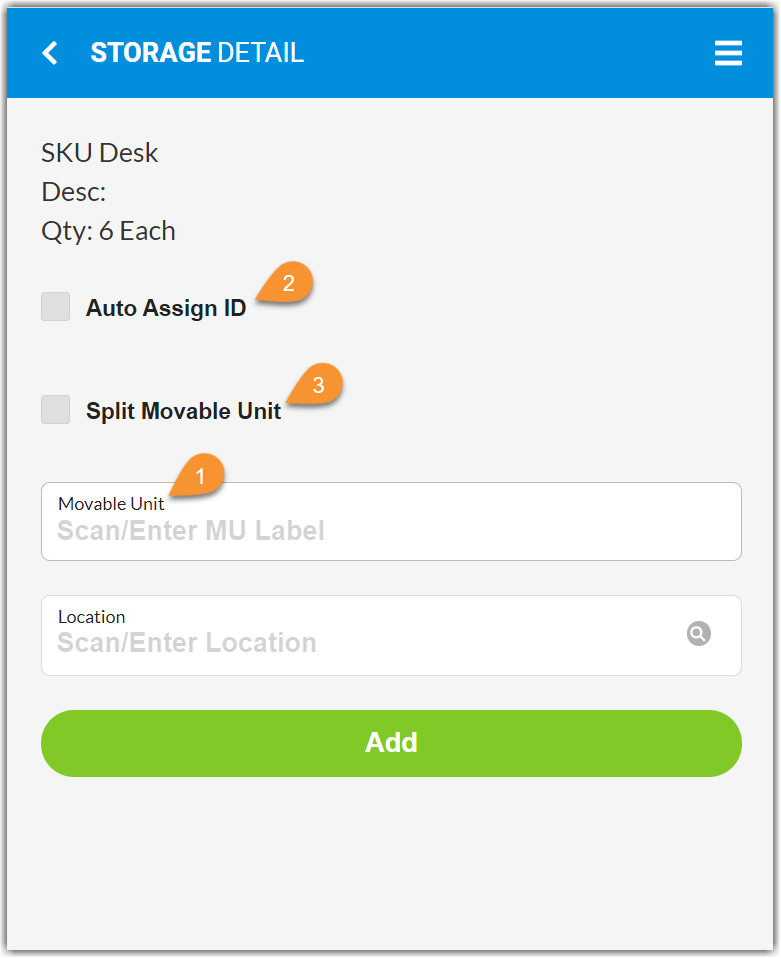
  1. If you have a predefined MU label, scan or enter a value for the MU label, commonly referred to as the MU's unique license plate, in the Movable Unit field.
  2. If you do not have a predefined MU label, tap Auto Assign ID to let the system assign a MU label instead.
  3. If the total number of primary units is greater than 1 MU, tap Split Movable Unit to split each MU into individual line items.

Printing MU Labels

If you chose for the system to assign an MU label or you need to re-print an existing MU label, you can print the label out from the Find Receipts page.

Select the relevant receipt from the Find Receipts grid, then select Documents > MU Label. If you have multiple versions, you must select a version as well.

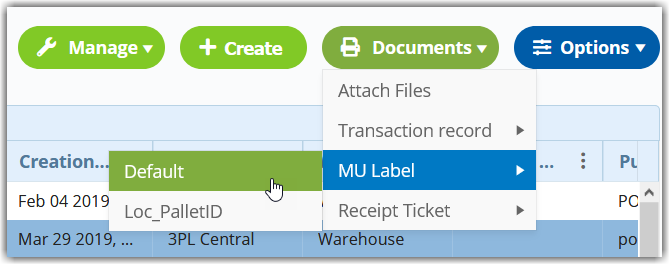
The label generates as a PDF in a new tab for you to print and attach to the MU.

mobility transferring

Was this article helpful?

Yes
No
Share additional feedback about this article

Related Articles

  • Configuring a Drop Ship Address
  • April 1, 2020 – Minor Release Notes
  • March 30, 2020 – Minor Release Notes
  • Managing Invoices

Not finding the help you need?

Contact Support
Solutions
  • Solutions for Brands
  • Solutions for 3PLs
  • Solutions for 4PLs
  • Solutions for B2B
Products
  • Extensiv 3PL Warehouse Manager
  • Extensiv Warehouse Manager
  • Extensiv Order Manager
  • Extensiv Integration Manager
  • Extensiv Network Manager
Products
  • Customer Success
  • Implementation
  • Consulting
Ecosystem
  • Fulfillment Marketplace
  • Integrations
  • Partners
  • Become a Partner
Resources
  • Resource Library
  • Blog
  • Market Insights
  • What is a 3PL?
  • What is a 4PL?
  • What is a WMS?
  • Why a Cloud-based WMS?
  • Glossary
Help
  • Help Center
  • API Documentation
  • Extensiv Univerisity
  • Community
  • System Status
  • Extensiv Logo
  • 100 N Pacific Coast Hwy, Suite 1100, El Segundo, CA 90245
  • |
  • Contact Us:
  • 83-EXTENSIV 888.375.2368 (main)
  • |
  • 310.844.7570 (local)
  • Copyright © 2023 Extensiv
  • |
  • All rights reserved.
  • Privacy Policy
  • |
  • Terms of Service
  • Follow Us:
Expand