3PL Warehouse Manager

Updated on November 6th, 2023

  • Extensiv Hub
    Popular Articles Getting Started Using Hub Technical Issues & FAQs Extensiv's Ideas Portal
  • 3PL Warehouse Manager
    Receiving Operations Inventory Management Shipping Operations System Configuration Scanning Operations Integrations Content Best Practice Resources Release Notes Popular Articles Troubleshooting Guides
  • Warehouse Management
    Getting Started Admin Console Shipping Order Picking & Packing Receiving Customer Portal Cycle Counting Kit Building Managing Users Barcode Scanner Import/Export Integrations Barcoding Wave Picking Bin Move Mobile Receiving and Picking Settings Popular Articles Reporting
  • Order Management
    Dashboard Orders Inventory Purchase Orders Shipments Customers Products Analytics Settings API API Integrations Accessing and Navigating Order Manager Error Messages Order Manager Popular Articles Accounting Integrations
  • Integration Management
    Getting Started with Integration Manager General Support Troubleshooting Extras & Addons API Documentation Popular Articles Order Sources Order Destinations
  • FAQs
  • Network Manager
    Getting Started Order Routing Management Technical Issues Shopping Carts Settings Settings, Products, and Orders
  • Billing Manager
    Getting Started Using Billing Manager
  • Release Notes
    Extensiv Sandbox Extensiv Extensiv Hub 3PL Warehouse Manager Integration Management Warehouse Management Order Management Billing Manager
  • Fulfillment Marketplace
    Getting Started
  • Sandbox
    Getting Started
+ More
  • Help Center
  • 3PL Warehouse Manager
  • Inventory Management
  • Item Control
  • Inventory Management
    • Item Creation
        • Creating Items
        • Understanding Units of Measure
        • Entering Basic Item Details
        • Defining Units of Measure
        • Creating Item Assemblies
        • Configuring Item-Level Recurring Storage Charges
        • Configuring Item-Level Storage and Handling Charges
    • Inventory Management
        • Using the Manage Inventory Page
        • Understanding Allocation Logic
        • Making Adjustments
        • Transferring Inventory
        • Editing Track-By Values
        • Getting Started with Directed Putaway
        • Understanding Directed Putaway Logic
        • Understanding Replenishments
        • Counting Inventory
        • Performing Item-Based Audits
    • Movable Units
        • Understanding Movable Units
        • Enabling Movable Units for Customers
        • Defining Movable Unit Types
        • Specifying an Item's Movable Unit Type
        • Receiving Movable Units
        • Moving Movable Units
        • Reconfiguring Movable Units
    • Item Control
        • Managing Assembly Transactions
        • Moving Items
        • Batch-Updating Items
        • Managing Item Aliases
        • Managing Commodities
        • Managing Classifications
        • Managing Pricing
        • Managing Item Images
        • Managing Storage Rates
        • Uploading Import Templates
        • Understanding Item Alias

Managing Storage Rates

Once you've established recurring storage rates via item setup, the Manage Storage Rates page groups items that have the same counting mechanism and cost and allows you to batch update the rates. This article reviews how to edit or remove previously configured recurring storage rates for items.

To manage storage rates, you must have the following permission assigned to your user role: Customer Module > Customer Items > Manage Storage Rates.


Please note that you cannot use this page to define recurring storage rates for the first time. You must have recurring storage rates established on an item before you can attempt to manage existing rates on this page. For more information on defining these rates, please see Configuring Item-Level Recurring Storage Charges.

 
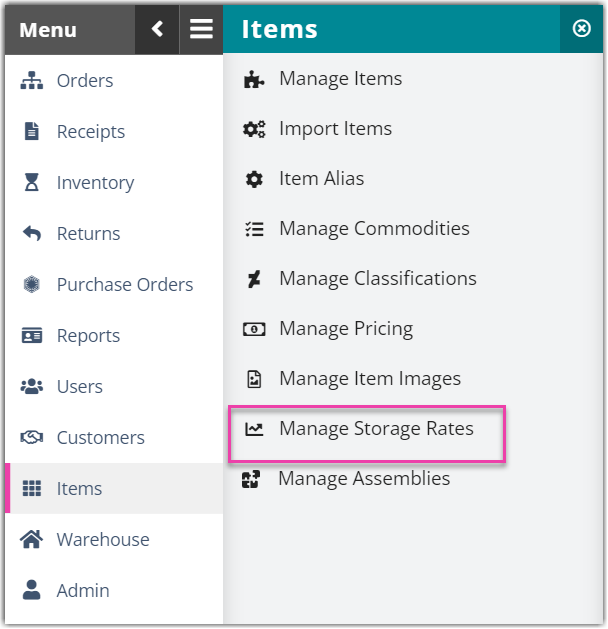
  1. Navigate to Items > Manage Storage Rates, then select a relevant customer and facility from the respective drop-down menus.
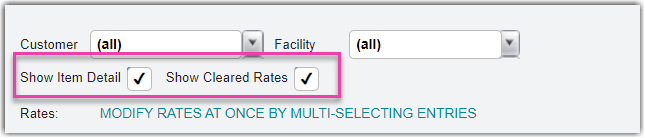
  2. Optional: Select Show Item Detail to populate the 'Item SKU' grid column or Show Cleared Rates to view storage charges that have counting mechanisms defined without specified rates.
  3. Select one or more items for which you would like to manage storage rates, using < Ctrl > or < Shift > on your keyboard to multi-select.
    • To enter a new rate, click Edit, enter the new 'Recurring Rate', then click Save.
    • To remove a rate, click Clear, then click Save.
  4. Once saved, the new rates are instantly updated on the item(s) and officially go into effect once the next inventory count takes place for the following billing period.
rates control storage management

Was this article helpful?

Yes
No
Share additional feedback about this article

Related Articles

  • Magento 2.x Shopping Cart Connection
  • January 23, 2020 – Minor Release Notes
  • Sending Receipt Advice
  • Creating Pick Jobs

Not finding the help you need?

Contact Support
Solutions
  • Solutions for Brands
  • Solutions for 3PLs
  • Solutions for 4PLs
  • Solutions for B2B
Products
  • Extensiv 3PL Warehouse Manager
  • Extensiv Warehouse Manager
  • Extensiv Order Manager
  • Extensiv Integration Manager
  • Extensiv Network Manager
Products
  • Customer Success
  • Implementation
  • Consulting
Ecosystem
  • Fulfillment Marketplace
  • Integrations
  • Partners
  • Become a Partner
Resources
  • Resource Library
  • Blog
  • Market Insights
  • What is a 3PL?
  • What is a 4PL?
  • What is a WMS?
  • Why a Cloud-based WMS?
  • Glossary
Help
  • Help Center
  • API Documentation
  • Extensiv Univerisity
  • Community
  • System Status
  • Extensiv Logo
  • 100 N Pacific Coast Hwy, Suite 1100, El Segundo, CA 90245
  • |
  • Contact Us:
  • 83-EXTENSIV 888.375.2368 (main)
  • |
  • 310.844.7570 (local)
  • Copyright © 2023 Extensiv
  • |
  • All rights reserved.
  • Privacy Policy
  • |
  • Terms of Service
  • Follow Us:
Expand