Managing Assembly Transactions
3.5 min read
|An assembly combines two or more components, including both SKU and non-SKU materials, into one unique kitted item. Assembly transaction, the transaction serves as a receiving confirmation of the assembly transaction making the newly created assembly inventory available for orders to be placed against it.
This article reviews how to create a new assembly transaction and cancel an existing assembly transaction.
Create a new assembly transaction
Before creating an assembly transaction, you must configure the item to list the component items within that assembly. You can define the item assembly components from Items > Manage Items > Assembly tab. For more information, please see this help article for Creating Item Assemblies.
It is best practice to create an assembly transaction when the necessary component inventory is available and confirm the assembly transaction once all items have been built.
Import assembly transaction
If you have multiple assemblies to enter into the system or have a spreadsheet that contains the assembly information, we recommend entering these assemblies into the system via an import file.
To import an assembly transaction:
- Follow the instructions on the Assembly Import Template, then navigate to Items > Manage Assemblies > and click Import located at the top part of the page. This will open the Import Assemblies window.
2. Select a Customer and a Warehouse.
3. Select On error, cancel the import to abort the import process if it detects an error.
4. Download the Assembly import template file, which contains instructions about how to properly use it, from the Extensiv Help Center.
5. To select an import file, either drag and drop it onto the Import Assemblies modal, or click Browse Files to search for it.
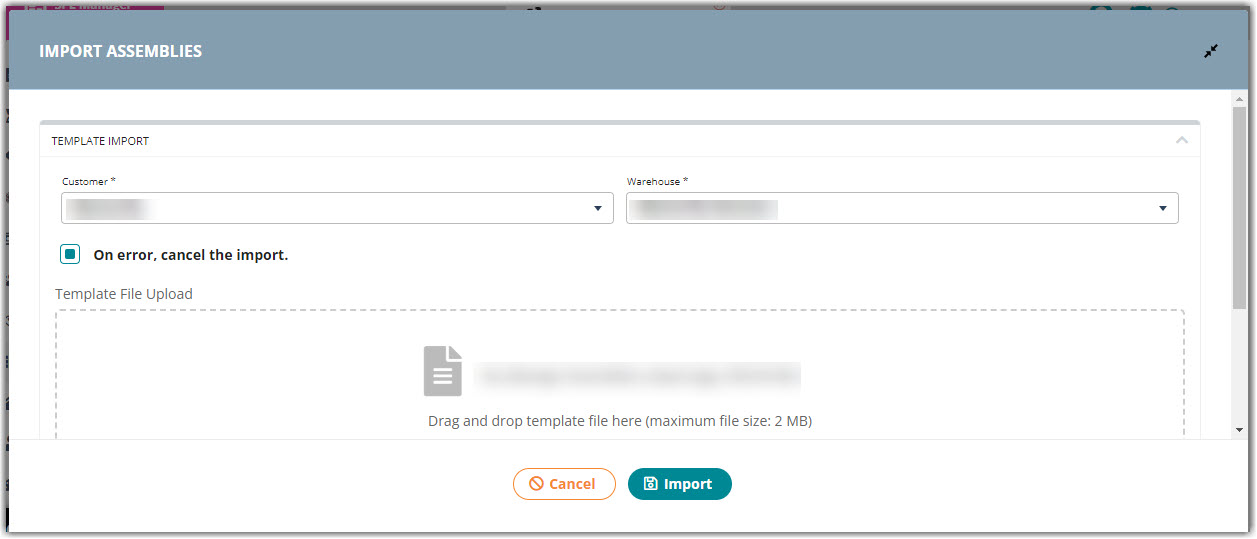
6.Click the Import button.
Once the import completes, the newly created assembly transactions display on the Manage Assemblies page.
After importing an assembly transaction, confirm it from the Manage Assemblies page.
Manually creating an assembly transaction
To create a new assembly transaction, select Items > Manage Assemblies > Create.
Step 1: Enter basic information
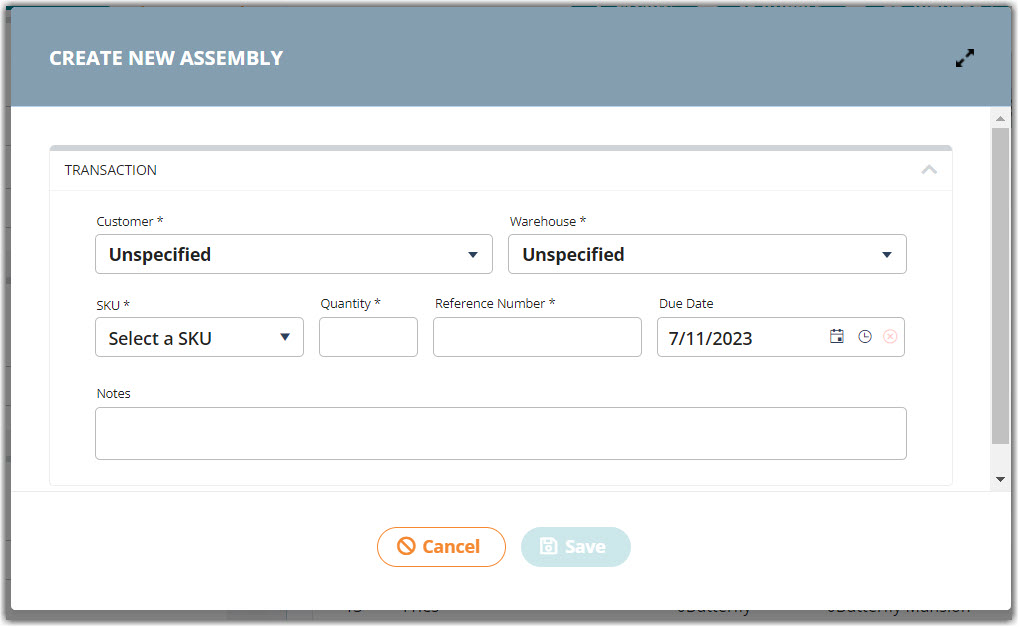
- Select the Customer and the Warehouse.
- Select the assembly SKU to create.
For more information, refer to our article for Creating Item Assemblies. - Specify the Quantity of this assembly to build.
- Enter a unique Reference Number for the Assembly transaction.
- Specify a due date for this assembly transaction to be complete.
By default, the due date is the current date (today).
Note: You can specify a due date in the past, if needed. - (Optional) Add a note related to this assembly.
- Click Save.
At this point, the WMS creates the assembly transaction and opens the Edit Existing Assembly dialog. If you click Cancel the dialog closes, but the assembly transaction remains available in the Manage Assemblies grid so you can edit it later.
Step 2: Edit existing assembly
To edit an existing assembly transaction, select it in the Assemblies grid, then click Manage > Edit.
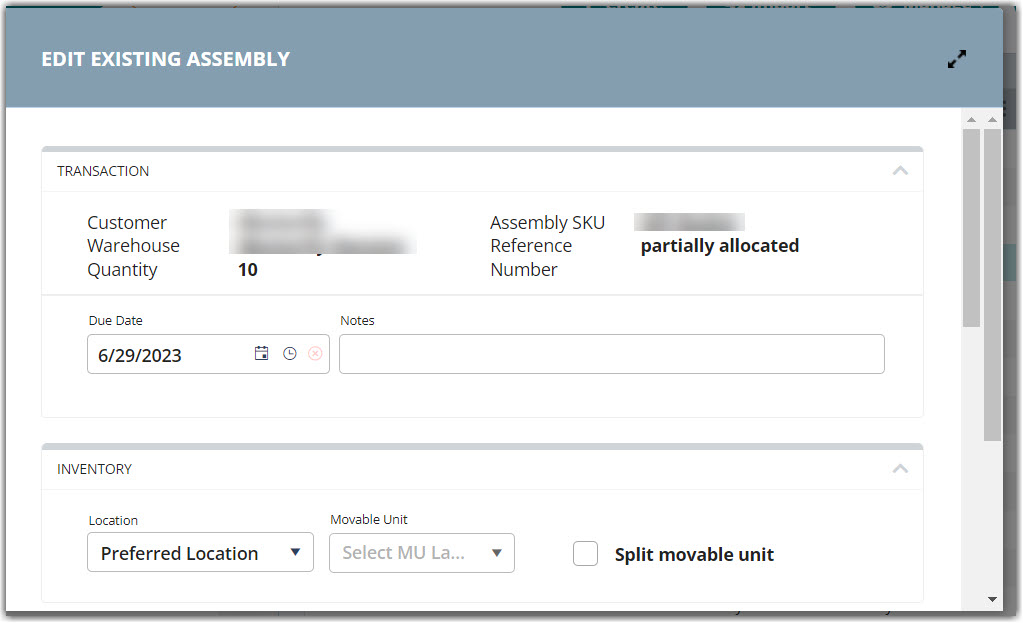
In the Edit Existing Assembly modal, you can edit the following sections:
- Transaction – has the basic information for the assembly and you can edit the Due Date and Notes.

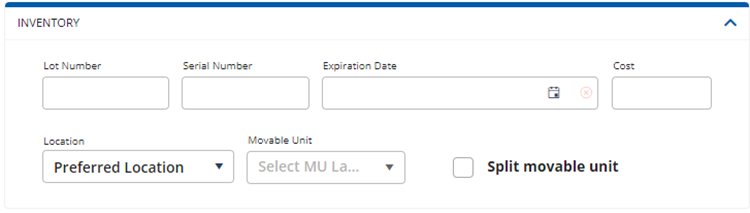
- Inventory – specify the details of the new items being created by the assembly transaction, including: track-bys (Lot, Serial, Expiration, Cost), destination Location and Movable Unit, and whether to have the system automatically split the movable unit, if needed.
- Allocation – view and modify the component parts allocated to the assembly transaction. For more information about how the system allocates inventory, please see our help center article on Allocation Logic.
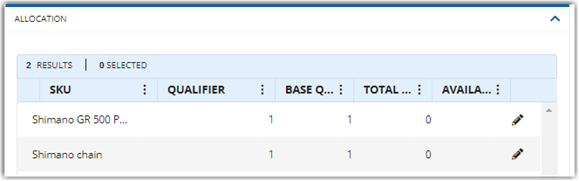
- Click the Edit icon to open the Edit Allocations modal for any of the allocated items. From this modal, you can see details about the allocated items and modify item allocations are allocated. The Primary Units To Add column indicates the quantity allocated to the assembly transaction. By moving the quantity to different rows in the grid, you can choose to allocate different inventory than what was originally selected by the system.
- Click the Edit icon to open the Edit Allocations modal for any of the allocated items. From this modal, you can see details about the allocated items and modify item allocations are allocated. The Primary Units To Add column indicates the quantity allocated to the assembly transaction. By moving the quantity to different rows in the grid, you can choose to allocate different inventory than what was originally selected by the system.
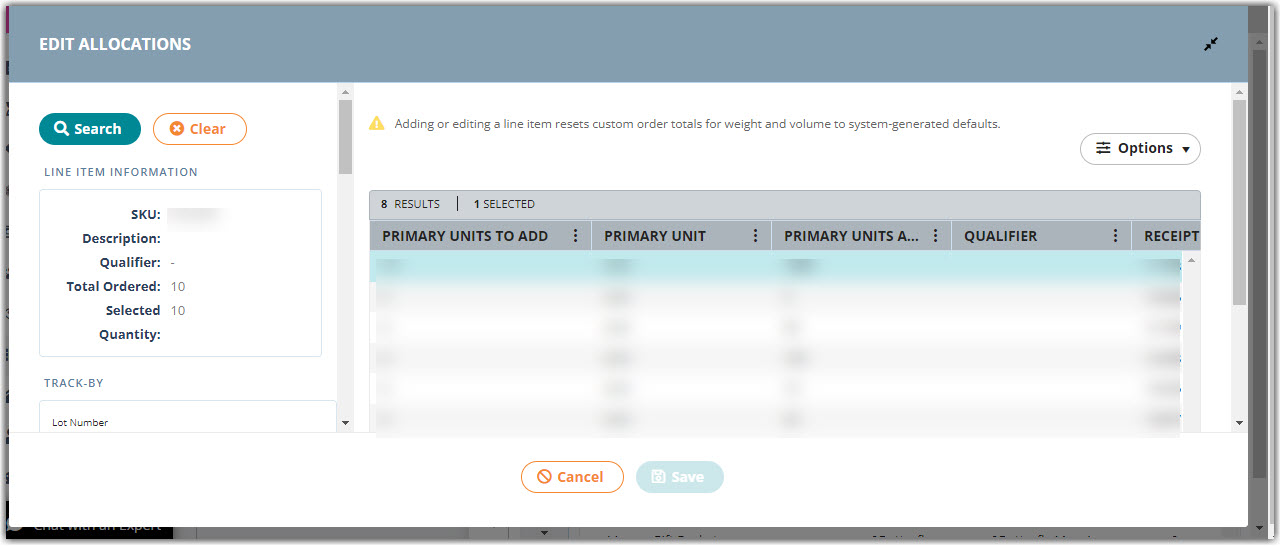
You must specify the exact quantity required by the Assembly transaction, but you can split the quantity across multiple rows, if desired.
- Click Save when done editing the allocation.
- Charges – allows you to bill your customer for the Assembly. You can apply both predefined charges and ad hoc manual charged to an assembly transaction:
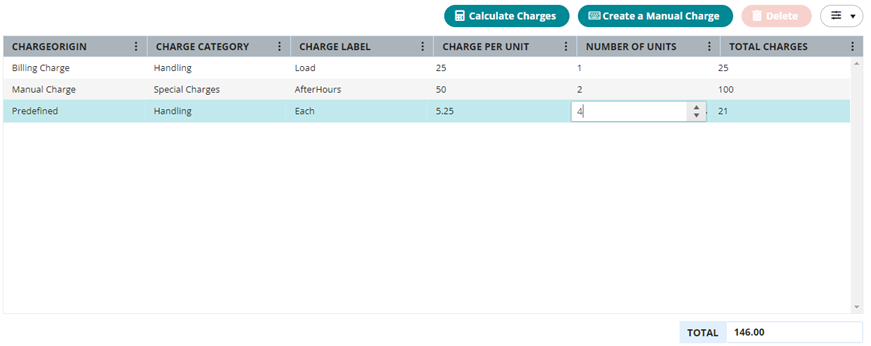
- Predefined charge:
- Predefined charges display automatically in the Charges grid.
- To apply a predefined charge, click the ‘Number of Units’ field for that charge, then specify how many units of that charge to apply.
- The number of units is multiplied by the “Charge Per Unit” to determine the total charge.
- Ad hoc manual charge:
- Click Create a Manual Charge.
- Select Charge Category
- Enter Charge Label
- Enter Type of Charge Unit
- Enter Charge per Unit
- Enter the Number of Units for this charge.
- (Optional) Enter additional charge info, including General Ledger Acct number, External Accounts Receivable, External Item Identifier, and External Item Description.
- Click Add Charge.
- Predefined charge:
- Click Calculate Charges to view any automatic billing charges the system will apply to this transaction as it is currently configured. These charges are “read-only”. You cannot modify them from the Charges grid.
- Click Save when you are done editing the Assembly.
Bill of Material
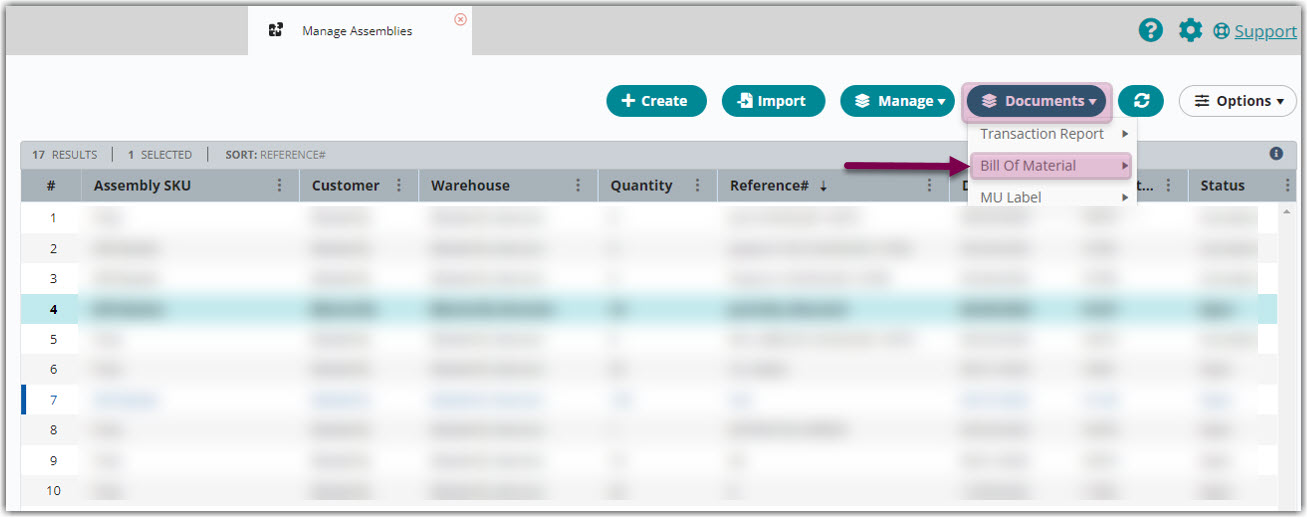
- Once all assembly details are defined, you can print a Bill of Material (BOM)–which is essentially a pick ticket for an assembly transaction. It identifies the assembly’s component SKUs, the quantities needed to complete the assembly transaction, and where the component SKUs are stored.
- To generate a Bill of Material in PDF format, select one or more assembly transactions in the Assemblies grid, then click Documents > Bill of Materials.
Confirming the assembly transaction
Once confirmed, the Assembly transaction is closed, and inventory adjustments are reflected in the system (increasing the quantity of the assembly item and decreasing the quantity of the assembly components), and you can view the assembly through Transaction by Activity Report.
- To confirm, select the assembly transaction and click Manage > Confirm.
Canceling an existing assembly transaction
You can only cancel an assembly transaction that has not been confirmed.
To cancel a transaction, select an assembly transaction and click Cancel. The reference number will end with the word CANCELED and the associated transaction number.

Extensiv University