3PL Warehouse Manager

Updated on July 25th, 2023

  • Extensiv Hub
    Popular Articles Getting Started Using Hub Technical Issues & FAQs Extensiv's Ideas Portal
  • 3PL Warehouse Manager
    Receiving Operations Inventory Management Shipping Operations System Configuration Scanning Operations Integrations Content Best Practice Resources Release Notes Popular Articles Troubleshooting Guides
  • Warehouse Management
    Getting Started Admin Console Shipping Order Picking & Packing Receiving Customer Portal Cycle Counting Kit Building Managing Users Barcode Scanner Import/Export Integrations Barcoding Wave Picking Bin Move Mobile Receiving and Picking Settings Popular Articles Reporting
  • Order Management
    Dashboard Orders Inventory Purchase Orders Shipments Customers Products Analytics Settings API API Integrations Accessing and Navigating Order Manager Error Messages Order Manager Popular Articles Accounting Integrations
  • Integration Management
    Getting Started with Integration Manager General Support Troubleshooting Extras & Addons API Documentation Popular Articles Order Sources Order Destinations
  • FAQs
  • Network Manager
    Getting Started Order Routing Management Technical Issues Shopping Carts Settings Settings, Products, and Orders
  • Billing Manager
    Getting Started Using Billing Manager
  • Release Notes
    Extensiv Sandbox Extensiv Extensiv Hub 3PL Warehouse Manager Integration Management Warehouse Management Order Management Billing Manager
  • Fulfillment Marketplace
    Getting Started
  • Sandbox
    Getting Started
+ More
  • Help Center
  • 3PL Warehouse Manager
  • Inventory Management
  • Movable Units
  • Inventory Management
    • Item Creation
        • Creating Items
        • Understanding Units of Measure
        • Entering Basic Item Details
        • Defining Units of Measure
        • Creating Item Assemblies
        • Configuring Item-Level Recurring Storage Charges
        • Configuring Item-Level Storage and Handling Charges
    • Inventory Management
        • Using the Manage Inventory Page
        • Understanding Allocation Logic
        • Making Adjustments
        • Transferring Inventory
        • Editing Track-By Values
        • Getting Started with Directed Putaway
        • Understanding Directed Putaway Logic
        • Understanding Replenishments
        • Counting Inventory
        • Performing Item-Based Audits
    • Movable Units
        • Understanding Movable Units
        • Enabling Movable Units for Customers
        • Defining Movable Unit Types
        • Specifying an Item's Movable Unit Type
        • Receiving Movable Units
        • Moving Movable Units
        • Reconfiguring Movable Units
    • Item Control
        • Managing Assembly Transactions
        • Moving Items
        • Batch-Updating Items
        • Managing Item Aliases
        • Managing Commodities
        • Managing Classifications
        • Managing Pricing
        • Managing Item Images
        • Managing Storage Rates
        • Uploading Import Templates
        • Understanding Item Alias

Reconfiguring Movable Units

Similar to an adjustment, the Reconfigure Movable Units page allows you to add items to or remove items from a movable unit, as well as print updated MU labels. This article reviews how to reconfigure a movable unit.

Because reconfiguring an MU is essentially removing the location from an MU entirely, you cannot reconfigure MUs if you have location required in a customer's setup options.

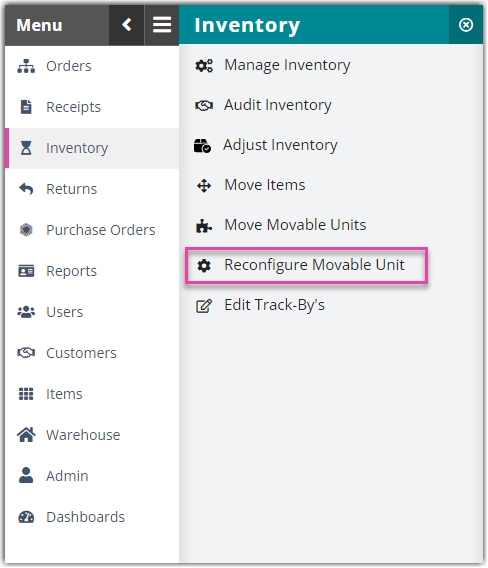
  1. Navigate to Inventory > Reconfigure Movable Unit.
    reconfigure movable unit nav bar menu
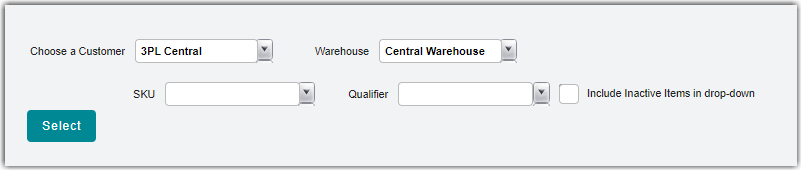
  2. Select a Customer, Warehouse, and SKU from the respective drop-down menus, then click Select.
    reconfigure movable unit drop-down menus
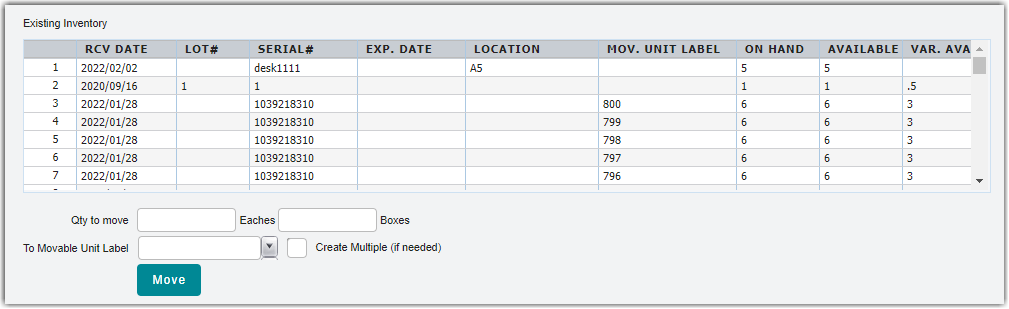
  3. The Existing Inventory grid displays all available inventory.
    • Select the SKUs you wish to remove from the existing MU, using < Ctrl > or < Shift > to multi-select, then specify the 'Qty to move'.
    • The 'To Movable Unit Label' drop-down list displays all MU labels associated with the specified SKU (also shown in the bottom Movable Units grid).
      • You cannot use the system-assigned MU label functionality when reconfiguring MUs.
      • To use an existing MU label for the items, select one of the options from the drop-down menu.
      • To create a new MU label, manually type a new entry in this field (and click < Tab > to ensure the system recognizes your entry). Alternatively, you can click Add under the Movable Units grid to define a new MU label, then select the newly defined label from the drop-down list.
    • If the total number of primary units is greater than 1 MU, select Create Multiple (if needed) to create multiple MUs based on your item setup.
    • Click Move to reconfigure the MU and refresh the grid.
      reconfigure movable unit existing inventory window
  4. If you wish to generate an updated MU label, select the label from the Movable Units grid, then click Download. Print and re-attach to your MU(s) as needed.
    reconfigure movable units download button

    This MU label differs from the Find Receipts document because the transaction ID is not included.

     
  5. Repeat Steps 2–4 for each MU you need to reconfigure.
moveable reorganize

Was this article helpful?

Yes
No
Share additional feedback about this article

Related Articles

  • April 15, 2020 – 1.321 Major Release Notes
  • Managing Commodities
  • Adjusting Receipt Charges
  • Managing Classifications

Not finding the help you need?

Contact Support
Solutions
  • Solutions for Brands
  • Solutions for 3PLs
  • Solutions for 4PLs
  • Solutions for B2B
Products
  • Extensiv 3PL Warehouse Manager
  • Extensiv Warehouse Manager
  • Extensiv Order Manager
  • Extensiv Integration Manager
  • Extensiv Network Manager
Products
  • Customer Success
  • Implementation
  • Consulting
Ecosystem
  • Fulfillment Marketplace
  • Integrations
  • Partners
  • Become a Partner
Resources
  • Resource Library
  • Blog
  • Market Insights
  • What is a 3PL?
  • What is a 4PL?
  • What is a WMS?
  • Why a Cloud-based WMS?
  • Glossary
Help
  • Help Center
  • API Documentation
  • Extensiv Univerisity
  • Community
  • System Status
  • Extensiv Logo
  • 100 N Pacific Coast Hwy, Suite 1100, El Segundo, CA 90245
  • |
  • Contact Us:
  • 83-EXTENSIV 888.375.2368 (main)
  • |
  • 310.844.7570 (local)
  • Copyright © 2023 Extensiv
  • |
  • All rights reserved.
  • Privacy Policy
  • |
  • Terms of Service
  • Follow Us:
Expand