Network Manager

Updated on March 19th, 2024

  • Extensiv Hub
    Popular Articles Getting Started Using Hub Technical Issues & FAQs Extensiv's Ideas Portal
  • 3PL Warehouse Manager
    Receiving Operations Inventory Management Shipping Operations System Configuration Scanning Operations Integrations Content Best Practice Resources Release Notes Popular Articles Troubleshooting Guides
  • Warehouse Management
    Getting Started Admin Console Shipping Order Picking & Packing Receiving Customer Portal Cycle Counting Kit Building Managing Users Barcode Scanner Import/Export Integrations Barcoding Wave Picking Bin Move Mobile Receiving and Picking Settings Popular Articles Reporting
  • Order Management
    Dashboard Orders Inventory Purchase Orders Shipments Customers Products Analytics Settings API API Integrations Accessing and Navigating Order Manager Error Messages Order Manager Popular Articles Accounting Integrations
  • Integration Management
    Getting Started with Integration Manager General Support Troubleshooting Extras & Addons API Documentation Popular Articles Order Sources Order Destinations
  • FAQs
  • Network Manager
    Getting Started Order Routing Management Technical Issues Shopping Carts Settings Settings, Products, and Orders
  • Billing Manager
    Getting Started Using Billing Manager
  • Release Notes
    Extensiv Sandbox Extensiv Extensiv Hub 3PL Warehouse Manager Integration Management Warehouse Management Order Management Billing Manager
  • Fulfillment Marketplace
    Getting Started
  • Sandbox
    Getting Started
+ More
  • Help Center
  • Network Manager
  • Order Routing Management
  • Products
  • Order Routing Management
    • Orders
        • Apply Actions to Existing Orders in Bulk
        • Custom Fields for Orders (Custom Columns)
        • Duplicate or Clone an Order
        • Customizing the organization of Columns in the Orders Module
        • Resolving an Order in Missing Product Information Status
        • Restoring a Canceled Order
        • Cancel an Order
        • Restore an On-Hold Order
        • Creating a Manual Order
        • Out of Stock Orders
        • Creating a Manual Order - Single or Bulk
        • Manually Mark an Order as Shipped - Individually or in Bulk
        • Export an Order to a 3PL
        • Validating Shipping Addresses
        • Missing Order Info
        • Importing Orders Via Spreadsheet (In Bulk)
        • Resolving an Awaiting Payment Order
        • Merging Orders in Network Manager
        • Exporting Orders
        • Filtering Orders
        • Resolving Missing Product Info Orders
        • How to Add an item to an existing order
        • Missing Fulfillment Source
    • Products
        • Exporting Products
        • Associating and Creating a Listing SKU
        • How to Manage Products
        • Reassign a Listing SKU to Another Product
        • Creating Products
        • Creating Listing SKUs in Bulk (via Spreadsheet)
        • How to Disable Inventory Updates for a Specific Sales Channel
        • How does Extensiv Order Manager handle variations of the same product?
        • Creating Products via Spreadsheet
        • Adjusting Master SKUs
        • Custom Bundle/Kit Export
    • Inventory
        • Viewing Stock Edit History
        • Inventory - How Extensiv Network Manager Presents Bundle Inventory
        • Exporting Stock Details
        • Exporting Inventory
        • Searching for SKUs in the Inventory Module
        • Inventory Module Overview
        • How to Filter Inventory by Warehouse
    • Settings
      • Sales Channel
          • Shopify Locations
          • Shopify Tags
          • Enable or Disable Extensiv Network Manager Email Notifications to Your Customers
          • Deactivating a Sales Channel
          • Adding Shopify as a Sales Channel
          • Viewing a Sales Channel's Edit History
          • Adding Amazon as a Sales Channel
          • Adding eBay as a Sales Channel
          • Adding Walmart as a Sales Channel
          • Editing Sales Channels
          • Adding a Manual Sales Channel
          • How to Exclude a Warehouse From Pushing Inventory to a Sales Channel
          • Adding Sales Channels
          • Reactivating Sales Channels
          • How to Enable Out of Stock Control for eBay Sales Channels
      • Webhooks
          • Order Payment Webhook
          • Shopify Auto-Subscribing Webhooks
          • Shopify Product Update / Product Edit Webhook
          • Order Creation Webhook
          • Shopify Cancellation Webhook
          • Shopify Fulfillment Webhook
          • Shopify Refund Webhook - POS Orders
          • Shopify Product Deletion Webhook
          • BigCommerce Webhook
      • Warehouses
          • Setting Up a Warehouse's International Rank
          • Set Up Field Mappings of Import/Export Files
          • FTP Inventory Import for a 3PL
          • Setting Up Domestic Backup Warehouses
          • Creating and Configuring Warehouses in Extensiv Network Manager
          • Deactivating a Warehouse in Extensiv Network Manager
          • Updating the Address/Return Address for Your Warehouse
          • Enabling Use Component Inventory Setting for Bundles and Kits
      • Orderbots
          • Creating an Orderbot
          • Deactivating an Orderbot in Extensiv Network Manager
          • Editing an Orderbot
          • Automate Orders to Fulfill from a Specific Warehouse
          • Postal Zones in Extensiv Network Manager
          • Orderbots filtered by zip code range
          • Support for Shopify's Additional Details
        • Reverify Shopify Connection
      • Reverify Shopify Connection
      • Understanding Order, Shipment and Inventory Sync Times in Network Manager

Creating Products

There are three types of products in Extensiv Network Manager: Core Products, Bundles/Kits, and Product Variations. When creating or editing products in Extensiv Network Manager, you can choose between two methods: manual creation in the UI or import via spreadsheet. To create a core product manually, follow the steps outlined below for the appropriate product type.

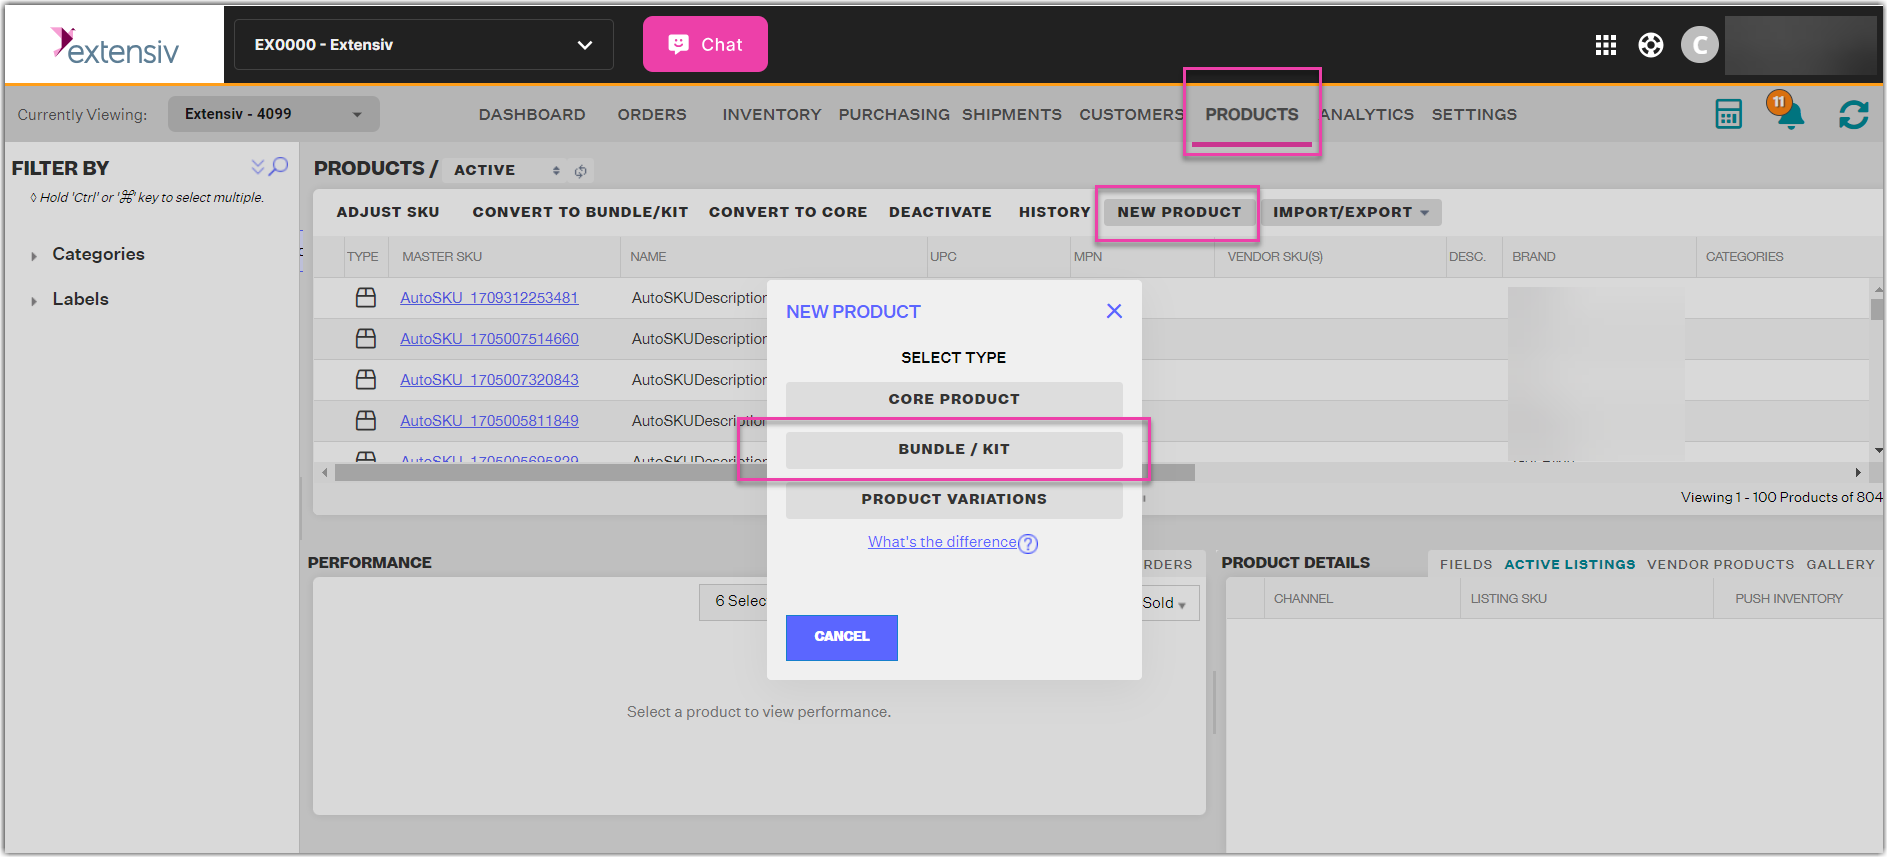
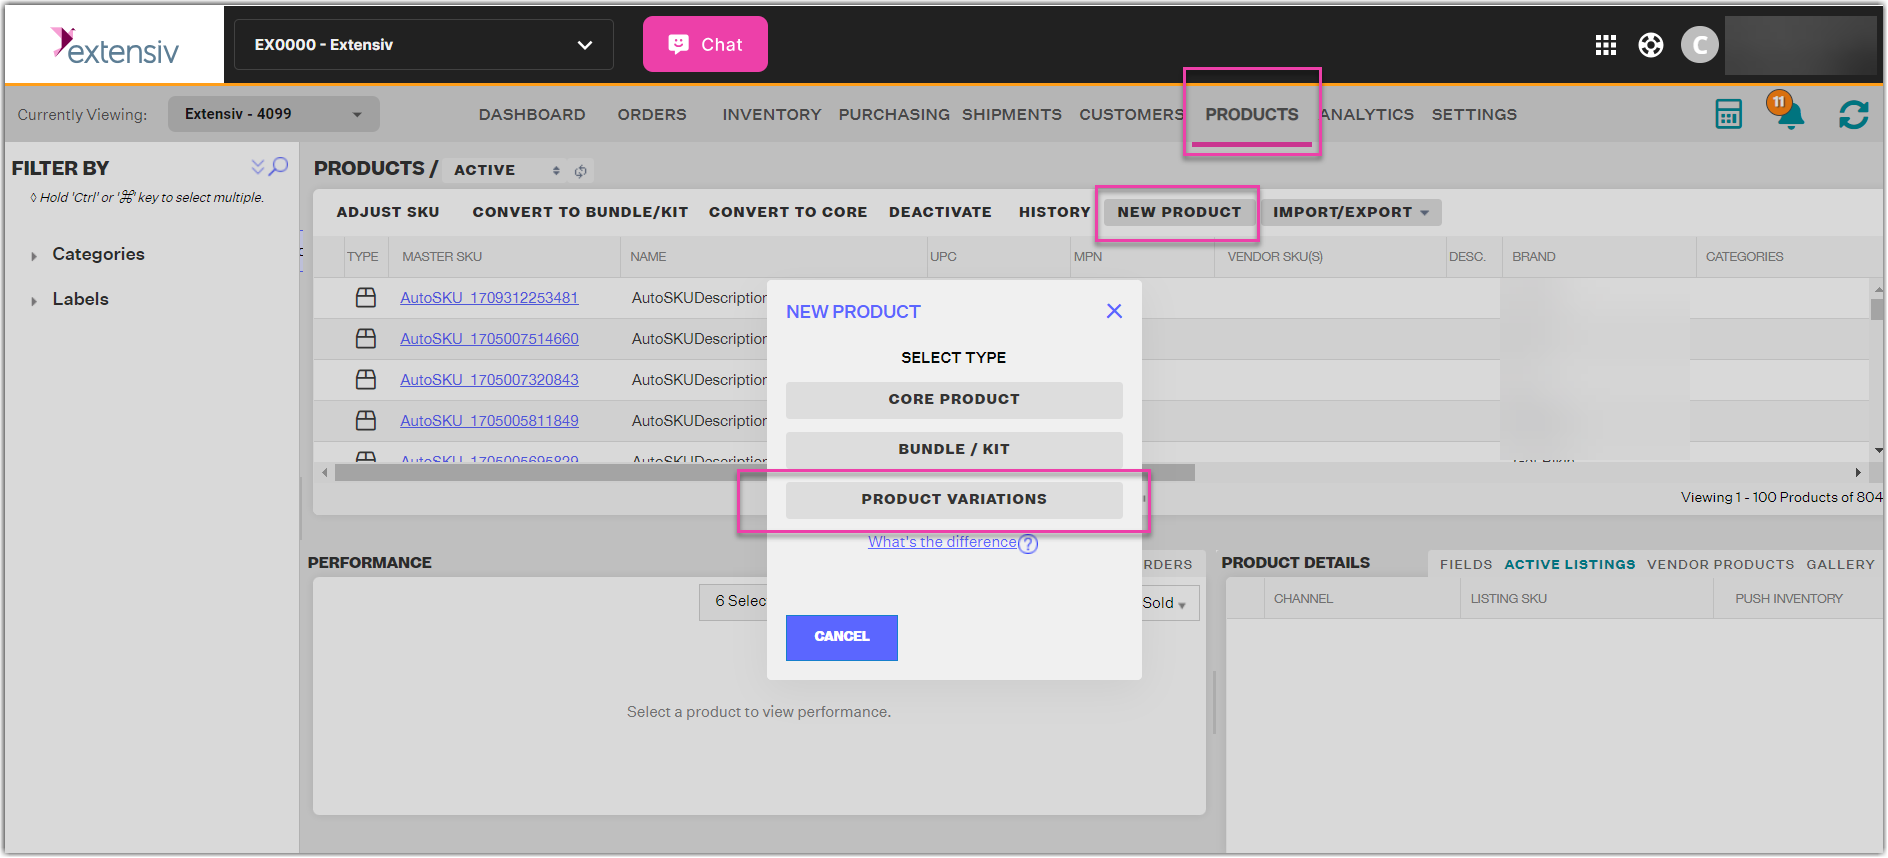
  1. Navigate to the Order Routing page. Confirm the company by clicking the dropdown next to Currently Viewing field. Next, go to Products module, and click the New Product button.
     
  2. Select the type of product you want to create from Core Product, Bundle/Kit, or Product Variations.
     

Core products

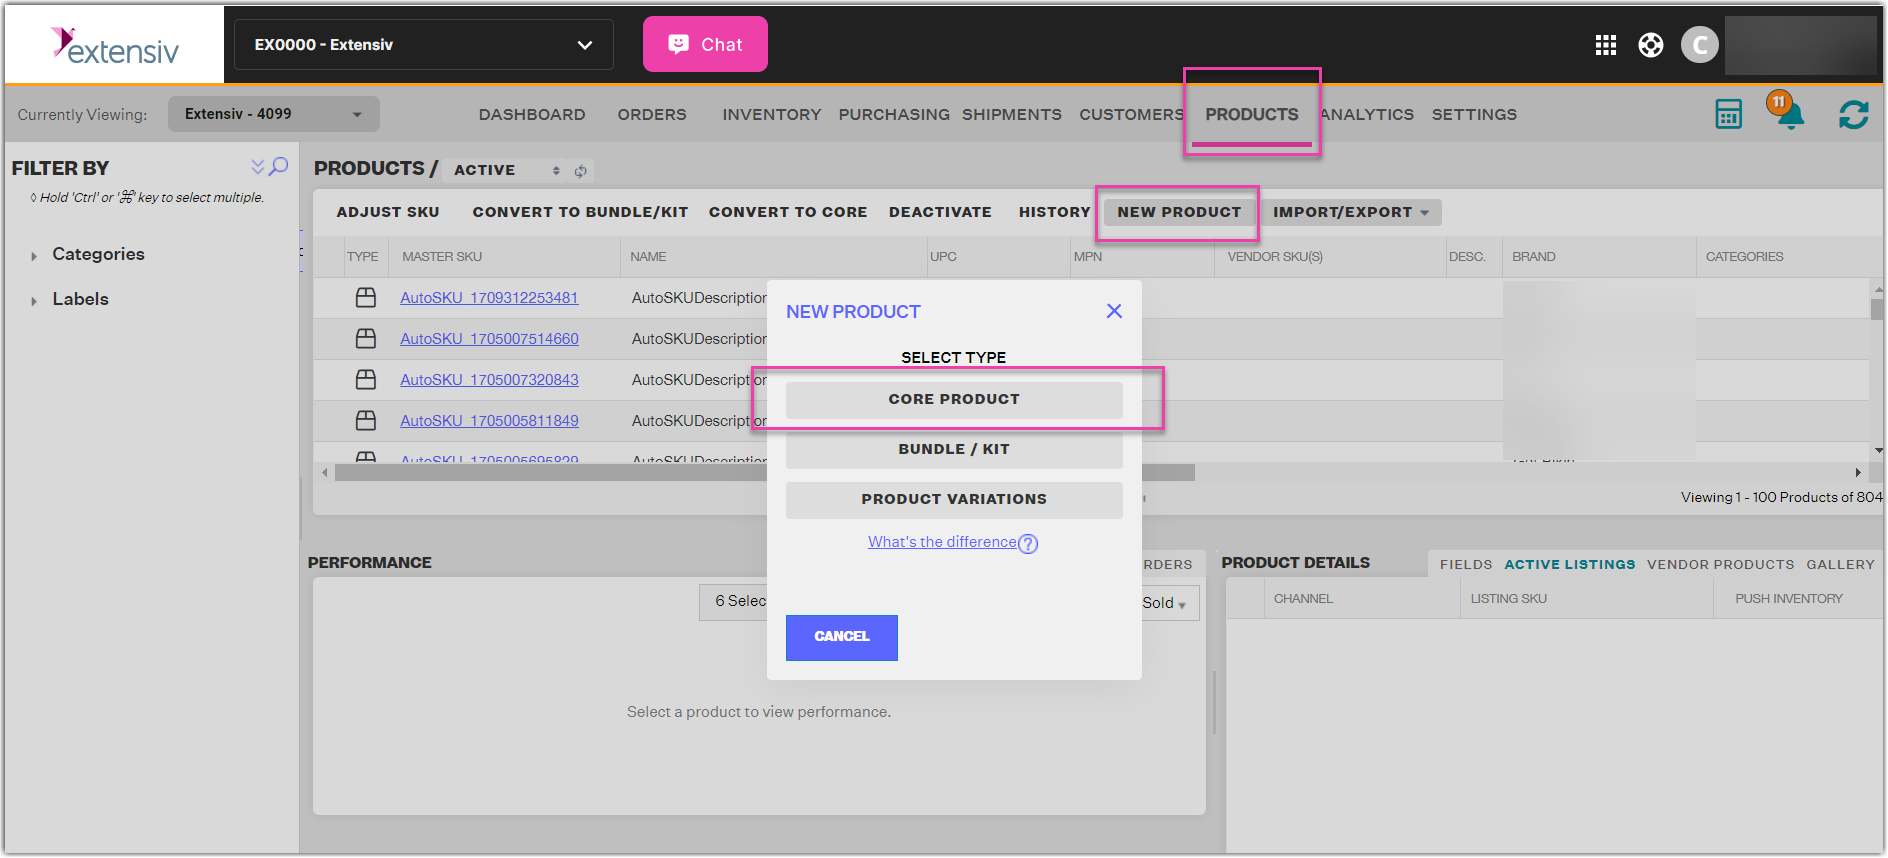
A core product is a single unique product that may be added into a bundle or kit. If the answer to this question: "Does the product I am selling contain an item within it that I order individually from my supplier?" is "no", then you have a core product.

Basic info
When creating a Core Product, you’ll be taken to an edit window to fill out product info. There are three required fields here which must be entered before you can proceed:

  • Master SKU
  • Name
  • Brand

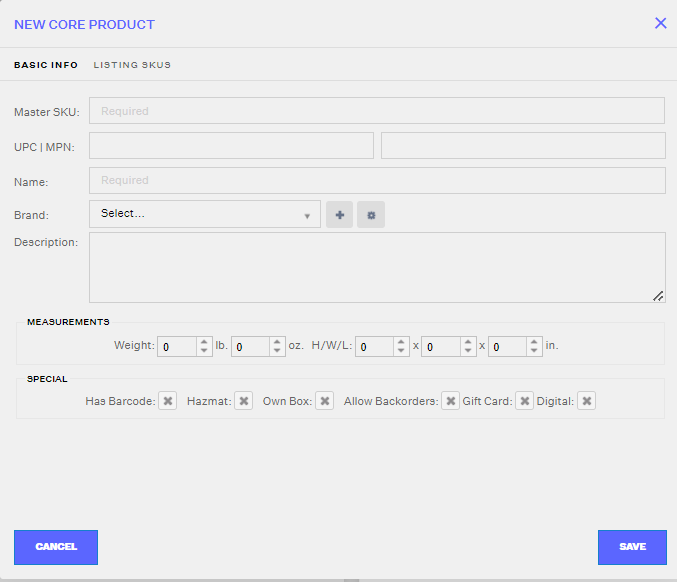
  • You cannot create a Master SKUs that already exists, active or inactive
  • Dropdown fields with a blue plus sign or gear icon button next to them are fields that can have a new option added or edited, respectively.
  • The Special section at the bottom is for informational purposes only. No special function will occur if these boxes are checked or not, so you can choose to set them with a value or not.

Overview of all Product Fields:

Field Name Definition Usage
Master SKU The unique value used to identify the product in-house. Does not need to match the listing SKU Used to identify the product in Extensiv Network Manager
UPC Acronym for "Universal Product Code" Barcode generation
Brand Goods identified by name as the product of a supplier or manufacturer A way to categorize and filter products you sell
Description Characteristics of Product Additional way to identify specific attributes between similar products
M.A.P. Minimum Advertised Price Informational
Max Shipping Cost Highest dollar amount to ship a product Informational
Vendor Cost Cost of Goods Sold Used to calculate your COGS for products without a vendor SKU
Weight Weight of Each (lb, oz) Used to calculate order Weight
H/W/L Height / Width / Length (in) Used to calculate order dimension


Listing SKUs
Associates the Sales Channel-specific SKUs back to the Master SKU within Extensiv Network Manager. This way, regardless of which channel you sell on, you calculate one comprehensive sales velocity based on the sell through of the Master SKU across all channels.

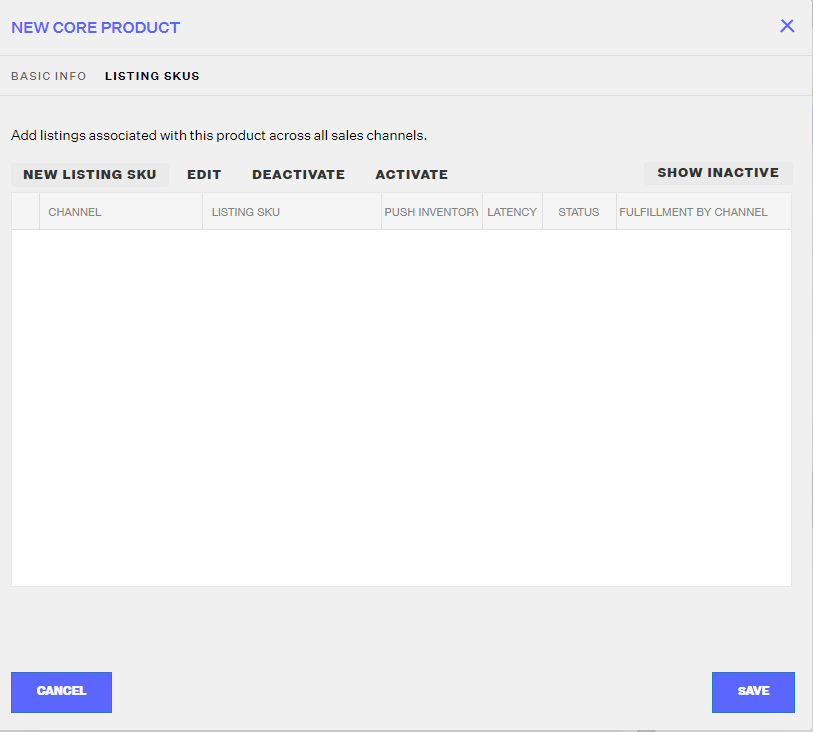
Click New Listing SKU, select the channel, and enter the appropriate Listing SKU.

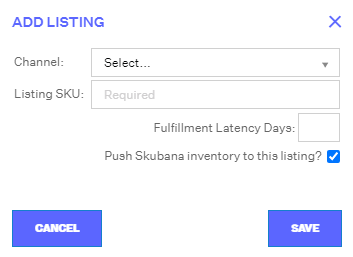
Fulfillment latency days is the lead time to ship out your orders. If left blank, it will be left at Amazon’s or Walmart’s default time period of 1-2 business days. However, if a specific integer value is entered, it will appear on Amazon with a message such as: "Processing takes an additional 4 to 5 days for orders from this seller.”

Push Extensiv Network Manager inventory to this listing is to specify if the listing SKU is FBA or FBM. This feature can also be utilized for SKUs you don’t want to push inventory to.

If the SKU is FBA, deselect the "Push Inventory" option. We do not need to push inventory to the listing as it could create ghost listings. If ghost listings occur, the listing will need to be toggled from FBA to FBM back to FBA. This can also be done in bulk using the inventory import. This must be done on Seller Central


Bundles/Kits


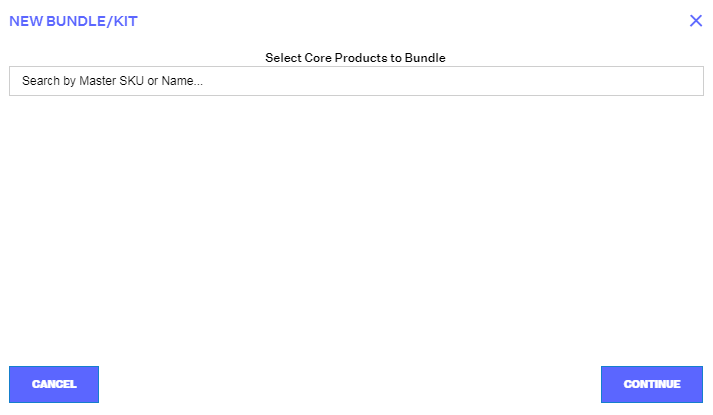
To create a bundle/kit, click on the “Bundle / Kit” button.

Next, a new pop-up window will show a field where you can search for the Master SKUs that you would like to bundle together.

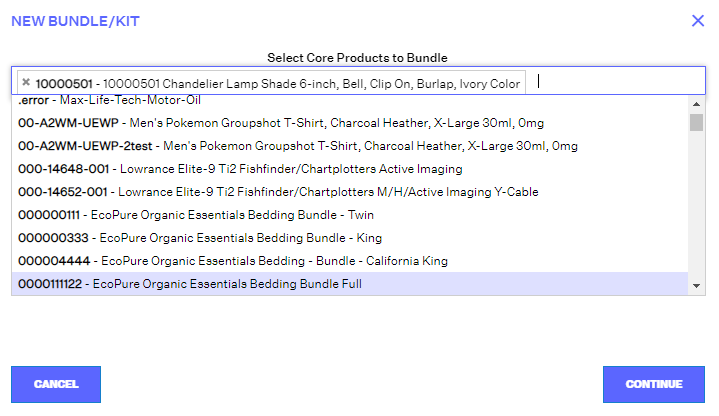
You can search by the Master SKU or product name and click on it to begin creating your bundle. Enter the required products and when ready, click Continue.

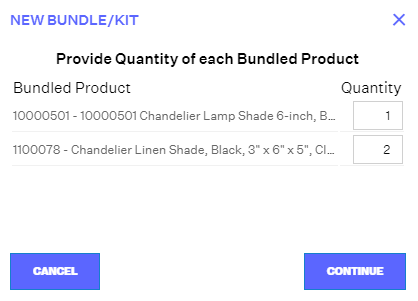
A new window will appear asking for the quantities per SKU that will make up the bundle/kit. Click Continue when done.

As you saw when you created a new core product through the UI, you will see the same window to create the new Bundle/Kit.

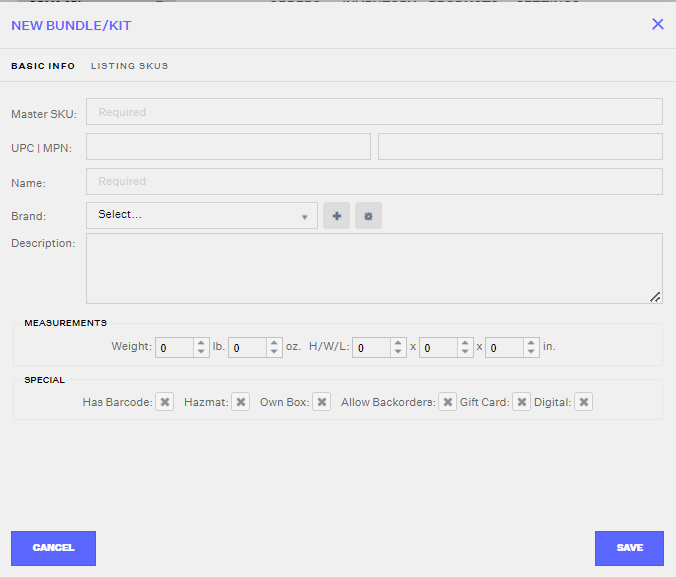
The required fields are the same as when you created a core product:

  • Master SKU
  • Name
  • Brand


Variations


Creating variations in Extensiv Network Manager is very straight forward. To get started, click on the “Product Variations” button.

Once you do, you will see a new pop-up window where you can create the “Virtual SKU” or “Parent SKU” of the variation. You must also add the name for the variation grouping along with the brand. So, for a quick recap, these fields are required:

  • Virtual SKU
  • Name
  • Brand


Once you are done, click Save, and you will have created your variation in Extensiv Network Manager.

user interface product design

Was this article helpful?

Yes
No
Share additional feedback about this article

Related Articles

  • Exporting Products
  • Associating and Creating a Listing SKU
  • Creating Products via Spreadsheet
  • Reassign a Listing SKU to Another Product

Not finding the help you need?

Contact Support
Solutions
  • Solutions for Brands
  • Solutions for 3PLs
  • Solutions for 4PLs
  • Solutions for B2B
Products
  • Extensiv 3PL Warehouse Manager
  • Extensiv Warehouse Manager
  • Extensiv Order Manager
  • Extensiv Integration Manager
  • Extensiv Network Manager
Products
  • Customer Success
  • Implementation
  • Consulting
Ecosystem
  • Fulfillment Marketplace
  • Integrations
  • Partners
  • Become a Partner
Resources
  • Resource Library
  • Blog
  • Market Insights
  • What is a 3PL?
  • What is a 4PL?
  • What is a WMS?
  • Why a Cloud-based WMS?
  • Glossary
Help
  • Help Center
  • API Documentation
  • Extensiv Univerisity
  • Community
  • System Status
  • Extensiv Logo
  • 100 N Pacific Coast Hwy, Suite 1100, El Segundo, CA 90245
  • |
  • Contact Us:
  • 83-EXTENSIV 888.375.2368 (main)
  • |
  • 310.844.7570 (local)
  • Copyright © 2023 Extensiv
  • |
  • All rights reserved.
  • Privacy Policy
  • |
  • Terms of Service
  • Follow Us:
Expand