How to Disable Inventory Updates for a Specific Sales Channel
To disable inventory updates from being pushed to a specific sales channel, follow the steps below.
- Log in to Extensiv Network Manager. Navigate to Order Routing page.
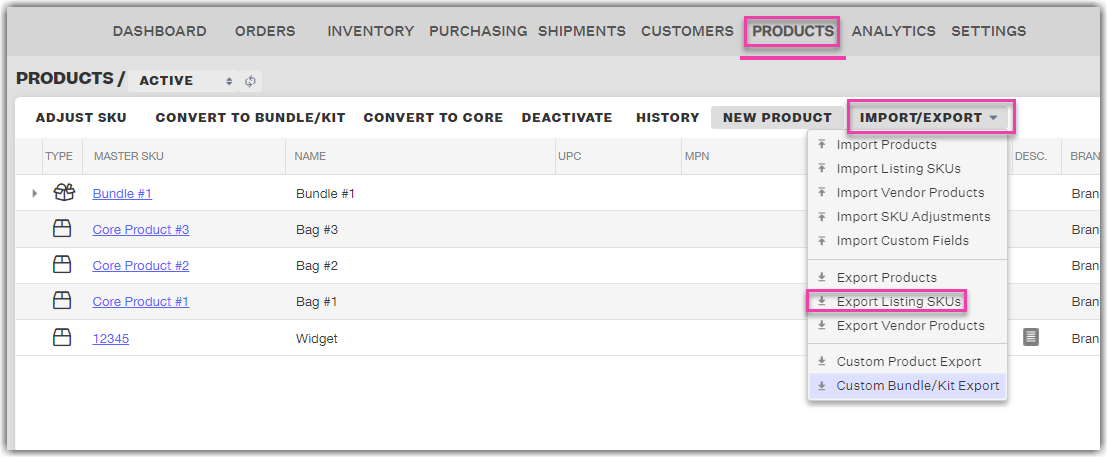
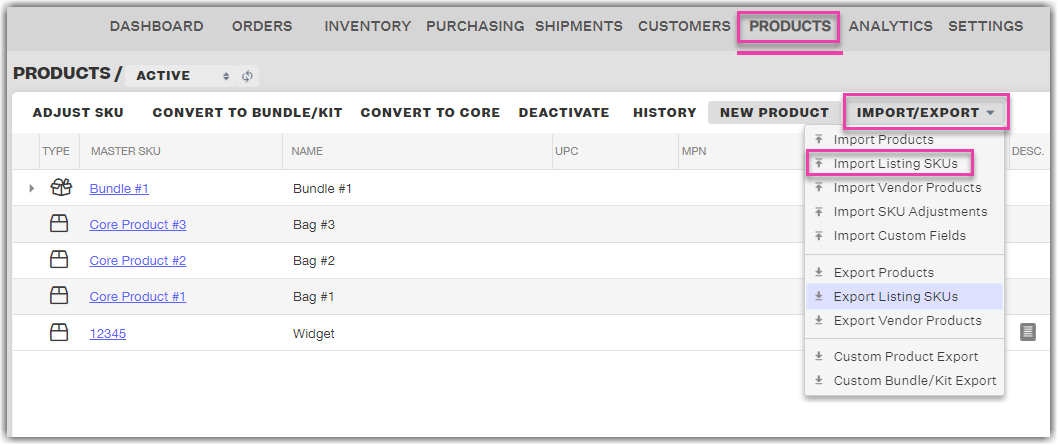
- Click on the Products module.
- Click the Import/Export button and select Export Listing SKUs.

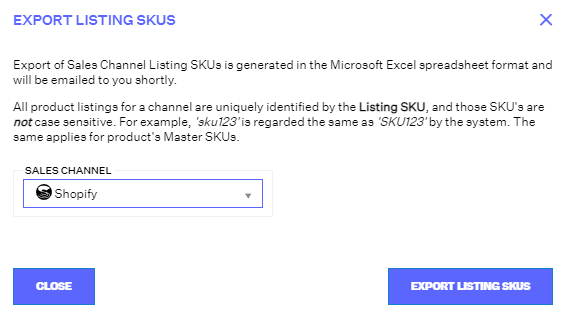
- In the Export Listing SKUs window, select the sales channel that you no longer want to push inventory to from the Sales Channel dropdown and click on the Export Listing SKUs button.
You will receive an email from Extensiv Network Manager with a Microsoft Excel spreadsheet containing all of your current listing SKUs for the selected sales channel.
- In column C, the Push inventory to Channel? column, input FALSE for all listing SKUs and save the spreadsheet.
- Go back to the Products module, click on the Import/Export button, and select Import Listing SKUs from the dropdown.

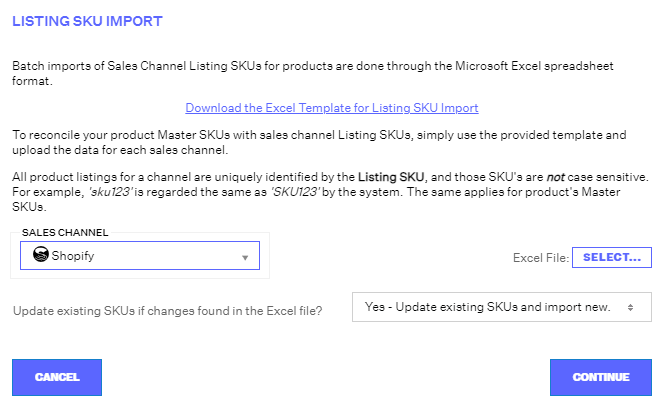
- In the Listing SKU Import window, select the sales channel from the Sales Channel dropdown and upload the edited listing SKU spreadsheet. For the Update existing SKUs if changes found in the Excel file? question, select Yes - Update existing SKUs and import new.
- Click Continue to import the edited listing SKU spreadsheet.

Once the edited listing SKU spreadsheet has been imported, all of the listing SKUs for this sales channel that originally had the Push Inventory to Channel? setting set to TRUE will have this setting set to FALSE and Extensiv Network Manager will no longer push inventory to them.
