3PL Warehouse Manager

Updated on September 30th, 2024

  • Extensiv Hub
    Popular Articles Getting Started Using Hub Technical Issues & FAQs Extensiv's Ideas Portal
  • 3PL Warehouse Manager
    Receiving Operations Inventory Management Shipping Operations System Configuration Scanning Operations Integrations Content Best Practice Resources Release Notes Popular Articles Troubleshooting Guides
  • Warehouse Management
    Getting Started Admin Console Shipping Order Picking & Packing Receiving Customer Portal Cycle Counting Kit Building Managing Users Barcode Scanner Import/Export Integrations Barcoding Wave Picking Bin Move Mobile Receiving and Picking Settings Popular Articles Reporting
  • Order Management
    Dashboard Orders Inventory Purchase Orders Shipments Customers Products Analytics Settings API API Integrations Accessing and Navigating Order Manager Error Messages Order Manager Popular Articles Accounting Integrations
  • Integration Management
    Getting Started with Integration Manager General Support Troubleshooting Extras & Addons API Documentation Popular Articles Order Sources Order Destinations
  • FAQs
  • Network Manager
    Getting Started Order Routing Management Technical Issues Shopping Carts Settings Settings, Products, and Orders
  • Billing Manager
    Getting Started Using Billing Manager
  • Release Notes
    Extensiv Sandbox Extensiv Extensiv Hub 3PL Warehouse Manager Integration Management Warehouse Management Order Management Billing Manager
  • Fulfillment Marketplace
    Getting Started
  • Sandbox
    Getting Started
+ More
  • Help Center
  • 3PL Warehouse Manager
  • Inventory Management
  • Inventory Management
  • Inventory Management
    • Item Creation
        • Creating Items
        • Understanding Units of Measure
        • Entering Basic Item Details
        • Defining Units of Measure
        • Creating Item Assemblies
        • Configuring Item-Level Recurring Storage Charges
        • Configuring Item-Level Storage and Handling Charges
    • Inventory Management
        • Using the Manage Inventory Page
        • Understanding Allocation Logic
        • Making Adjustments
        • Transferring Inventory
        • Editing Track-By Values
        • Getting Started with Directed Putaway
        • Understanding Directed Putaway Logic
        • Understanding Replenishments
        • Counting Inventory
        • Performing Item-Based Audits
    • Movable Units
        • Understanding Movable Units
        • Enabling Movable Units for Customers
        • Defining Movable Unit Types
        • Specifying an Item's Movable Unit Type
        • Receiving Movable Units
        • Moving Movable Units
        • Reconfiguring Movable Units
    • Item Control
        • Managing Assembly Transactions
        • Moving Items
        • Batch-Updating Items
        • Managing Item Aliases
        • Managing Commodities
        • Managing Classifications
        • Managing Pricing
        • Managing Item Images
        • Managing Storage Rates
        • Uploading Import Templates
        • Understanding Item Alias

Transferring Inventory

A customer-to-customer (C2C) transfer allows you to move inventory from one customer to another. If you wish to transfer more than one received item, the items must have the same Customer, SKU, and Lot Number—use < Ctrl > or < Shift > on your keyboard to multi-select as needed.

This article reviews how to perform a C2C transfer.

To transfer inventory, you must have the following permission assigned to your user role: Inventory Module > Transfer Inventory > Customer Transfers.

 
  1. Navigate to Inventory > Manage Inventory in 3PL Warehouse Manager, then select the Warehouse from which you want to transfer inventory.
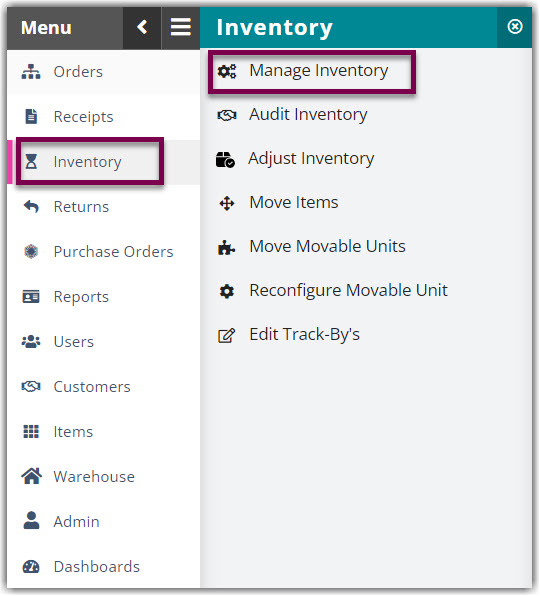
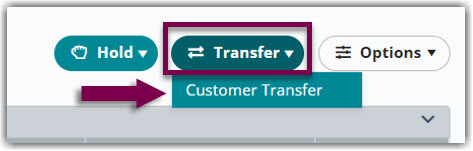
  2. Select the received item you'd like to transfer from the grid, then click Transfer > Customer Transfer to open the Customer Transfer dialog.
  3. If needed, under 'Transfer Source' modify the Quantity you wish to transfer.
  4. Under 'Transfer Destination', select the customer you wish to transfer the selected inventory. Note that SKU quantity and MU labels must be completed as needed; they may differ from the original inventory line item.  
  5. Select the SKU, enter the Quantity, and then update the track-by and location information as needed.
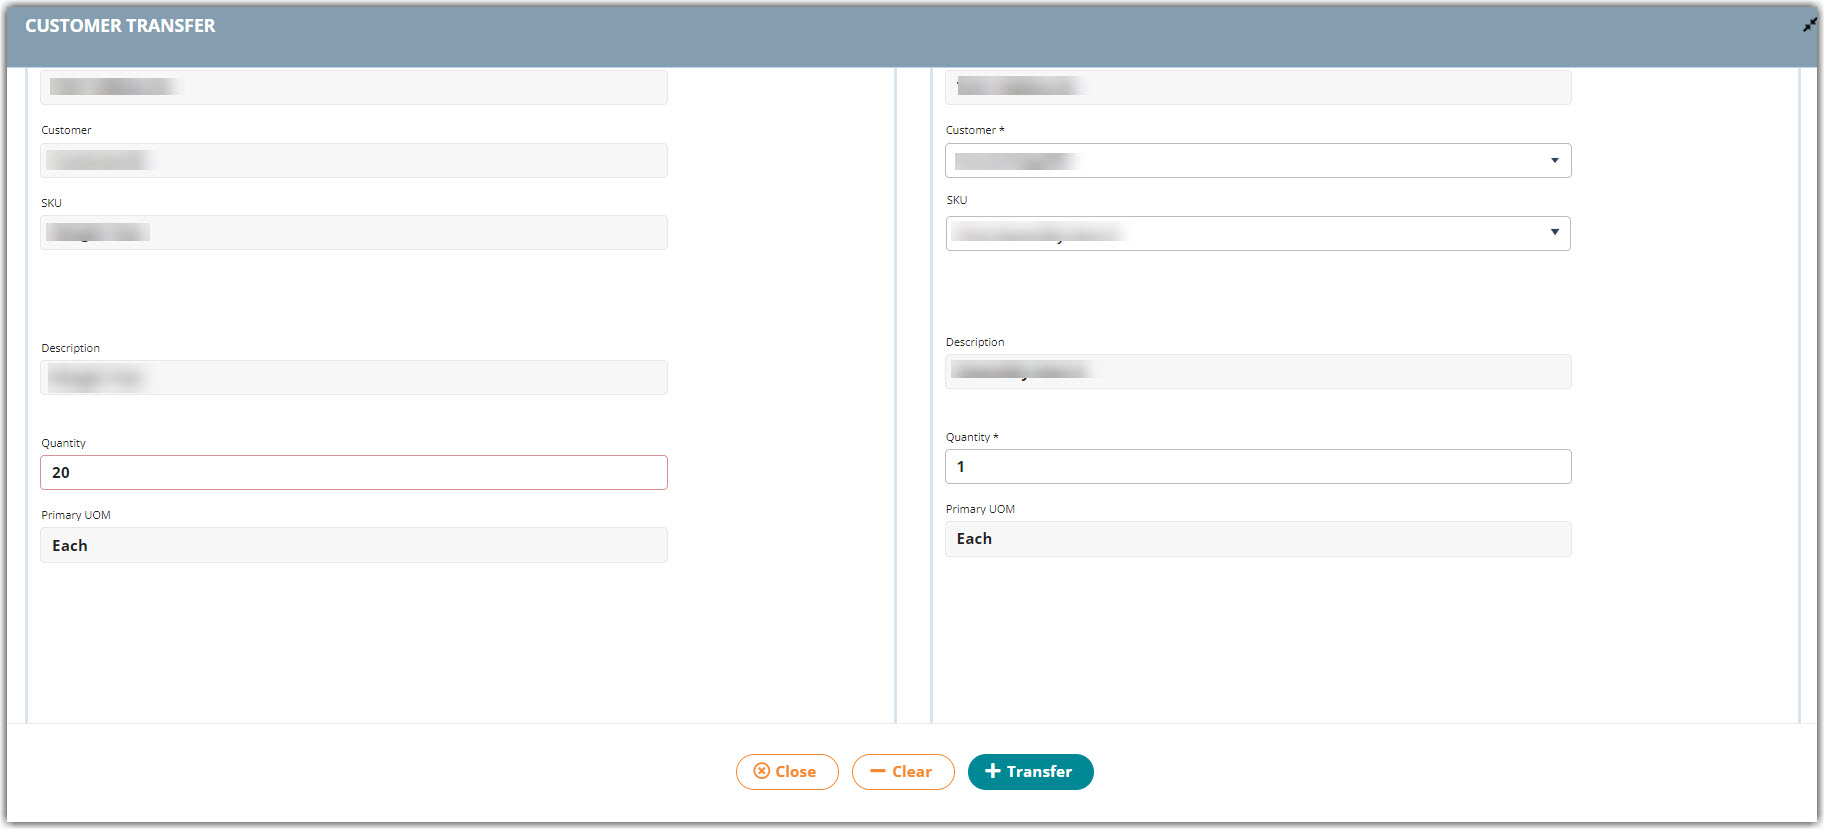
  6. Click Transfer to transfer the inventory to the specified customer. A confirmation message will display.

You can view transfer activity that has taken place within your warehouse with the Transfer Activity report under Reports > Transactions > Transfer Activity.


To configure an auto-billing charge for C2C transfers, navigate to Customers > Billing Wizard > Per Transaction Billing Setup > TransferIn / TransferOut > Update and create an auto-billing charge for each customer as needed. Once created, C2C transfer charges populate on the Manage Invoices page as adjustments.


Extensiv University

Gain deeper insights and learn more about 3PL Warehouse Manager with our online course at Extensiv University.
inventory movement stock transfer

Was this article helpful?

Yes
No
Share additional feedback about this article

Related Articles

  • Managing Customers
  • Managing 3rd-Party-Billing Contacts
  • January 20, 2020 – Minor Release Notes
  • February 12, 2020 – 1.319 Major Release Notes

Not finding the help you need?

Contact Support
Solutions
  • Solutions for Brands
  • Solutions for 3PLs
  • Solutions for 4PLs
  • Solutions for B2B
Products
  • Extensiv 3PL Warehouse Manager
  • Extensiv Warehouse Manager
  • Extensiv Order Manager
  • Extensiv Integration Manager
  • Extensiv Network Manager
Products
  • Customer Success
  • Implementation
  • Consulting
Ecosystem
  • Fulfillment Marketplace
  • Integrations
  • Partners
  • Become a Partner
Resources
  • Resource Library
  • Blog
  • Market Insights
  • What is a 3PL?
  • What is a 4PL?
  • What is a WMS?
  • Why a Cloud-based WMS?
  • Glossary
Help
  • Help Center
  • API Documentation
  • Extensiv Univerisity
  • Community
  • System Status
  • Extensiv Logo
  • 100 N Pacific Coast Hwy, Suite 1100, El Segundo, CA 90245
  • |
  • Contact Us:
  • 83-EXTENSIV 888.375.2368 (main)
  • |
  • 310.844.7570 (local)
  • Copyright © 2023 Extensiv
  • |
  • All rights reserved.
  • Privacy Policy
  • |
  • Terms of Service
  • Follow Us:
Expand