-
Rates
-
Understanding Rates
- Understanding Global Rates vs Custom Rates
- Creating, Duplicating, and Deleting a Rate
- Understanding Default Assigned Rate vs Assigning Rate per Warehouse Facility
- Assigning Rates and Rate Sheets to a Customer
- Understanding Standard vs Volume Tiering
- Understanding Count vs Count Less Other UOMs
- Creating a Rate Sheet
- Count Less Other UOMs (Unit of Measures) Pre-Condition
- Understanding the Use of Movable Units as Counting Units in Rate Creation
- Common Terminologies in Rate Creation
- Reassigning Rate Sheet from Customer Settings
- Understanding Units of Measure (UOM) Count Rate
- Unassigning a Rate From a Customer
- Duplicating a Rate Sheet
- Return Transaction Rates
-
Receiving Transaction Rates
- Creating a Rate for After-Hours Receipt of Devan Inbound 20' Containers
- Creating Rates for Inbound Devanning: 20', 40', and 45' High Cube Containers (Multiple Conditions)
- Creating a Rate for Inbound Receiving Excess Weight Fee
- Creating a Rate Based on Unique Lot IDs
- Creating a Rate Based on Unique SKUs Shipped
- Creating a Rate Based on Unique Location
- Creating Rate Based on Quantity of Lot with Volume Tiered Rate
- Creating a Rate Based on Quantity of Location with Standard Tiered Rate
- Creating a Rate for Storage Upon Receipt per Carton Using a Split Rate
- Creating a Smart Rate for Devan Inbound 20’ Container
- Creating a Standard Warehouse Inbound Receipt Rate
- Creating a Weekend Receipt Charge Rate
- Creating a Rate for Inbound Pallet Fee Based on the Number of Pallets
- Creating a Rate to Charge for a Partial Pallet Based on Movable Unit Types
- Creating a Rate for Primary Unit vs Packaging Unit vs Pallet
- Creating a Rate for Inbound Pallets with Multiple Movable Unit Types: Rounding Up Movable Units by Quantity
- Creating a Rate for Movable Units Based on the Number of Pallets
- Creating a Rate for Storage Upon Receipt by Movable Units Using a Split Rate
- Creating a Rate Based on Total Weight
- Creating a Rate for an Inbound 20' and 40' Floor Loaded Containers Based on Carton Count
- Creating a Standard Tiered Rate for Each Pick
- Creating a Rate for Inbound Pallet Fee based on Unique Movable Unit
- Creating a UOM Count Rate for a Receipt or Shipment
-
Shipping Transaction Rates
- Special Charges
- Creating a Rate for Order Processing Fee
- Creating a Package Materials Fee and Small Parcel Shipping Label Fee
- Creating a Handling Oversized Shipment Surcharge Rate (Over 40 lbs)
- Creating a Shipping Oversized Pick Surcharge Fee (Over 20lbs)
- Creating an FBA Prep Carton Label with Standard Tiered Fee
- Creating a Rate for Pick-and-Pack Fee with Amazon Item Classification
- Creating a Fragile Package Handling Rate
- Creating a Promotional Rate Based on SKU for a Specific Customer
- Creating a Rate for an Outbound Pick Fee with a Minimum Base Charge
- Creating a Pick Fee Rate Based on Business to Business Order
- Creating a Minimum Order Charge Rate Based on Total Weight
- Creating an Inner Case Pick Rate Using Standard Tiering
- Creating a Base Charge Rate for Less Than Truckload (LTL) Orders Going to Various Retailers
- Creating a Base Charge Rate for Orders That Exceed 5 Cartons Shipped
- Creating a Case Picking Rate Using Volume Tiered Fee
- Creating a Rate for an Outbound Picking Fee Based on Individual Units
- Creating a Rush Fee Rate
- Creating a UOM Count Rate for a Receipt or Shipment
- Creating a Rate Based on Shipping Destination
- Transaction Minimum / Markup Rates
- Storage Rates
-
Warehousing Services / Adjustments / Assemblies Rates
- Creating a Tiered Rate for Adjustments per SKU
- Creating a Tiered Rate for Adjustments Counting Total Quantity
- Creating a Tiered Rate for Assembly Kitting Component Fee (Total Count)
- Creating a Rate for Adjustment by Unique Location
- Creating a Rate for an Adjustment Based on Total Volume
- Creating a Rate for Assembly Kitting Component Fee by SKU
- Creating a Custom Rate for Adjustments per Unique SKU
- Creating a Tiered Rate for Assemblies (Total Kits Fee)
- Creating a Rate for Total Kits Created in an Assembly Using Volume Tiering
- Creating a Rate for Total Kits Created in an Assembly Using Standard Tiering
- Creating an Assembly Per Kit Fee Rate with a Minimum Charge
-
Understanding Rates
Creating a Rate Sheet
This article is about the Billing Manager app, not the Billing Wizard in 3PL Warehouse Manager. To learn about the Billing Wizard, please refer to the articles in the Billing Setup.
A rate sheet is a collection of global rates that can be added in any quantity. Using a rate sheet saves time when assigning multiple standard rates to a customer. For example, when onboarding a new customer, there's no need to assign 20 global rates to each customer individually. Instead, those 20 rates can be added to a standard rate sheet. Any changes made to the rate sheet will apply to all customers assigned to it.
The following outlines the steps on how to create a new rate sheet.
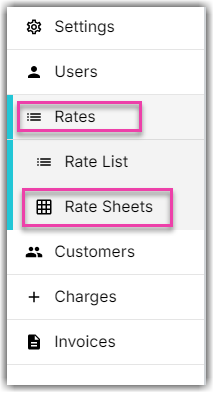
- Navigate to the Rates module of Billing Manager. Then, click Rate Sheets.
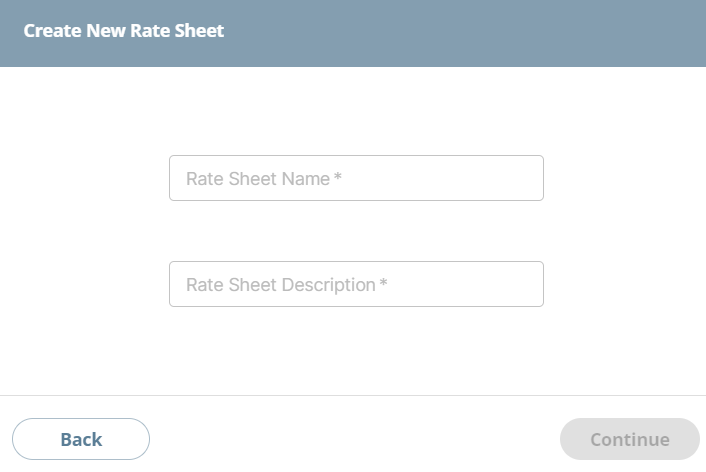
- Click Create Rate Sheet. This will open the Create New Rate Sheet window.
- Provide the Rate Sheet Name and Rate Sheet Description. Afterwards, click Continue.
- On ‘Edit Rate Sheet’ page, you'll find the add button per category. It will open the ‘Add Rate to This Rate Sheet’ window.
Currently, we have 5 categories. These are Shipping, Receiving, Adjustments, Assemblies, and Returns. - Add rates from here by clicking the + button.
You can filter this page by category by clicking the dropdown arrow instead of All. - 
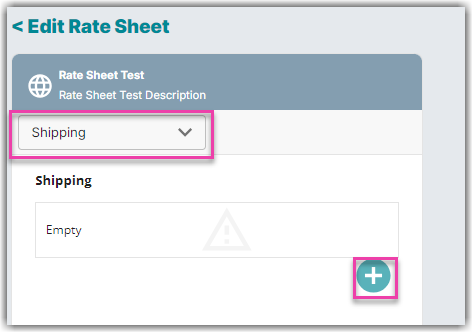
Select which rates you want to add to your rate sheet. Use the search function to locate the rate you want to add.
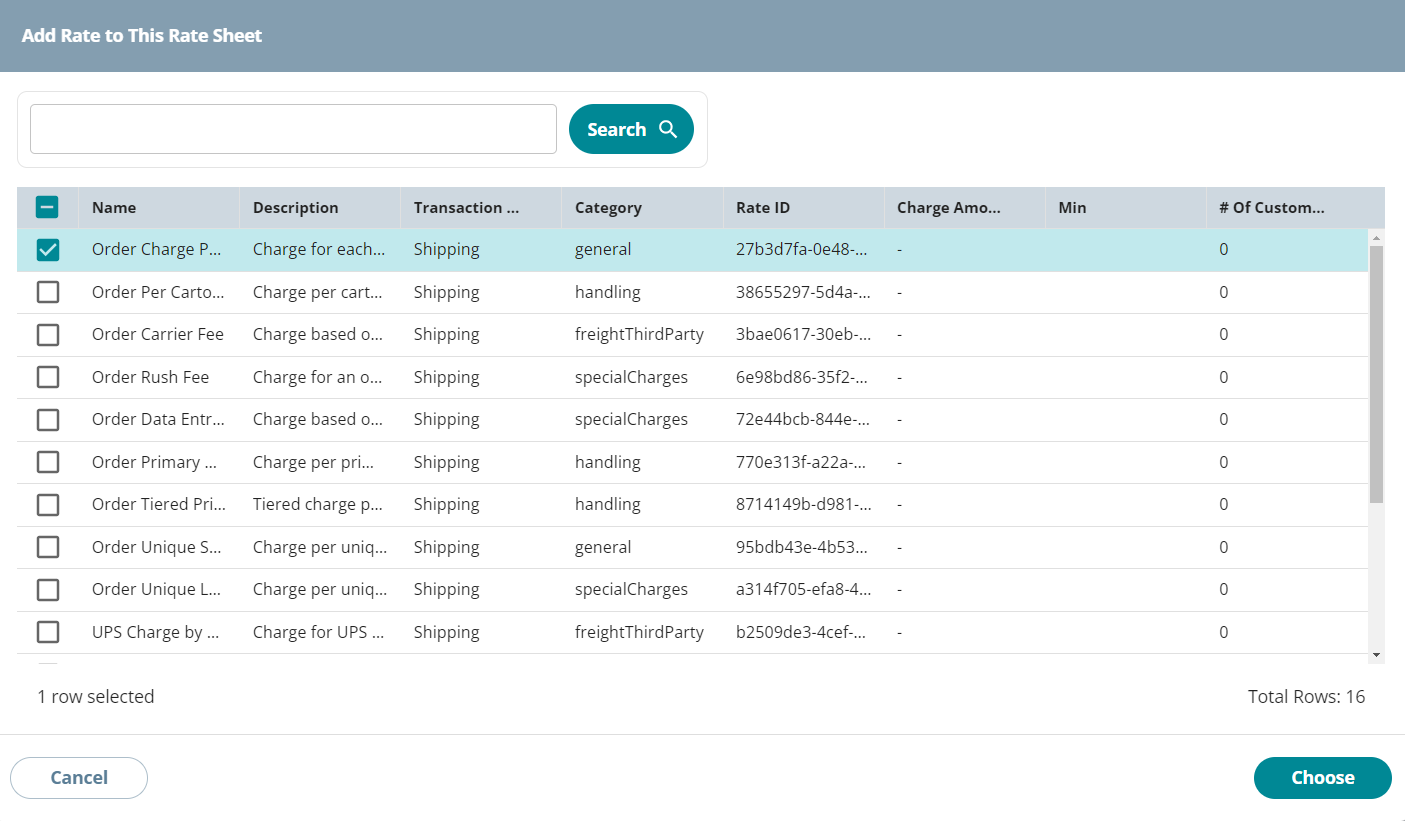
- Click Choose. You will find the rate added to the category.
- Continue adding rates as necessary. Click Done once finished.