3PL Warehouse Manager

Updated on April 10th, 2025

  • Extensiv Hub
    Popular Articles Getting Started Using Hub Technical Issues & FAQs Extensiv's Ideas Portal
  • 3PL Warehouse Manager
    Receiving Operations Inventory Management Shipping Operations System Configuration Scanning Operations Integrations Content Best Practice Resources Release Notes Popular Articles Troubleshooting Guides
  • Warehouse Management
    Getting Started Admin Console Shipping Order Picking & Packing Receiving Customer Portal Cycle Counting Kit Building Managing Users Barcode Scanner Import/Export Integrations Barcoding Wave Picking Bin Move Mobile Receiving and Picking Settings Popular Articles Reporting
  • Order Management
    Dashboard Orders Inventory Purchase Orders Shipments Customers Products Analytics Settings API API Integrations Accessing and Navigating Order Manager Error Messages Order Manager Popular Articles Accounting Integrations
  • Integration Management
    Getting Started with Integration Manager General Support Troubleshooting Extras & Addons API Documentation Popular Articles Order Sources Order Destinations
  • FAQs
  • Network Manager
    Getting Started Order Routing Management Technical Issues Shopping Carts Settings Settings, Products, and Orders
  • Billing Manager
    Getting Started Using Billing Manager
  • Release Notes
    Extensiv Sandbox Extensiv Extensiv Hub 3PL Warehouse Manager Integration Management Warehouse Management Order Management Billing Manager
  • Fulfillment Marketplace
    Getting Started
  • Sandbox
    Getting Started
+ More
  • Help Center
  • 3PL Warehouse Manager
  • Inventory Management
  • Item Control
  • Inventory Management
    • Item Creation
        • Creating Items
        • Understanding Units of Measure
        • Entering Basic Item Details
        • Defining Units of Measure
        • Creating Item Assemblies
        • Configuring Item-Level Recurring Storage Charges
        • Configuring Item-Level Storage and Handling Charges
    • Inventory Management
        • Using the Manage Inventory Page
        • Understanding Allocation Logic
        • Making Adjustments
        • Transferring Inventory
        • Editing Track-By Values
        • Getting Started with Directed Putaway
        • Understanding Directed Putaway Logic
        • Understanding Replenishments
        • Counting Inventory
        • Performing Item-Based Audits
    • Movable Units
        • Understanding Movable Units
        • Enabling Movable Units for Customers
        • Defining Movable Unit Types
        • Specifying an Item's Movable Unit Type
        • Receiving Movable Units
        • Moving Movable Units
        • Reconfiguring Movable Units
    • Item Control
        • Managing Assembly Transactions
        • Moving Items
        • Batch-Updating Items
        • Managing Item Aliases
        • Managing Commodities
        • Managing Classifications
        • Managing Pricing
        • Managing Item Images
        • Managing Storage Rates
        • Uploading Import Templates
        • Understanding Item Alias

Managing Item Aliases

The item alias feature allows you to configure a SKU label if your customer needs you to ship multiple component SKUs as one item. Whereas an assembly is a group of components that makes up one master SKU, an item alias is a label that represents one or more components. This kitting method is best for ad-hoc or seasonal purposes, as it removes the need to officially assemble the component parts in the item setup or create an assembly transaction.

This article reviews how to create and update an item alias.

In order to utilize item aliases, you need to have the Item Alias feature enabled for your database under Admin > Settings. Once enabled, you also need to have the following permission assigned to your user role: Customer Module > Customer Items > Manage Item Aliases.


Guidelines

You can create item aliases in 3PL Warehouse Manager via import file or manual entry. Both methods are reviewed below. Before you continue with the steps below, please note the following about alias SKUs:

  • To view inventory levels for an alias SKU, you must search for each individual component SKU—item aliases do not display on the Manage Inventory page or Stock Status Report.
  • If an alias SKU is ordered via flat file import or an EDI/API integration, the associated component SKUs populate on the order.
  • The alias SKU is also not listed on order documents, such as pick tickets and packing slips—you only have visibility into the component SKU quantities.

Import item aliases

If you have multiple item aliases to create or you want to make changes to multiple existing aliases, we recommend adding or editing these item aliases via import file.

The Item Alias Import Template file must have more than one entry to import correctly.


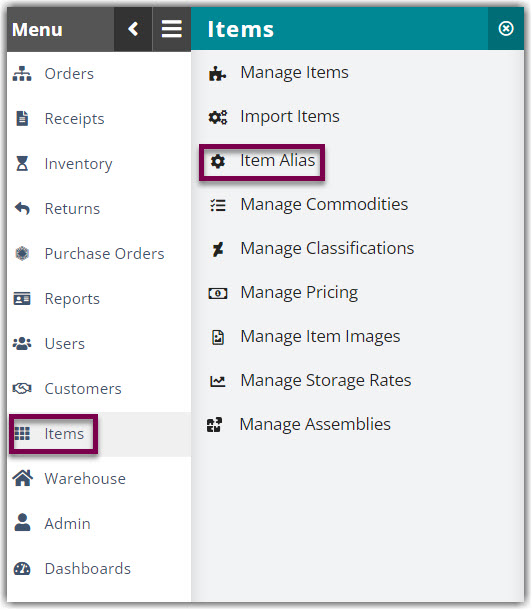
  1. Follow the instructions on the Item Alias Import Template, then navigate to Items > Item Alias in 3PL Warehouse Manager.
  2. Click Import, then select a relevant customer from the drop-down menu.
  3. Click Choose File, double-click the import file, then click Import. A preview of the alias data displays in the Item Aliases To Be Created grid and the bottom text box.

     If one or more item aliases are unsuccessful in your import file, the failed SKUs display under the "FAILED ----------" section at the bottom of the Data From Import File text box.


  4. Verify for accuracy, then click one of the following options to finalize the import:
    • Keep Existing: Only imports the alias SKUs that do not currently exist
    • Replace Existing: Imports all alias SKUs and replaces the existing aliases with the updated components contained in the import file
    • Deactivate Existing: Deactivates all existing aliases in the import file
       

Once finalized, the imported data displays in the Import Results grid and is populated in the grid under Items > Item Alias.

Enter item aliases

  1. To create a new alias, navigate to Items > Item Alias in 3PL Warehouse Manager.
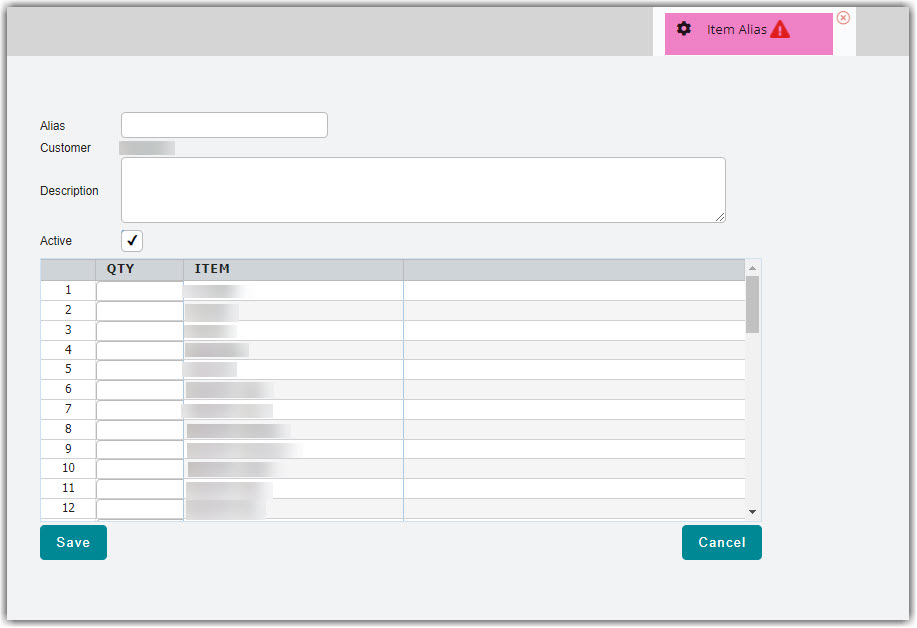
  2. Click Add, then select the relevant customer from the drop-down menu.
  3. Enter your Alias, a 'Description' for your alias SKU, and the Qty for each item that is a part of the alias SKU. When your customer orders this alias SKU, the system adds receipt line items for the quantities specified here.
  4. Once all components are accounted for, click Save.
     

Repeat Steps 2–4 to create additional item aliases.

If you need to edit an alias or mark it as inactive, you can do so from the same Item Alias page. Click the edit icon in the row of the appropriate alias, make your changes, then click Save. You can also delete an item alias by clicking the delete icon and OK to confirm. Please note that changes only affect orders that have not been placed, and all existing orders still retain the original item alias configuration.


item naming alias management

Was this article helpful?

Yes
No
Share additional feedback about this article

Related Articles

  • Sending an ASN
  • Creating End of Day Requests (Manifesting)
  • Setting Up FTP Email Notifications

Not finding the help you need?

Contact Support
Solutions
  • Solutions for Brands
  • Solutions for 3PLs
  • Solutions for 4PLs
  • Solutions for B2B
Products
  • Extensiv 3PL Warehouse Manager
  • Extensiv Warehouse Manager
  • Extensiv Order Manager
  • Extensiv Integration Manager
  • Extensiv Network Manager
Products
  • Customer Success
  • Implementation
  • Consulting
Ecosystem
  • Fulfillment Marketplace
  • Integrations
  • Partners
  • Become a Partner
Resources
  • Resource Library
  • Blog
  • Market Insights
  • What is a 3PL?
  • What is a 4PL?
  • What is a WMS?
  • Why a Cloud-based WMS?
  • Glossary
Help
  • Help Center
  • API Documentation
  • Extensiv Univerisity
  • Community
  • System Status
  • Extensiv Logo
  • 100 N Pacific Coast Hwy, Suite 1100, El Segundo, CA 90245
  • |
  • Contact Us:
  • 83-EXTENSIV 888.375.2368 (main)
  • |
  • 310.844.7570 (local)
  • Copyright © 2023 Extensiv
  • |
  • All rights reserved.
  • Privacy Policy
  • |
  • Terms of Service
  • Follow Us:
Expand