3PL Warehouse Manager

Updated on October 22nd, 2024

  • Extensiv Hub
    Popular Articles Getting Started Using Hub Technical Issues & FAQs Extensiv's Ideas Portal
  • 3PL Warehouse Manager
    Receiving Operations Inventory Management Shipping Operations System Configuration Scanning Operations Integrations Content Best Practice Resources Release Notes Popular Articles Troubleshooting Guides
  • Warehouse Management
    Getting Started Admin Console Shipping Order Picking & Packing Receiving Customer Portal Cycle Counting Kit Building Managing Users Barcode Scanner Import/Export Integrations Barcoding Wave Picking Bin Move Mobile Receiving and Picking Settings Popular Articles Reporting
  • Order Management
    Dashboard Orders Inventory Purchase Orders Shipments Customers Products Analytics Settings API API Integrations Accessing and Navigating Order Manager Error Messages Order Manager Popular Articles Accounting Integrations
  • Integration Management
    Getting Started with Integration Manager General Support Troubleshooting Extras & Addons API Documentation Popular Articles Order Sources Order Destinations
  • FAQs
  • Network Manager
    Getting Started Order Routing Management Technical Issues Shopping Carts Settings Settings, Products, and Orders
  • Billing Manager
    Getting Started Using Billing Manager
  • Release Notes
    Extensiv Sandbox Extensiv Extensiv Hub 3PL Warehouse Manager Integration Management Warehouse Management Order Management Billing Manager
  • Fulfillment Marketplace
    Getting Started
  • Sandbox
    Getting Started
+ More
  • Help Center
  • 3PL Warehouse Manager
  • Scanning Operations
  • Inventory Management
  • Scanning Operations
    • Configuration
        • Setting Up Barcodes
        • Getting Started with GS1 Barcodes
        • Connecting Printers to SmartScan
        • Managing Barcode Definitions
        • Updating Samsung Keyboards
        • Configuring SmartScan on Zebra Enterprise Browser
        • Clearing Enterprise Browser Cache in SmartScan
        • Creating Custom MU Labels
        • Configuring SmartScan on Keyence Devices
        • Capturing Images in SmartScan
    • Inbound Operations
        • Receiving with SmartScan
        • Creating Receipts with SmartScan
        • Receiving Against an ASN
        • Printing MU Labels for Receipts
    • Inventory Management
        • Performing Inventory Audits
        • Moving Inventory with SmartScan
        • Looking Up Inventory with SmartScan
    • Outbound Operations
        • Picking Orders with SmartScan
        • Creating Pick Jobs
        • Multi-User Picking in SmartScan
        • Picking Multiple Orders
        • Bin-Picking
        • Picking for Load-Out
        • Picking for Load-Out FAQs
        • Packing Orders with SmartScan
        • Packing from Shelves
        • Using Outbound Serialization
        • Enabling Pick Paths
        • Picking a Single Order

Moving Inventory with SmartScan

The Move module allows you to move items in the warehouse through a scan sequence. Scanning an item, MU, or location barcode initiates the move process. We recommend physically moving the inventory during or directly after the time that you confirm your move to ensure full accuracy.

This article reviews how to move inventory using SmartScan's Move functionality.

To move inventory using SmartScan, you must have the following permission assigned to your user role: Mobile Scanner > Move Module > Mobile Move. If you also need the ability to move inventory that is currently allocated to orders, you must have the 'Allocated Stock Move' feature enabled for your account via Admin > Settings and the following permission assigned to your user role: Mobile Scanner > Move Module > Move Allocated Inventory.


Guidelines

To get started, log in to SmartScan. Ensure the appropriate 'Warehouse' is selected from the drop-down list, then tap the Move module.
 

Continue reading below to learn how to complete each type of move.

Move items

Move individual items from one warehouse location to another using the following steps.

Please note that any items not in a specified location cannot be moved because SmartScan requires a source location to move inventory. Additionally, moving partial quantity from a MU removes the MU altogether.

 
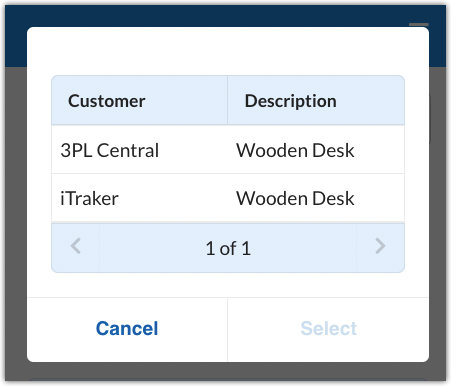
  1. Enter a Customer name (optional), then scan a SKU/UPC barcode or enter the SKU name.

    If you don't specify a customer and there are results for multiple customers, choose the appropriate customer, then tap Select.

     
  2. Scan the barcode of the Source Location or Source Movable Unit, or manually enter the location name, then do the same for any track-by's associated with the item and tap Add.
  3. A new dialog opens that lists each item matching the specified location and track-by values. Enter the quantity for the item you'd like to move in the 'Move Qty' column, then tap Next.
    To view additional details of an item, tap the chevron to the left of the 'Move Qty' value.

  4. Repeat Steps 1–3 for each SKU being moved.
  5. Once all SKUs are captured, tap Next, then scan the barcode or manually enter the name of the Destination Location and/or Destination Movable Unit.

    If you need to create/assign an MU license plate and print an MU label, tap Create New Movable Unit. Select the appropriate 'Movable Unit Type' from the drop-down menu, then adjust the dimensions as needed. Enter a specific 'Movable Unit Label,' or leave this field empty to generate a system-assigned license plate, then tap Print Label. Once printed, affix the label to the MU.

     
  6. To finalize the move, tap Next, then tap Confirm Move to receive a confirmation message. Note: Tapping Cancel returns you to the original Move page and cancels the inventory move.


Move movable units

Move entire pallets, or other types of MUs, from one warehouse location to another using the following steps.

  1. Tap the 'Move Type' drop-down menu, then select Movable Unit.

  2. Scan the source Movable Unit label, then do the same for the Destination Location. Alternatively, you can manually enter these values and hit < Enter > on your device to proceed to the next field.
  3. To finalize the MU move, tap Confirm Move to receive a confirmation message. Note: Tapping Cancel returns you to the original Move page and cancels the inventory move.

  4. Repeat these steps for each MU you wish to move.

Move locations

Move all inventory from one warehouse location to another using the following steps.

  1. Tap the 'Move Type' drop-down menu, then select Location.
  2. Scan the source Location. Alternatively, you can manually enter the location, then hit < Enter > on your device.
  3. Scan the Destination Location to view all items set to move. Alternatively, you can manually enter the location, then hit < Enter > on your device.
  4. To finalize the location move, tap Confirm Move to receive a confirmation message. Note: Tapping Cancel returns you to the original Move page and cancels the inventory move.

  5. Repeat these steps for each location in which you wish to move all inventory.
inventory smartscan

Was this article helpful?

Yes
No
Share additional feedback about this article

Related Articles

  • Consolidating Packages
  • Voiding Shipping Labels
  • Managing Customers
  • January 17, 2020 – Minor Release Notes

Not finding the help you need?

Contact Support
Solutions
  • Solutions for Brands
  • Solutions for 3PLs
  • Solutions for 4PLs
  • Solutions for B2B
Products
  • Extensiv 3PL Warehouse Manager
  • Extensiv Warehouse Manager
  • Extensiv Order Manager
  • Extensiv Integration Manager
  • Extensiv Network Manager
Products
  • Customer Success
  • Implementation
  • Consulting
Ecosystem
  • Fulfillment Marketplace
  • Integrations
  • Partners
  • Become a Partner
Resources
  • Resource Library
  • Blog
  • Market Insights
  • What is a 3PL?
  • What is a 4PL?
  • What is a WMS?
  • Why a Cloud-based WMS?
  • Glossary
Help
  • Help Center
  • API Documentation
  • Extensiv Univerisity
  • Community
  • System Status
  • Extensiv Logo
  • 100 N Pacific Coast Hwy, Suite 1100, El Segundo, CA 90245
  • |
  • Contact Us:
  • 83-EXTENSIV 888.375.2368 (main)
  • |
  • 310.844.7570 (local)
  • Copyright © 2023 Extensiv
  • |
  • All rights reserved.
  • Privacy Policy
  • |
  • Terms of Service
  • Follow Us:
Expand