3PL Warehouse Manager

Updated on October 7th, 2024

  • Extensiv Hub
    Popular Articles Getting Started Using Hub Technical Issues & FAQs Extensiv's Ideas Portal
  • 3PL Warehouse Manager
    Receiving Operations Inventory Management Shipping Operations System Configuration Scanning Operations Integrations Content Best Practice Resources Release Notes Popular Articles Troubleshooting Guides
  • Warehouse Management
    Getting Started Admin Console Shipping Order Picking & Packing Receiving Customer Portal Cycle Counting Kit Building Managing Users Barcode Scanner Import/Export Integrations Barcoding Wave Picking Bin Move Mobile Receiving and Picking Settings Popular Articles Reporting
  • Order Management
    Dashboard Orders Inventory Purchase Orders Shipments Customers Products Analytics Settings API API Integrations Accessing and Navigating Order Manager Error Messages Order Manager Popular Articles Accounting Integrations
  • Integration Management
    Getting Started with Integration Manager General Support Troubleshooting Extras & Addons API Documentation Popular Articles Order Sources Order Destinations
  • FAQs
  • Network Manager
    Getting Started Order Routing Management Technical Issues Shopping Carts Settings Settings, Products, and Orders
  • Billing Manager
    Getting Started Using Billing Manager
  • Release Notes
    Extensiv Sandbox Extensiv Extensiv Hub 3PL Warehouse Manager Integration Management Warehouse Management Order Management Billing Manager
  • Fulfillment Marketplace
    Getting Started
  • Sandbox
    Getting Started
+ More
  • Help Center
  • 3PL Warehouse Manager
  • Scanning Operations
  • Outbound Operations
  • Scanning Operations
    • Configuration
        • Setting Up Barcodes
        • Getting Started with GS1 Barcodes
        • Connecting Printers to SmartScan
        • Managing Barcode Definitions
        • Updating Samsung Keyboards
        • Configuring SmartScan on Zebra Enterprise Browser
        • Clearing Enterprise Browser Cache in SmartScan
        • Creating Custom MU Labels
        • Configuring SmartScan on Keyence Devices
        • Capturing Images in SmartScan
    • Inbound Operations
        • Receiving with SmartScan
        • Creating Receipts with SmartScan
        • Receiving Against an ASN
        • Printing MU Labels for Receipts
    • Inventory Management
        • Performing Inventory Audits
        • Moving Inventory with SmartScan
        • Looking Up Inventory with SmartScan
    • Outbound Operations
        • Picking Orders with SmartScan
        • Creating Pick Jobs
        • Multi-User Picking in SmartScan
        • Picking Multiple Orders
        • Bin-Picking
        • Picking for Load-Out
        • Picking for Load-Out FAQs
        • Packing Orders with SmartScan
        • Packing from Shelves
        • Using Outbound Serialization
        • Enabling Pick Paths
        • Picking a Single Order

Packing Orders with SmartScan

SmartScan's Pack module has a standard packing option that allows you to pack orders using scanning efficiency with a supported Zebra or Keyence device. Consumer devices are also supported in this packing process but require you to manually select a package type and tap items to pack, rather than scan a SKU or UPC code. This method of packing orders is best to use when you have generally low volumes of large-sized orders, such as for a pallet in/pallet out workflow.

This article reviews how to pack orders using SmartScan and assumes that an order has already been picked and the relevant inventory is sitting near or on a packaging station.

The Pack module also has a Pack from Shelves option, which allows you to pick and pack simultaneously—to learn more, please see Packing from Shelves.


Please note that a 'Pick Done Date' must be present on an order for it to display in the Pack module.


Guidelines

The packing process consists of specifying a package type and specifying each item being packed inside.

To access the Pack module in SmartScan, you must have the following permission assigned to your user role: Mobile Scanner > Mobile Pack.

 
  1. Log in to SmartScan.
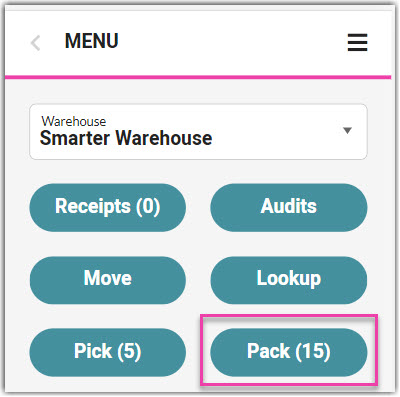
  2. Ensure the appropriate 'Warehouse' is selected from the drop-down list, then tap the Pack module. Note that the number displayed reflects the number of orders available to pack using the standard packing method.
  3. Tap Standard Pack, then specify the order you wish to pack using one of two methods:
    1. Scan the associated transaction number, tracking number, or bin ID. If you are unable to scan, manually enter the value, then hit < Enter > on your keyboard.
    2. Select an order manually.
      • To begin the order shown, tap Start Pack.
      • To skip to the next prioritized order, tap Skip Pack. Once all orders are skipped, there is an option to 'Reset Pack' to return to the first prioritized order.
  4. Specify the first package by scanning the package barcode or selecting a package type from the 'Add a Package' drop-down menu. The package type displays in gray under Items to Pack.
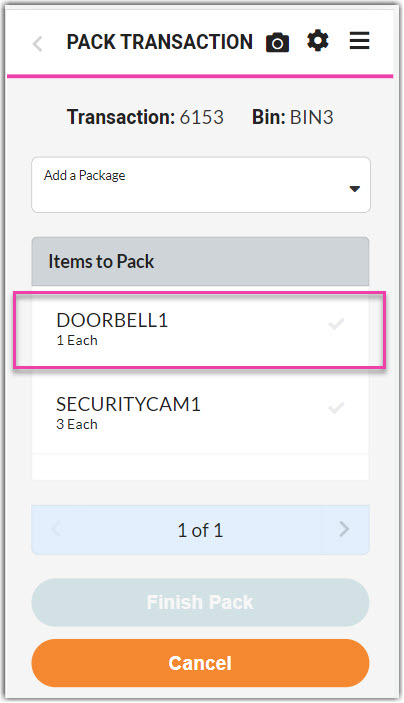
  5. Begin packing each item into the first package type by scanning the SKU/UPC barcode or selecting it from the grid. For each item that is successfully packed, a confirmation message appears and a green check populates on the line item.
    • If there are track-by's associated with an item, SmartScan asks you to verify they are correct—if they are incorrect, modify as needed. Please note that 'Reallocate at Pick Time' must be enabled for your account and for the customer in order to pack items with track-by's that are different from what was originally specified on the order.
    • If you have multiple line items with the same SKU and use the scanning functionality to specify the item, SmartScan marks the first SKU listed as packed and continues in the displayed order. If you need to pack out of order, you must tap the relevant line item from the grid rather than scan it.
    • If you need to unpack an item, select it from the grid, then tap Unpack.
    • If you need to edit or remove a specified package type, tap the Edit icon in the package grid row. To edit, make your changes, then tap Save. To delete, tap Delete, then Yes, Delete to confirm that you want to unpack all items placed in the package.
  6. If there are additional packages on the order, repeat Steps 4 and 5 until all items are packed.
  7. Once you have packed all items on the order, tap Finish Pack.

Once you finalize the pack, SmartScan redirects you to the initial Pack screen that displays each order ready to be packed, and the Pack Done Date column populates with the appropriate data in the Find Orders grid.


Repeat Steps 3–7 to pack additional orders.

packaging smartscan

Was this article helpful?

Yes
No
Share additional feedback about this article

Related Articles

  • Shipping with FedEx One Rate®
  • Packing Orders
  • Creating Receipts
  • Importing Ship-to Contacts

Not finding the help you need?

Contact Support
Solutions
  • Solutions for Brands
  • Solutions for 3PLs
  • Solutions for 4PLs
  • Solutions for B2B
Products
  • Extensiv 3PL Warehouse Manager
  • Extensiv Warehouse Manager
  • Extensiv Order Manager
  • Extensiv Integration Manager
  • Extensiv Network Manager
Products
  • Customer Success
  • Implementation
  • Consulting
Ecosystem
  • Fulfillment Marketplace
  • Integrations
  • Partners
  • Become a Partner
Resources
  • Resource Library
  • Blog
  • Market Insights
  • What is a 3PL?
  • What is a 4PL?
  • What is a WMS?
  • Why a Cloud-based WMS?
  • Glossary
Help
  • Help Center
  • API Documentation
  • Extensiv Univerisity
  • Community
  • System Status
  • Extensiv Logo
  • 100 N Pacific Coast Hwy, Suite 1100, El Segundo, CA 90245
  • |
  • Contact Us:
  • 83-EXTENSIV 888.375.2368 (main)
  • |
  • 310.844.7570 (local)
  • Copyright © 2023 Extensiv
  • |
  • All rights reserved.
  • Privacy Policy
  • |
  • Terms of Service
  • Follow Us:
Expand