Creating Custom MU Labels
4.7 min read
|Overview
This article explains how to create, edit, delete, and copy custom Movable Unit (MU) Labels.
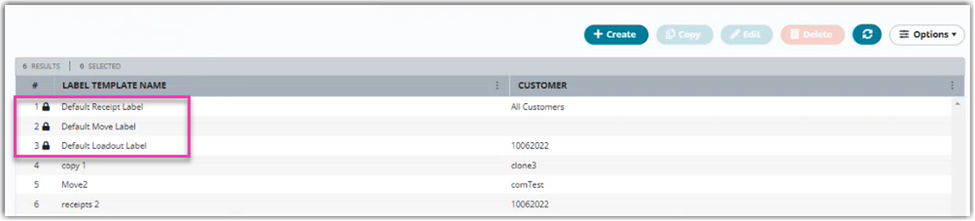
There are three different modules or places where you can print these labels. Because each module has a unique data model, we provide a default label template for each module:
- Receipts
- Move
- Loadout
Accessing Label Templates
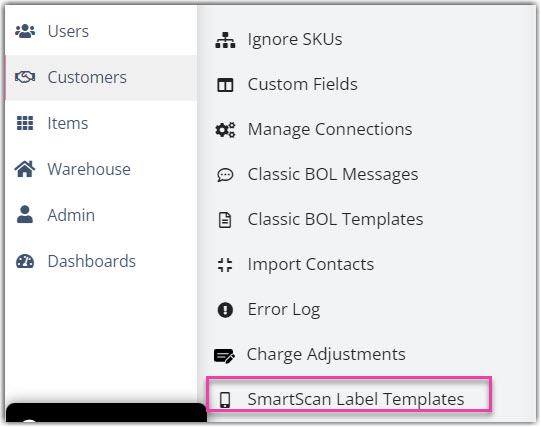
In 3PL Warehouse Manager, go to Customers > SmartScan Label Templates.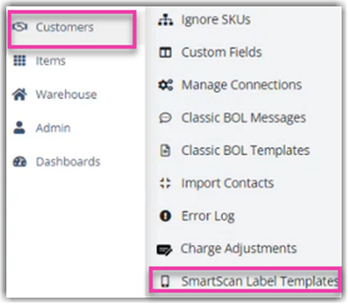
The Label Template grid provides a list of available Label Templates.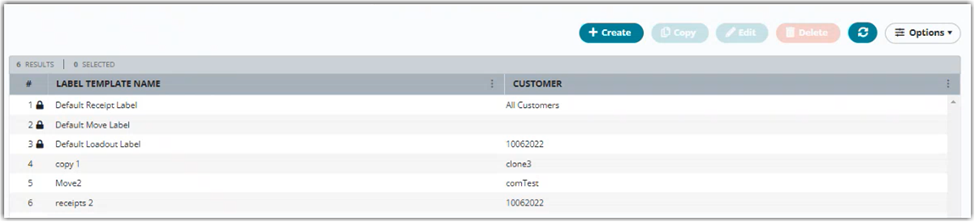
ZPL Viewer
To help you create the desired formatting in the ZPL code, you can use any ZPL viewer. There are several free options available on the Web. For example, http://labelary.com/viewer.html
Simply copy/paste the ZPL code between the Label Command field and the ZPL viewer.
MU Template processes
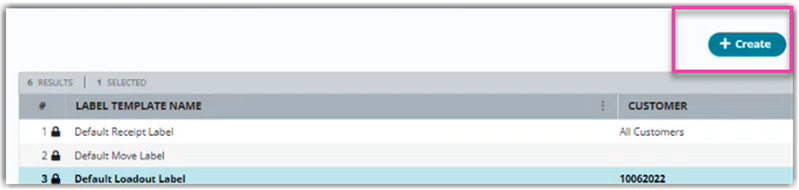
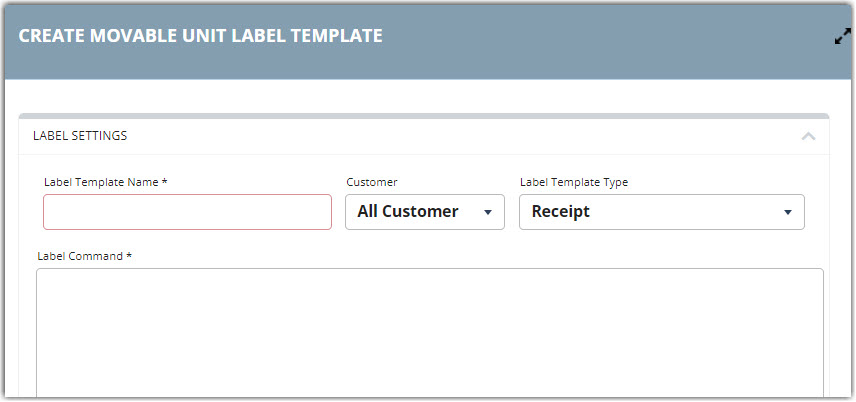
Creating a custom Template
- Click Create.
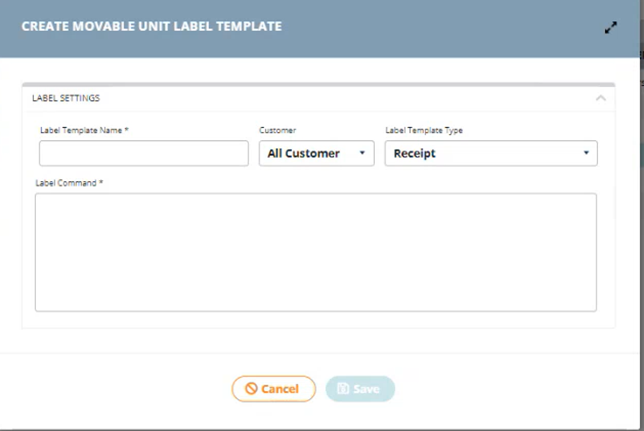
- Enter the Label Template Name.
- Select a customer that can use the Label Template.
- Select a Label Template Type, in which module this template should appear:
- Receipt
- Move
- Loadout
- Then insert the Zebra Programming Language (ZPL) code that you want your label layout to look like.
3PL Warehouse Manager provides the following variables you can use when creating your ZPL code. These variables are replaced with the associated WMS data when the label is printed.
- TransactionList: Adds a list of all Receipt transaction numbers associated with the inventory linked to the movable unit.
- Transaction: Adds the Receipt transaction number associated with the inventory linked to the movable unit.
- Reference: Adds the Receipt reference ID associated with the inventory linked to the movable unit. (Single value in Receipts, list in other modules)
- MULabel: Adds the assigned Movable Unit ID to the label.
- Customer: Adds the customer’s name associated with the inventory linked to the movable unit.
- SKUList: Adds a list of SKUs linked to the movable unit.
- Quantity: Adds the SKU quantity associated with the movable unit at the time the label is generated.
- Qualifier: Adds a list of qualifiers on the movable unit.
- Lot: Adds the lot number associated with a SKU on the moveable unit.
- Expiration: Adds the expiration date of the moveable unit.
- SerialNumber: Adds the serial number of the moveable unit.
- Supplier: Adds the supplier of the moveable unit.
For more information, you may refer to the Zebra Programming Language official page.
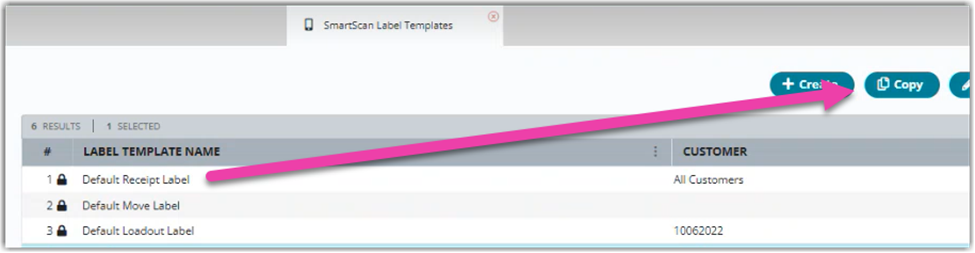
Copying a Label Template
If you have limited knowledge of ZPL, you can use the codes from the existing Default Label Templates by copying them and customizing them to your own liking.
- Select a Label Template.
- Click Copy.
- In the “Copy Movable Unit Label Template” screen, enter the Label Template Name, the Customer, and Label Template Type. The Label Command is prefilled with the code from the template it was copied from.
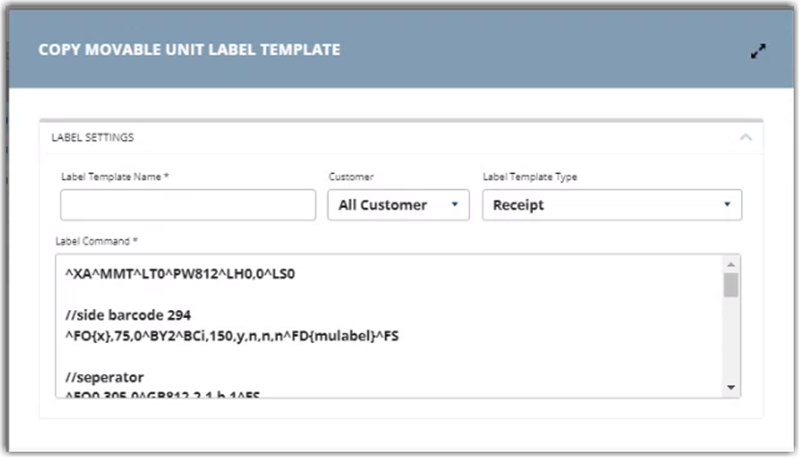
- Make any desired changes to the ZPL code in the Label Command field, then click Save.
Editing a Label Template
To edit a Label Template, highlight a Template then click Edit.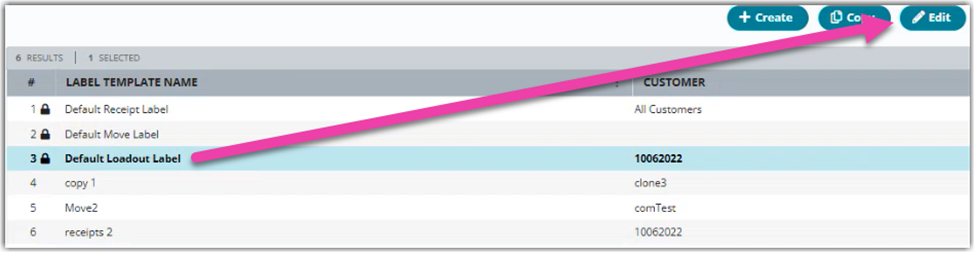
The function differs depending on the type of template:
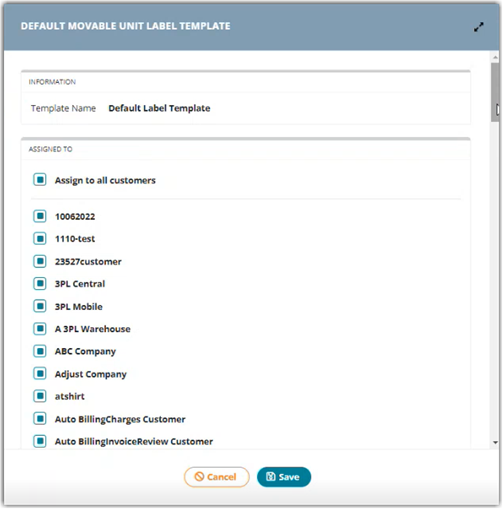
- For Default Label Templates, you can only edit the list of customers to which this template is assigned.
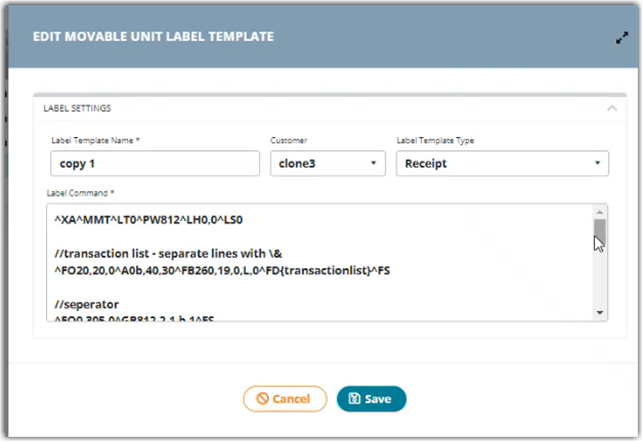
- For non-default Label Templates, you can edit all Label Settings, including name, assigned customer, type, and the label code itself.
Deleting a Template
Select a Label Template and click Delete.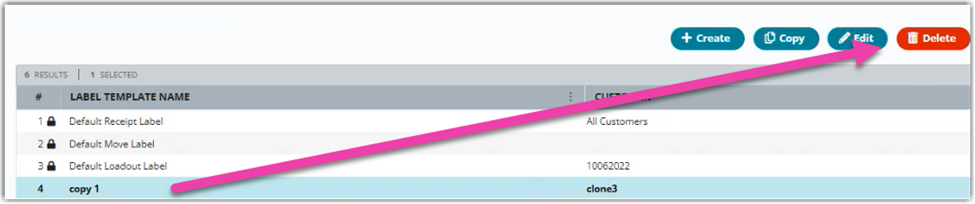
You cannot delete a default Label Template.
Support for printers with different DPIs
Label Templates can now support 300 and 600 DPI(Dots Per Inch) resolutions for the following label templates:
- Default Move
- Default Loadout
- Default Receipt
Using the custom 300 and 600 DPI Label Templates
- To use these, go to Customers > SmartScan Label Templates.
- Enter ‘Label Template Name’, Select ‘Customer’, and ‘Label Template Type’
- Then paste the templates from the section below according to the Label Template Type and DPI.
Default Receipt Label 300DPI
^XA^A0N,64,64^FT32,128
//side barcode 294
^FO360,175,0^BY4^BCi,150,y,n,n,n^^FS
//seperator
^FO0,405,0^GB1212,2,1,b,1^FS
//pallet label
//down left
^FO350,404^A0b,200,120^FB1513,2,0,C,0^FD{mulabel}^FS
//main barcode 625
^FO550,{y},2^BY3^BCb,550,n,n,n,n^FD{mulabel}^FS
//extra data area
^FO020,450,4^GB280,1350,2,b,0^FS
//customer
^FO50,1480,0^A0b,60,50^FB300,1,0,L,0^FDCustomer:^FS
^FO50,500,0^A0b,60,60^FB700,1,0,R,0^FD{customer}^FS
//tra
^FO130,1480,0^A0b,60,50^FB300,1,0,L,0^FDTransaction:^FS
^FO130,500,0^A0b,60,60^FB1400,1,0,R,0^FD{transaction}^FS
//ref
^FO210,1480,0^A0b,60,50^FB300,1,0,L,0^FDReference:^FS
^FO210,500,0^A0b,60,60^FB1400,1,0,R,0^FD{reference}^FS
//
^XZ
Default Receipt Label 600DPI
^XA^MUd, 200, 600
//side barcode 294
^FO{x},75,0^BY2^BCi,150,y,n,n,n^FD{mulabel}^FS
//seperator
^FO0,305,0^GB812,2,1,b,1^FS
//pallet label
//down left
^FO220,604^A0b,100,70^FB913,2,0,C,0^FD{mulabel}^FS
//main barcode 625
^FO290,{y},2^BY2^BCb,420,n,n,n,n^FD{mulabel}^FS
//extra data area
^FO10,327,2^GB180,871,2,b,0^FS
//customer
^FO30,970,0^A0b,40,30^FB550,1,0,L,0^FDCustomer:^FS
^FO30,350,0^A0b,40,30^FB700,1,0,R,0^FD{customer}^FS
//tra
^FO80,970,0^A0b,40,30^FB550,1,0,L,0^FDTransaction:^FS
^FO80,350,0^A0b,40,30^FB700,1,0,R,0^FD{transaction}^FS
//ref
^FO130,970,0^A0b,40,30^FB550,1,0,L,0^FDReference:^FS
^FO130,350,0^A0b,40,30^FB700,1,0,R,0^FD{reference}^FS
^XZ
Default Move Label 300DPI
^XA^A0N,64,64^FT32,128
//sku list - separate lines with \&
^FO30,100,0^A0b,70,60^FB260,19,0,L,0^FD{skulist}^FS
//seperator
^FO0,405,0^GB1212,2,1,b,1^FS
//pallet label
//down left
^FO350,404^A0b,200,120^FB1513,2,0,C,0^FD{mulabel}^FS
//main barcode 625
^FO550,{y},2^BY3^BCb,550,n,n,n,n^FD{mulabel}^FS
//extra data area
^FO020,450,4^GB120,1350,2,b,0^FS
//customer
^FO50,1480,0^A0b,60,50^FB300,1,0,L,0^FDCustomer:^FS
^FO50,500,0^A0b,60,60^FB700,1,0,R,0^FD{customer}^FS
^XZ
Default Move Label 600DPI
^XA^MUd, 200, 600
//transaction list - separate lines with \&
^FO20,20,0^A0b,50,40^FB800,19,0,L,0^FD{skulist}^FS
//seperator
^FO0,305,0^GB812,2,1,b,1^FS
//pallet label
//down left
^FO170,604^A0b,100,70^FB913,2,0,C,0^FD{mulabel}^FS
//main barcode 625
^FO290,{y},2^BY2^BCb,320,n,n,n,n^FD{mulabel}^FS
//extra data area
^FO10,327,2^GB80,871,2,b,0^FS
//customer
^FO30,970,0^A0b,40,30^FB550,1,0,L,0^FDCustomer:^FS
^FO30,350,0^A0b,40,30^FB700,1,0,R,0^FD{customer}^FS
^XZ
Default Loadout Label 300DPI
^XA^A0N,64,64^FT32,128
//transaction list - separate lines with \&
^FO30,110,0^A0b,65,44^FB300,19,0,L,0^FD{transactionlist}^FS
//seperator
^FO0,440,0^GB1212,2,1,b,1^FS
//pallet label
//down left
^FO350,404^A0b,200,120^FB1513,2,0,C,0^FD{mulabel}^FS
//main barcode 625
^FO550,{y},2^BY3^BCb,550,n,n,n,n^FD{mulabel}^FS
//extra data area
^FO020,470,4^GB120,1350,2,b,0^FS
//customer
^FO50,1480,0^A0b,60,50^FB300,1,0,L,0^FDCustomer:^FS
^FO50,500,0^A0b,60,60^FB700,1,0,R,0^FD{customer}^FS
^XZ
Default Loadout Label 600DPI
^XA^MUd, 200, 600
//transaction list - separate lines with \&
^FO20,20,0^A0b,50,40^FB800,19,0,L,0^FD{transactionlist}^FS
//seperator
^FO0,305,0^GB812,2,1,b,1^FS
//pallet label
//down left
^FO170,604^A0b,100,70^FB913,2,0,C,0^FD{mulabel}^FS
//main barcode 625
^FO290,{y},2^BY2^BCb,320,n,n,n,n^FD{mulabel}^FS
//extra data area
^FO10,327,2^GB80,871,2,b,0^FS
//customer
^FO30,970,0^A0b,40,30^FB550,1,0,L,0^FDCustomer:^FS
^FO30,350,0^A0b,40,30^FB700,1,0,R,0^FD{customer}^FS
^XZ