Packing Orders with SmartScan
SmartScan's Pack module has a standard packing option that allows you to pack orders using scanning efficiency with a supported Zebra or Keyence device. Consumer devices are also supported in this packing process but require you to manually select a package type and tap items to pack, rather than scan a SKU or UPC code. This method of packing orders is best to use when you have generally low volumes of large-sized orders, such as for a pallet in/pallet out workflow.
This article reviews how to pack orders using SmartScan and assumes that an order has already been picked and the relevant inventory is sitting near or on a packaging station.
Guidelines
The packing process consists of specifying a package type and specifying each item being packed inside.
- Log in to SmartScan.
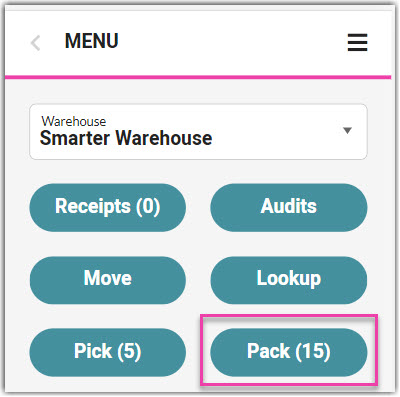
- Ensure the appropriate 'Warehouse' is selected from the drop-down list, then tap the Pack module. Note that the number displayed reflects the number of orders available to pack using the standard packing method.

- Tap Standard Pack, then specify the order you wish to pack using one of two methods:
- Scan the associated transaction number, tracking number, or bin ID. If you are unable to scan, manually enter the value, then hit < Enter > on your keyboard.
- Select an order manually.
- To begin the order shown, tap Start Pack.
- To skip to the next prioritized order, tap Skip Pack. Once all orders are skipped, there is an option to 'Reset Pack' to return to the first prioritized order.
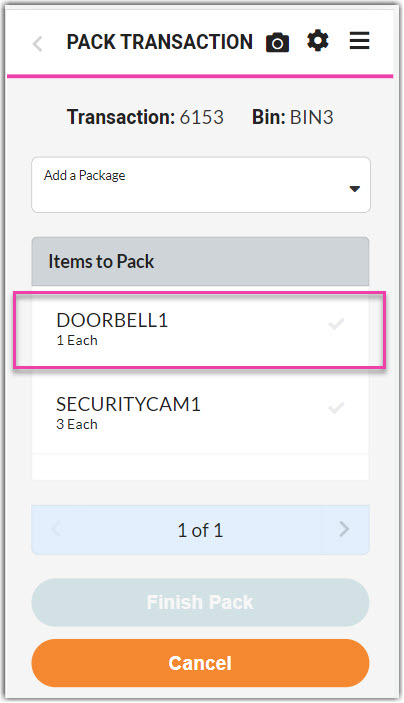
- Specify the first package by scanning the package barcode or selecting a package type from the 'Add a Package' drop-down menu. The package type displays in gray under Items to Pack.

- Begin packing each item into the first package type by scanning the SKU/UPC barcode or selecting it from the grid. For each item that is successfully packed, a confirmation message appears and a green check populates on the line item.
- If there are track-by's associated with an item, SmartScan asks you to verify they are correct—if they are incorrect, modify as needed. Please note that 'Reallocate at Pick Time' must be enabled for your account and for the customer in order to pack items with track-by's that are different from what was originally specified on the order.
- If you have multiple line items with the same SKU and use the scanning functionality to specify the item, SmartScan marks the first SKU listed as packed and continues in the displayed order. If you need to pack out of order, you must tap the relevant line item from the grid rather than scan it.
- If you need to unpack an item, select it from the grid, then tap Unpack.
- If you need to edit or remove a specified package type, tap the Edit icon in the package grid row. To edit, make your changes, then tap Save. To delete, tap Delete, then Yes, Delete to confirm that you want to unpack all items placed in the package.
- If there are additional packages on the order, repeat Steps 4 and 5 until all items are packed.
- Once you have packed all items on the order, tap Finish Pack.

Repeat Steps 3–7 to pack additional orders.
