Picking for Load-Out
4.8 min read
|SmartScan's "Load-Out" functionality is a picking method designed for customers leveraging FTL/LTL freight shipping. Load-Out is a two-stage process that incorporates the moving of inventory as it's picked to a staging area where it's prepped and organized for loading onto a trailer for shipment.
Once an order is marked as Complete, the system automatically populates a pick job for that order under "Pick for Load-Out" (if locations and MUs are enabled for the selected customer) and prioritizes jobs based on an order’s creation date and transaction number. Multi-order picking is also supported with load-out, which requires you to create a pick job from the Find Orders page in 3PL Warehouse Manager prior to following the guidelines below.
If you need to print MU labels at the time of pick, you must first configure your printer settings—see Connecting Printers to SmartScan for further guidelines.
This article reviews how to pick items for load-out using SmartScan.
If you have multiple users picking one order, please see our article for Multi-User Picking in SmartScan.
Stage 1: Pick movable units
The first stage of preparing movable units (MUs) for load-out is to pick the items from their storage location(s).
- To get started, log in to SmartScan.
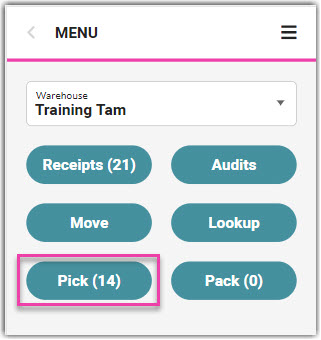
- Ensure that the appropriate 'Warehouse' is selected from the drop-down list, then tap the Pick module. Note that the number displayed reflects the total number of pick jobs available using the standard picking methods (not Pick-to-Bin or Pick for Load-Out).
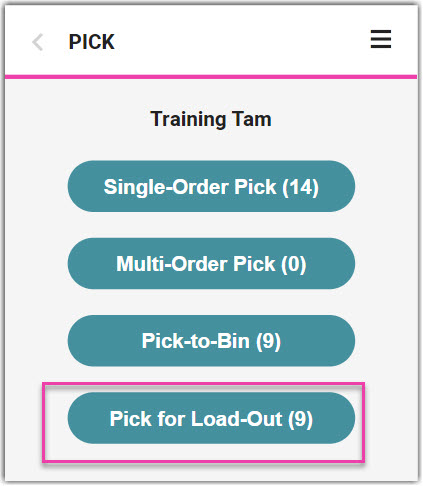
- Tap Pick for Load-Out.
- Once the Pick for Load-Out page opens, specify the order you wish to pick using one of the following methods:
- Scan the associated Transaction ID or Pick Job ID, or manually enter the value, then hit < Enter > on your keyboard.
- Select an order manually.
- If desired, enter a 'Customer' to filter the list of available jobs.
- To begin the order shown, tap Start Pick.
- To skip to the next prioritized order, tap Next Job.
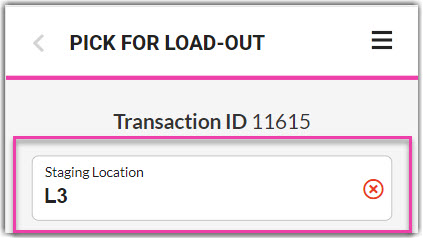
- Next, scan or enter the 'Staging Location' to generate the order items to load.
- If the grid indicates "Needs a Loadable MU," this means you must associate the order items with an MU label. If not, the MU(s) are already assigned a license plate—continue to Step 7.
- To assign an MU license plate and print an MU label, tap Create New Movable Unit.
- Select the appropriate 'Movable Unit Type' from the drop-down menu, then adjust the dimensions as needed.
- Enter a specific 'Movable Unit Label,' or leave this field empty to generate a system-assigned license plate, then tap Print Label. Once printed, affix the label to the MU.
You can reprint MU Label after creating the MU
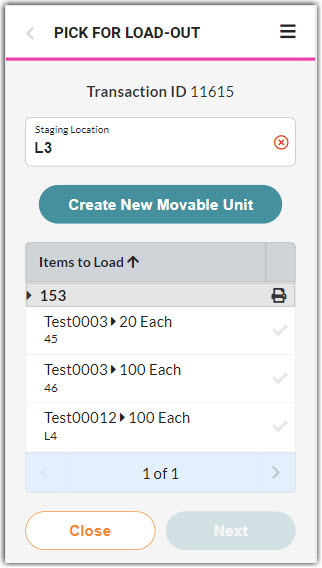
- Once SmartScan recognizes the MU license plate(s) associated with the order, that value populates in gray under Items to Load (153 in the example image below), along with the associated SKU (Test0003), the quantity (20 Each), and the location where the items are currently stored (45) for each line item.
- Pick the first item by scanning the MU label or selecting it from the grid.
If a specific location is associated with the item, SmartScan directs you to proceed to that location.
- Once you specify a line item to pick, the Pick Line Item dialog opens. Scan or enter the 'Location' or 'Movable Unit' label for the SKU, then modify each track-by value as needed.
- Scan each SKU to adjust the 'Quantity,' or manually update the quantity, then tap Done and move the MU to the specified staging location.
- If you are placing items on an MU at the time of pick, move the MU to the staging area once the MU is full.
- Once picked, the grid shows a green check to indicate the inventory has been picked.
- Each SKU shows as a separate line item.
- If you are picking SKUs from multiple MUs and placing them on a single MU, the picked items populate at the bottom of the grid and indicate the total quantity picked.
- Repeat Steps 8–10 until all order items are picked. If there are additional MUs on the order, repeat Steps 6–10 until all items are picked.
- If you need to unpick an item, select the line item from the grid, then tap Unpick Item.
- If you have multiple pages of line items to pick, tap one of the bottom arrows to navigate to the next or previous page of line items.
- After all items are picked, the Additional Charges dialog opens automatically, which includes all predefined manual (not automatic) charges that were set up in the Billing Wizard or created on the Create/Edit Order page in the WMS. If needed, tap the charge(s) from the grid and enter a 'Qty,' then tap Save to apply the associated charge amount(s).
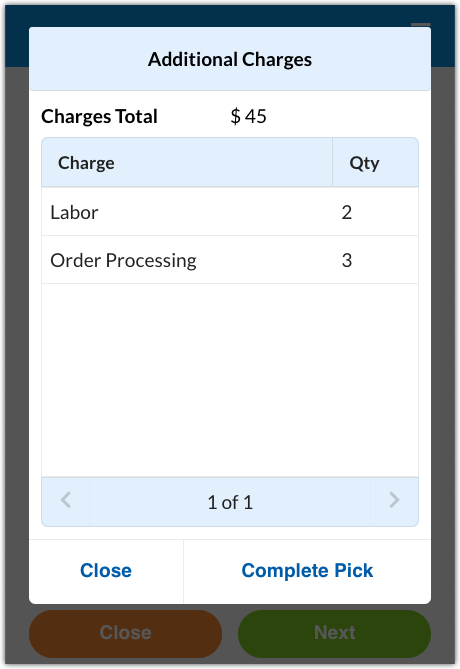
To view the total charge amount, you must have the following permission assigned to your user role: Orders Module > Order Charges > Manage Charges.
- Once you finish adding charges, tap Complete Pick to finalize the pick process and receive a confirmation message that lists the MU quantity and staging location.
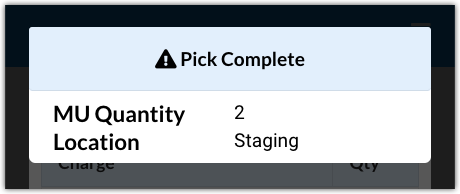
- After the pick is completed, SmartScan moves the pick job status to 'Ready to Load' and redirects you to the pick job list. The original pick job assignee is also cleared so that another user (e.g. the loader) can re-open the job and begin the loading stage of the process.
- To start a new pick, repeat Steps 4–13.
- To verify and load the MUs, continue to the next section.
After clicking ‘Pick Complete’, all picked inventory is in the Staging area. At this point, workers can do whatever additional prep work is needed to get the movable units ready to load on the truck. This might include wrapping pallets, applying labels, and reconfiguring movable units as needed to fit properly in the truck.
To reconfigure movable units prior to the Load Out step, use SmartScan Move Item to shift items from MU to MU, or to consolidate items from multiple MUs to a single MU.
Make sure that you change only the movable unit assignment when reconfiguring movable units and not the location.
Stage 2: Load movable units
Once the movable units (MUs) are picked and moved to the staging location, it's time to verify and load them onto the trailer.
- If you just completed the steps in the previous section, skip to Step 4 below. Otherwise, begin by logging in to SmartScan.
- Ensure that the appropriate 'Warehouse' is selected from the drop-down list, then tap the Pick module.
- Tap Pick for Load-Out to open the Pick for Load-Out page.
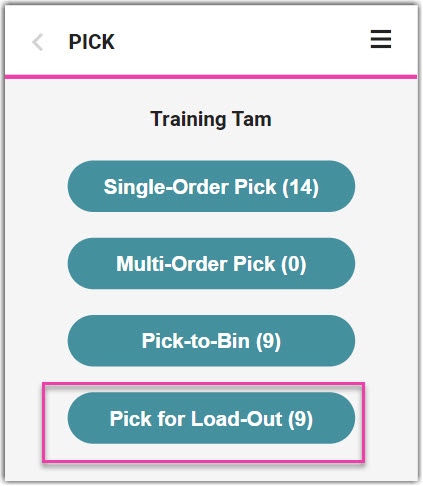
- Specify the order you wish to load using one of the following methods:
- Scan the associated Transaction ID or Pick Job ID, or manually enter the value, then hit < Enter > on your keyboard.
- Select an order manually.
- If desired, enter a 'Customer' to filter the list of available jobs.
- To begin the order shown, tap Start Load.
- To skip to the next prioritized order, tap Next Job.
- Under Load Verification, adjust the 'Staging Location' as needed, then scan or enter the relevant 'Door' and 'Trailer' numbers.
- Once the Trailer value is specified, the Scan All Movable Units dialog opens.
- Scan or enter each MU label expected on the order.
Note:
The MU labels and quantity of MUs must match the MUs identified during the pick process.
- Once each expected MU is verified, a green check appears and the dialog closes.
- Scan or enter each MU label expected on the order.
- Enter or scan the 'Seal' number associated with the load, then tap Next to open the Additional Charges dialog. The charges that populate in the grid include predefined manual (not automatic) charges that were set up in the Billing Wizard or created on the Create/Edit Order page in the WMS.
- If you have the following permission assigned to your role, you can view the total charge amount above the grid: Orders Module > Order Charges > Manage Charges. This amount includes all relevant automatic billing charges, as well as the predefined manual charges that were added during the pick process.
- To apply a charge amount for a predefined billing charge, tap the charge(s) from the grid and enter a 'Qty,' then tap Save to apply the associated charge amount. Repeat for each charge as needed.
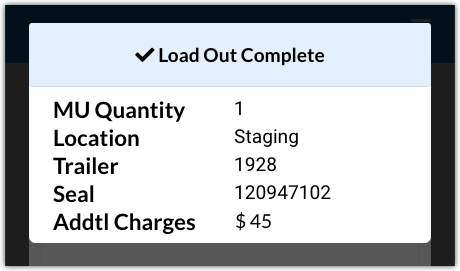
- Once all charges are applied, tap Complete Load-Out to confirm all MUs were loaded. A confirmation message appears that lists the MU quantity, location, trailer, seal, and total additional charges.
