Understanding Recurring Storage Charges
2.2 min read
|There are several steps involved with configuring and generating recurring storage charges. This article reviews each step needed to get started with recurring storage charges.
Recurring Storage Charges overview
Recurring Storage Charges can be generated and invoiced based on monthly, semi-monthly, or weekly Billing Periods. It is intended to charge your customer for the month, semi-month, or week ahead based on the inventory being counted at the end of the previous Billing Period.
Example: If there are 100 pallets in stock on the last day of January, your customer will be invoiced for 100 pallets stored for the month of February. Any new pallets that will arrive in the month of February can be charged an Initial Storage Fee at the time of receipt. This fee can be prorated based on whether it was received in the first half or second half of the month.
To calculate Recurring Storage Charges, automatic Inventory Counts can be set to a monthly, semi-monthly, weekly, or daily cadence.
Storage Rates for a given customer will determine the cadence of Inventory Counts for that customer’s products.
Storage Rates and Inventory Count Examples:
| Example A (monthly pallet rates) | If the Storage Rate for Customer “A” is $30 per month per pallet the cadence for the Inventory Count is Monthly or “Once (at the end of the billing period)”. |
| Example B (daily pallet rates) | If the Storage Rate for Customer “B” is $1 per day per pallet the cadence for the Inventory Count is Daily or “Every Day”. |
To create and manage recurring storage charges, you must have the following permission assigned to your user role: Administration Module > Recurring Storage Charges.
Step 1: Configure customer-level settings in Billing Wizard
The first configuration step is done in the Billing Wizard under System-Calculated Storage and Handling Charge Setup.
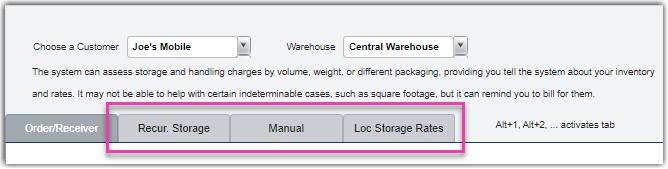
Within this setup, there are three separate ways to charge recurring storage rates:
- Automated recurring storage (under the Recur. Storage tab)
- If you decide that the default settings are sufficient, you must still click Save if you are setting these rates up for a new customer or a customer you have never generated recurring storage for previously.
- Manual recurring storage (under the Manual tab)
- These must be manually applied when you confirm the recurring storage charges at the end of the billing period—these apply on top of any automated charges you configure.
- Location storage (under the Loc Storage Rates tab)
- If you don't want to configure storage rates by item (reviewed in the next step), you can set a default rate to apply to specific storage locations configured in your warehouse.
For detailed guidance on each of these options, see Using the Billing Wizard and reference the System-Calculated Storage and Handling Charge Setup section.
Step 2: Configure item level settings
The second configuration step is done at the item level under Items > Manage Items.
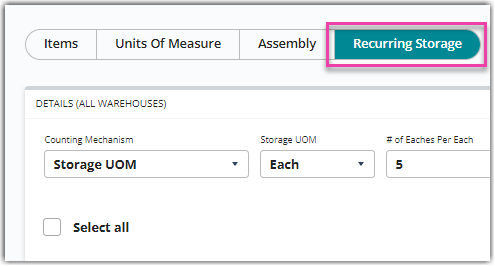
This method of charging allows you to calculate recurring storage charges based on a number of different inventory counting mechanisms.
To learn more about this setup process, please see Configuring Item-Level Recurring Storage Charges.
Step 3: Confirm recurring charges
Once your recurring storage charges are configured, you must confirm that the charges are accurate via Admin > Recurring Storage Charges.
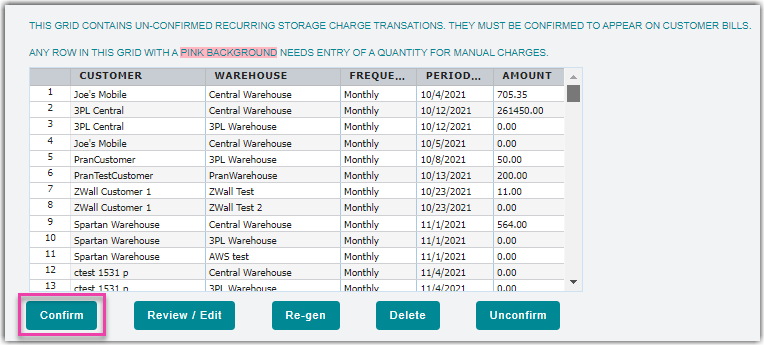
If you do not use this page to confirm these charges, they do not populate on your customer's invoice.
For confirmation instructions, see Reviewing Recurring Storage Charges.
Step 4: Generate invoices
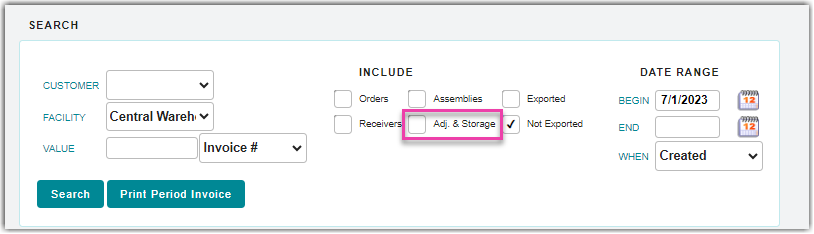
After your recurring storage charges are confirmed, these storage rates are considered adjustments and included on your customer's invoice once generated under Admin > Manage Invoices.
To search for recurring storage charges, enable the 'Adj. & Storage' search filter and note that the reference numbers are formatted in the data grid with the following metadata: CustomerID^FacilityID^DateTimeChargesWereGenerated-AutoBill.
For more information on generating invoices, please see Managing Invoices.