Exporting Invoices to QuickBooks
3.8 min read
|This article reviews how to export invoices to QuickBooks from the Manage Invoices page, use the QuickBooks Invoice Queue, and resolve the most common export errors.
To access the Manage Invoices page, you must have the following permission assigned to your user role: Administration Module > Manage Invoices.
Step 1: Send invoices to the QB Invoice Queue
The first step in exporting your invoices to your QuickBooks instance is finding the relevant invoices from the Manage Invoices page and exporting them to the QB Invoice Queue in 3PL Warehouse Manager.
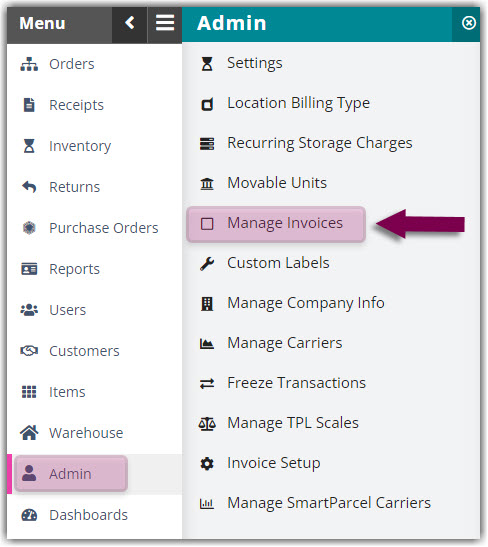
- Navigate to Admin > Manage Invoices.
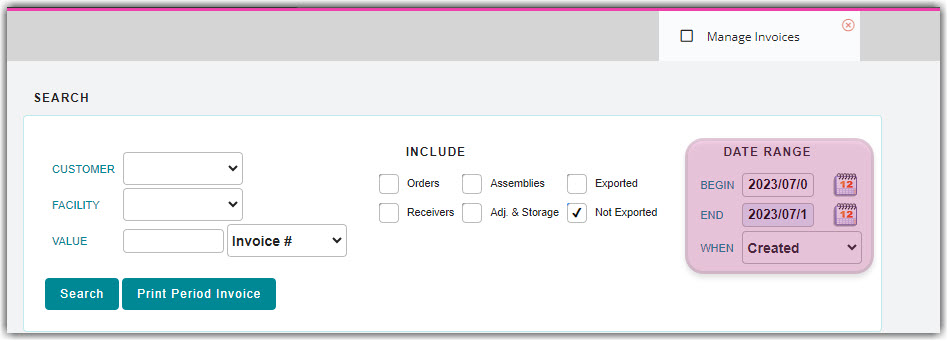
- Under Search, select a Customer and Facility from the respective drop-down menus.
- Under Include, select the transaction types you wish to include in your search.
- Orders includes invoices created from closed order transactions
- Receivers includes invoices created from closed receipt transactions
- Assemblies includes invoices created from confirmed assembly transactions
- Adj. & Storage includes invoices created from confirmed adjustment transactions, C2C transfers, and confirmed recurring storage charges
- Exported includes invoices that have already been exported to the QuickBooks Invoice Queue
- Not Exported includes invoices that have not been exported to the QuickBooks Invoice Queue
- Under Date Range, enter a Begin and End Date as needed, then click Search. The Invoice Queue grid populates the relevant transaction charges.
- To export one or more invoices, select the invoice(s) from the grid—using < Ctrl > or < Shift > on your keyboard to multi-select—then click Export.
- Specify whether you want to 'Set transaction's invoice delivered date to today'.
- Select whether you want to Consolidate into one invoice or create One invoice per transaction, then enter an 'Invoice Date'. Note: Selecting an invoice date is not currently supported for the QuickBooks Desktop integration—if using QB Desktop, the invoice date will automatically display as the date of export.
- Select the level of detail you wish to export, then click QuickBooks to send the invoice to the QB Invoice Queue. To learn more about each level of detail, see Understanding QuickBooks Online Billing Setup or Understanding QuickBooks Desktop Billing Setup depending on which QuickBooks integration you're utilizing.
If sending event notifications for consolidated invoices, please note that the system processes invoices in batches of 25—meaning, recipients of the 'Invoice Delivered' event will receive one email per batch of 25 transactions.
Step 2: View the export status in the QB Invoice Queue
Sending an invoice to the QB Invoice Queue from Admin > Manage Invoices sends the transaction data directly from 3PL Warehouse Manager to QuickBooks. The system's background processing pushes this data every ten minutes.
- Click QB Invoice Queue to view the status of the export.
- Under Queue Processing Status, specify which invoices you want to display in the grid.
- Completed shows all invoices that were successfully sent to QuickBooks
- Failed shows all invoices that failed to send to QuickBooks
- Queued shows all invoices that are queued to send to QuickBooks
- All shows all invoices in the queue
- Include Transaction Detail shows the transaction ID and reference number associated with an invoice
- Click Refresh to view the transactions related to your selections or to simply see the latest data.
- Once the system's background processing exports an invoice to QuickBooks, the 'Status' in the grid changes from "Queued" to "Completed" and you can find the relevant invoice in your QuickBooks instance (under Sales > Invoices in QuickBooks Online and Customers > Customer Central in QuickBooks Desktop).
If an invoice successfully exports to QuickBooks but contains zero total charges, the invoice does not populate in QuickBooks. You can view the charges associated with an invoice by generating a report.
Once exported, an Ultra Detailed invoice looks similar to the following image in QuickBooks Online and contains the following values:
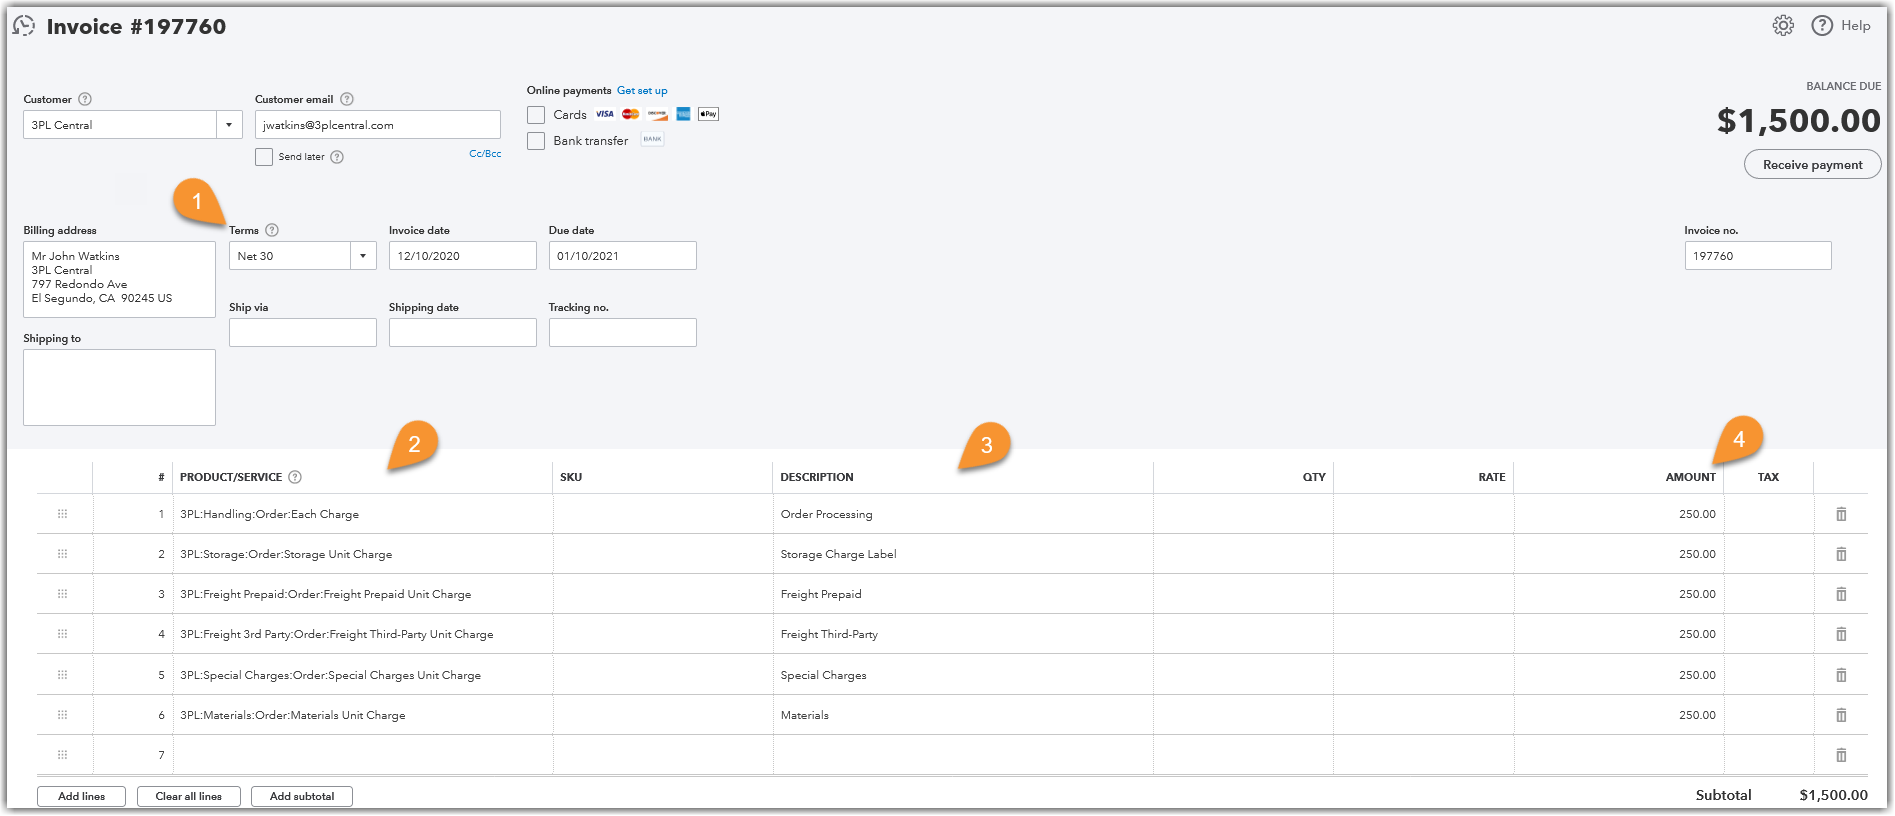
- Net Terms: Sets the net terms for the due date (supported with QB Online only)
- Product/Service: Includes your configured billing charges
- Description: Displays the 'Charge Label' defined in the Billing Wizard's Per Transaction Billing Setup
- Amount: Shows the total charge amount for each line item
To enlarge, right-click the image and select "View image" or "Open image in new tab"—the verbiage depends on your web browser.
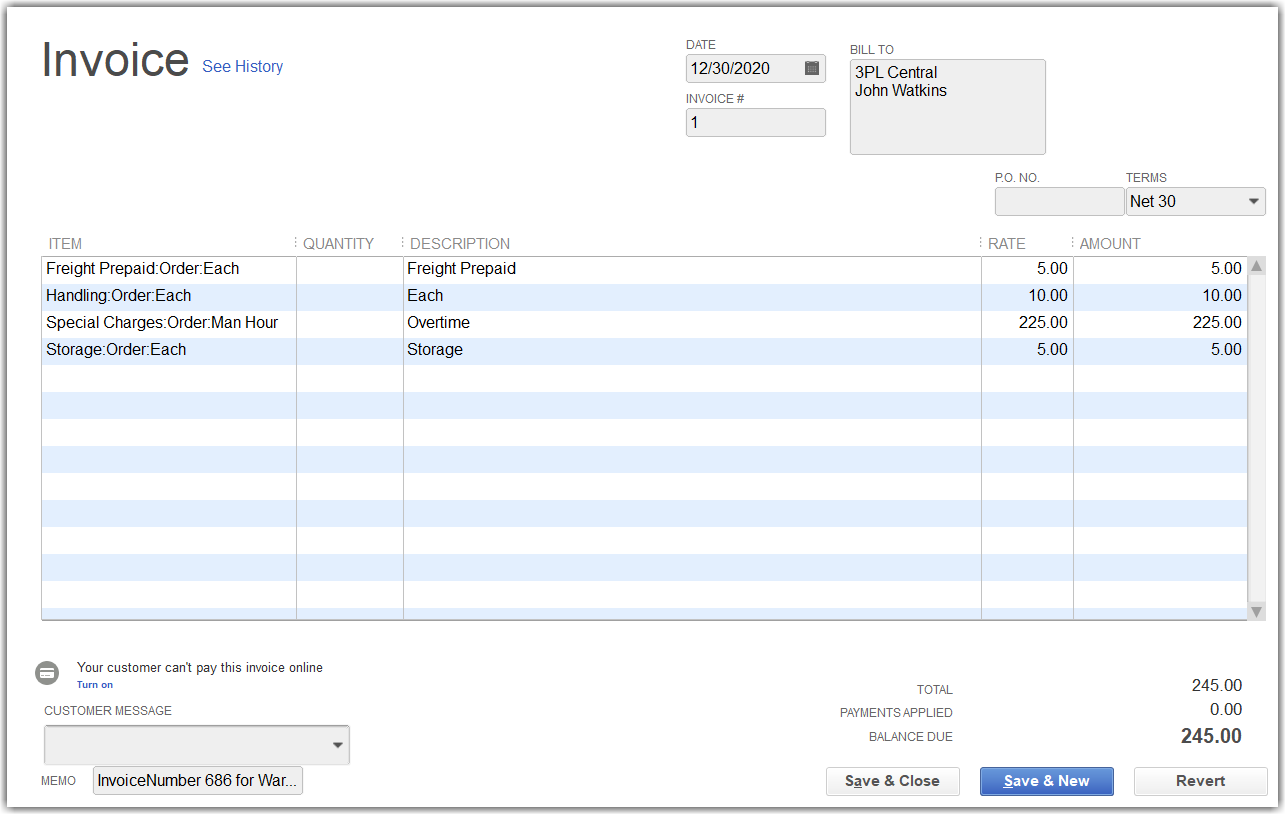
Alternatively, Ultra Detailed invoices in QuickBooks Desktop look similar to the following:
There are several other actions available in the QB Invoice Queue:
- Generate an invoice report. To generate a report of an invoice, select it from the grid, then click Run Report. An invoice populates with the ability to export.
- Edit or delete an invoice export. If you need to make changes to an invoice, remove it from the queue by selecting it from the grid and clicking Delete Queue. Note: If an invoice was successfully sent to QuickBooks, deleting it from the queue does not remove the invoice from QuickBooks. The same applies to invoices deleted in QuickBooks—if you delete it within QuickBooks, this does not remove the invoice from the QB Invoice Queue.
- Re-queue an invoice. After correcting failed invoices, click Retry Export to re-queue the invoice.
- Exit the queue. To exit the QuickBooks Invoice Queue and return to the main Manage Invoices page, click Close.
Step 3: Resolve errors as needed
When there is an error that causes the invoice export to fail, you can find the associated error message in the QB Invoice Queue within the 'Notes' column. Below are several common errors and resolution steps.
Mismatched QBCustName where Customer ID = X
Problem: The customer's name in QuickBooks does not match the Accounting Name in 3PL Warehouse Manager.
Solution: Find the associated 'Customer ID' in the Manage Customers grid using the 'Customer ID' grid column, then confirm the 'Accounting Name' customer setup field matches the name of the customer in QuickBooks exactly.
An item with the same key has already been added
Problem: Multiple customers have the same Accounting Name in 3PL Warehouse Manager. This could also occur if multiple customers have no Accounting Name value defined.
Solution: Update the 'Accounting Name' field for each customer so that they are unique and match exactly as listed in QuickBooks.
There is an invalid reference to QuickBooks Item "X" in the Invoice line.
Problem: Billing charge setups between QuickBooks and 3PL Warehouse Manager do not match.
Solution: Update charges in QuickBooks to match the transaction types, billing fields, and billing units of charges set up in 3PL Warehouse Manager. See Understanding QuickBooks Online Billing Setup for guidance.
Invoice export(s) failed. [Ref#] is not a valid name. Filenames cannot contain [/].
Problem: QuickBooks does not support the use of special characters in the invoice number.
Solution (Desktop): Contact Extensiv Support so a Support Engineer can help you complete the invoice transfer. Avoid including special characters in reference numbers when possible.
Solution (Online): Update your invoice number generation to use the transaction number instead of the reference number. See Configuring Invoice Settings for guidance.