
Managing Warehouses
The Manage Warehouse page allows you to edit existing facilities on your account. Since the number of warehouses configured for your account directly impacts your subscription fees, you must contact your Customer Success Manager to add, deactivate, or reactivate warehouses. (Please note that all transactions must be closed and all inventory must be removed before you can deactivate a warehouse.)
This article reviews how to edit an existing warehouse.
To access the Manage Warehouse page, you must have the following permission assigned to your user role: Warehouse Module > Manage Warehouse.
Guidelines
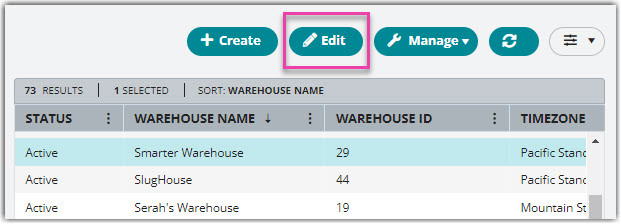
To get started, navigate to Warehouse > Manage Warehouse, select a warehouse from the grid, then click Edit.
Once selected, the warehouse record populates in the right pane of the screen with three configuration sections: Contact Information, Accounts, and Customizations. Each of these are reviewed below. Once you have entered all the necessary information, click Save.
Contact Information
The Contact Information section contains basic contact details for the warehouse, including the name, address, time zone, and general contact options. The Warehouse Name, Time Zone, and address-related fields are all required, and we recommend completing the remaining fields as needed for reference purposes.
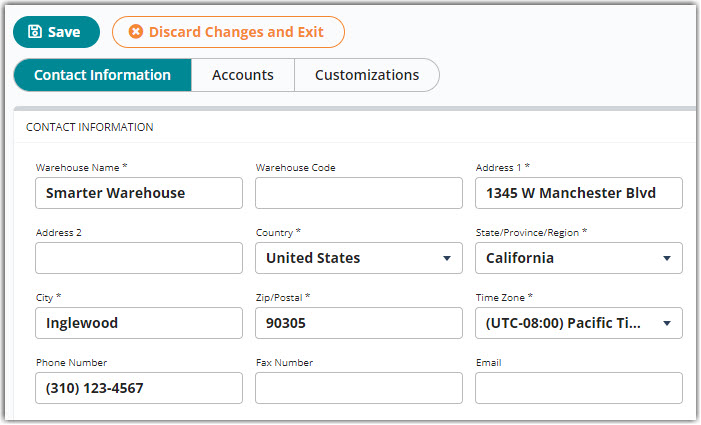
The 'Warehouse Code' field allows QuickBooks Desktop users to identify the relevant warehouse 'Class' when billing multiple facilities—this value must match the Class value exactly as it appears in your QuickBooks instance.
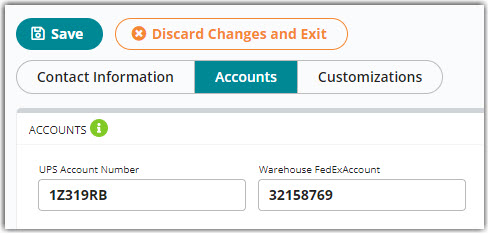
Accounts
The Accounts section allows you to specify your primary account numbers for UPS and FedEx shipments. Note that while these fields are optional and not required to ship packages with SmartParcel, they are particularly relevant fields if you are using a flat file carrier integration.
Regardless of whether you choose to enter this data—if you are a SmartParcel user, you are required to also set up your warehouse account information in the Small Parcel space—for guidance, please see Shipping in Small Parcel Suite.
Customizations
The Customizations section contains several custom fields that directly impact other parts of 3PL Warehouse Manager. Each field is detailed below.

- Fuel Surcharge: Defines the default fuel surcharge amount—if a customer's fuel surcharge is not defined, the Port Transportation and FSC billing script uses the amount defined here
- Freight Rate Location Code: Identifies the code that corresponds with a predetermined freight charge (not currently supported)
- Number of Fields Per Location: Specifies the number of sub-sections available when defining location names
- Measurement Standard: Defines the measurement values, such as for dimensions and weight, throughout the system for all customers associated with the warehouse
- Use only predefined locations: When selected, prevents users from creating locations when adjusting inventory
- Prevent Partial Order Allocation (Manual Allocation): When selected, prevents orders from being partially allocated—meaning, if an order cannot be fully allocated, it will not be allocated at all
- Enable Replenishment: Enables replenishment logic for this warehouse. Inventory is be made available for replenishments based on Location and Item settings.
- Replenish from fewest locations: Tells the system to use locations with higher quantities when creating a move request. This overrides item allocation settings such as (FIFO, LIFO, FEFO) when selecting inventory for a replenishment move request.
- SmartPack - Require Scan to Pack: (Available in Sandbox only) Requires you to scan each SKU during packing. Learn more about this feature in this article.
- Enable cross-customer pick jobs: (Available in Sandbox only) Enables the ability to create pick jobs containing multiple customers who share SKUs.
After configuring a warehouse, you can assign customers to a warehouse where they can store their inventories. Please go to the Managing Customer article and Managing User Roles article for more information.
