3PL Warehouse Manager

Updated on July 12th, 2023

  • Extensiv Hub
    Popular Articles Getting Started Using Hub Technical Issues & FAQs Extensiv's Ideas Portal
  • 3PL Warehouse Manager
    Receiving Operations Inventory Management Shipping Operations System Configuration Scanning Operations Integrations Content Best Practice Resources Release Notes Popular Articles Troubleshooting Guides
  • Warehouse Management
    Getting Started Admin Console Shipping Order Picking & Packing Receiving Customer Portal Cycle Counting Kit Building Managing Users Barcode Scanner Import/Export Integrations Barcoding Wave Picking Bin Move Mobile Receiving and Picking Settings Popular Articles Reporting
  • Order Management
    Dashboard Orders Inventory Purchase Orders Shipments Customers Products Analytics Settings API API Integrations Accessing and Navigating Order Manager Error Messages Order Manager Popular Articles Accounting Integrations
  • Integration Management
    Getting Started with Integration Manager General Support Troubleshooting Extras & Addons API Documentation Popular Articles Order Sources Order Destinations
  • FAQs
  • Network Manager
    Getting Started Order Routing Management Technical Issues Shopping Carts Settings Settings, Products, and Orders
  • Billing Manager
    Getting Started Using Billing Manager
  • Release Notes
    Extensiv Sandbox Extensiv Extensiv Hub 3PL Warehouse Manager Integration Management Warehouse Management Order Management Billing Manager
  • Fulfillment Marketplace
    Getting Started
  • Sandbox
    Getting Started
+ More
  • Help Center
  • 3PL Warehouse Manager
  • System Configuration
  • Warehouse Setup
  • System Configuration
    • Warehouse Setup
        • Configuring 3PL Settings
        • Managing Warehouses
        • Creating Locations
        • Mass-Updating Locations
        • Using Custom Labels
        • Freezing Transactions
    • Customer Setup
        • Managing Customers
        • Managing Customer Notifies
        • Managing Suppliers
        • Ignoring SKUs
        • Understanding Custom Fields
        • Cloning Customers
        • Connecting to 3PL Warehouse Manager SFTP Service
    • User Setup
        • Managing User Roles
        • Managing Users
    • Billing Setup
        • Using the Billing Wizard
        • Per Transaction Receiving Scripts
        • Per Transaction Shipping Scripts
        • Understanding Recurring Storage Charges
        • Managing Invoices
        • Exporting Invoices to QuickBooks
        • Reviewing Recurring Storage Charges

Mass-Updating Locations

The Mass Update Locations page allows you to make changes to existing locations via an import file rather than manual entry. This process extracts data from the locations that have been entered into the system, allows you to make changes to the locations through a spreadsheet, and then places the file back into the system to apply the modified settings.

This article reviews how to mass-update locations.

To update locations, you must have the following permission assigned to your user role: Warehouse Module > Manage Locations.


Please note that updating more than 1000 locations at one time will likely result in a timeout error.

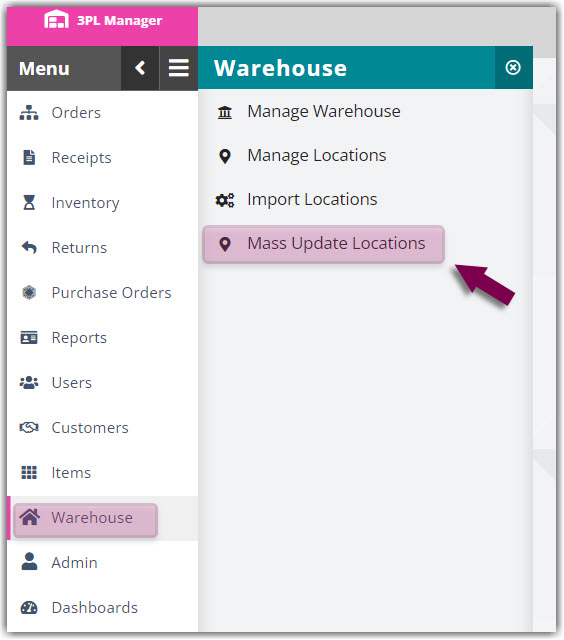
  1. To get started, navigate to Warehouse > Mass Update Locations.
  2. Select the relevant Warehouse from the drop-down menu, then click Export.
  3. Once the exported file downloads, open the file and make the changes that you need under the appropriate columns.

    Important! If numerical values contain leading zeros or exceed 11 characters, they automatically convert to scientific notation format upon export. To ensure your data is imported correctly, you must re-format these converted cells to numeric strings.


    The easiest way to do this using Excel is to copy your export data and open a new Excel sheet, select the entire sheet, then change the Number format to 'Text'.

    Once you have formatted the text, paste your data in, then make your changes. Unlike the default import template process, do not remove the column headers.
  4. After you make your changes, click Save As, enter a new name for the file so you can recognize the updated version of it, then choose to save the file as Text (Tab delimited).
  5. On the Mass Update Locations page, click Browse, select the updated file, then click Process File.
  6. A preview of the imported data displays in the text boxes. Once you've verified the data for accuracy, click Update Locations to finalize the import.

The locations are now updated in 3PL Warehouse Manager and available for viewing/editing under Warehouse > Manage Locations.


Extensiv University

Gain deeper insights and learn more about 3PL Warehouse Manager with our online course at Extensiv University.
mass update bulk update

Was this article helpful?

Yes
No
Share additional feedback about this article

Related Articles

  • Importing Purchase Orders
  • Item-Based Handling Fees
  • Managing Ship-to Contacts
  • Picking Orders with SmartScan

Not finding the help you need?

Contact Support
Solutions
  • Solutions for Brands
  • Solutions for 3PLs
  • Solutions for 4PLs
  • Solutions for B2B
Products
  • Extensiv 3PL Warehouse Manager
  • Extensiv Warehouse Manager
  • Extensiv Order Manager
  • Extensiv Integration Manager
  • Extensiv Network Manager
Products
  • Customer Success
  • Implementation
  • Consulting
Ecosystem
  • Fulfillment Marketplace
  • Integrations
  • Partners
  • Become a Partner
Resources
  • Resource Library
  • Blog
  • Market Insights
  • What is a 3PL?
  • What is a 4PL?
  • What is a WMS?
  • Why a Cloud-based WMS?
  • Glossary
Help
  • Help Center
  • API Documentation
  • Extensiv Univerisity
  • Community
  • System Status
  • Extensiv Logo
  • 100 N Pacific Coast Hwy, Suite 1100, El Segundo, CA 90245
  • |
  • Contact Us:
  • 83-EXTENSIV 888.375.2368 (main)
  • |
  • 310.844.7570 (local)
  • Copyright © 2023 Extensiv
  • |
  • All rights reserved.
  • Privacy Policy
  • |
  • Terms of Service
  • Follow Us:
Expand