3PL Warehouse Manager

Updated on July 11th, 2023

  • Extensiv Hub
    Popular Articles Getting Started Using Hub Technical Issues & FAQs Extensiv's Ideas Portal
  • 3PL Warehouse Manager
    Receiving Operations Inventory Management Shipping Operations System Configuration Scanning Operations Integrations Content Best Practice Resources Release Notes Popular Articles Troubleshooting Guides
  • Warehouse Management
    Getting Started Admin Console Shipping Order Picking & Packing Receiving Customer Portal Cycle Counting Kit Building Managing Users Barcode Scanner Import/Export Integrations Barcoding Wave Picking Bin Move Mobile Receiving and Picking Settings Popular Articles Reporting
  • Order Management
    Dashboard Orders Inventory Purchase Orders Shipments Customers Products Analytics Settings API API Integrations Accessing and Navigating Order Manager Error Messages Order Manager Popular Articles Accounting Integrations
  • Integration Management
    Getting Started with Integration Manager General Support Troubleshooting Extras & Addons API Documentation Popular Articles Order Sources Order Destinations
  • FAQs
  • Network Manager
    Getting Started Order Routing Management Technical Issues Shopping Carts Settings Settings, Products, and Orders
  • Billing Manager
    Getting Started Using Billing Manager
  • Release Notes
    Extensiv Sandbox Extensiv Extensiv Hub 3PL Warehouse Manager Integration Management Warehouse Management Order Management Billing Manager
  • Fulfillment Marketplace
    Getting Started
  • Sandbox
    Getting Started
+ More
  • Help Center
  • 3PL Warehouse Manager
  • System Configuration
  • Customer Setup
  • System Configuration
    • Warehouse Setup
        • Configuring 3PL Settings
        • Managing Warehouses
        • Creating Locations
        • Mass-Updating Locations
        • Using Custom Labels
        • Freezing Transactions
    • Customer Setup
        • Managing Customers
        • Managing Customer Notifies
        • Managing Suppliers
        • Ignoring SKUs
        • Understanding Custom Fields
        • Cloning Customers
        • Connecting to 3PL Warehouse Manager SFTP Service
    • User Setup
        • Managing User Roles
        • Managing Users
    • Billing Setup
        • Using the Billing Wizard
        • Per Transaction Receiving Scripts
        • Per Transaction Shipping Scripts
        • Understanding Recurring Storage Charges
        • Managing Invoices
        • Exporting Invoices to QuickBooks
        • Reviewing Recurring Storage Charges

Understanding Custom Fields

Custom fields (formerly known as flex fields) are most commonly used for EDI setups where specific line item data needs to pass into 3PL Warehouse Manager. Also referred to as saved elements, you can also use these fields to capture any data point that does not have a predefined field in the system.

There are two different types of custom fields: line item and transactional. There are also two places in which you can set up custom fields: under Customers > Custom Fields and on a transaction-by-transaction basis.

This article reviews the steps needed to create a custom field that can be applied across all transactions for a customer. Once configured, the custom fields display on the relevant transaction type, as well as on any desired custom reports or UCC labels.

To learn more about configuring custom fields on a transaction-by-transaction basis, please see Custom Order Info instead.


Note there are three requirements for accessing the Custom Fields page:

  1. You must have custom fields enabled for your account under Admin > Settings.
  2. Once enabled for your account, you must enable the use of custom fields for each relevant customer under Customers > Manage Customers by activating the 'Enable custom fields' setting under the System section.
  3. Users must have the following permission granted to their user role: Customer Module > Manage Custom Fields.


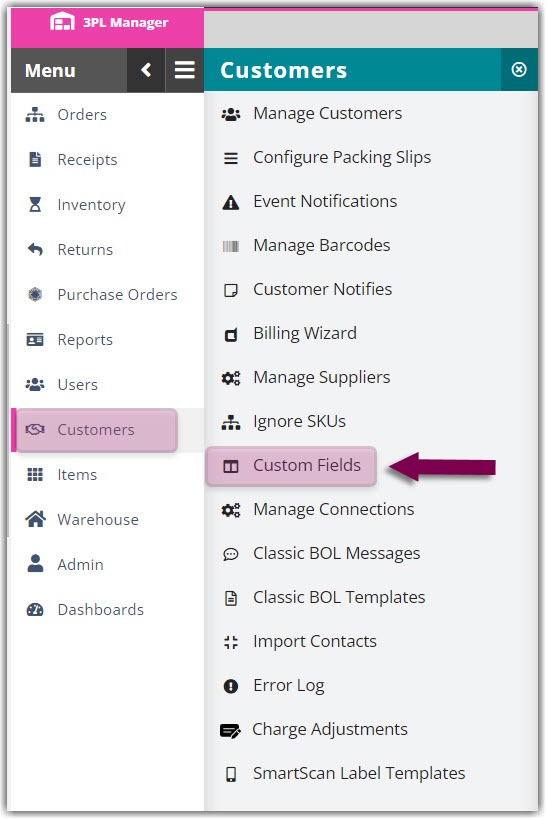
  1. Navigate to Customers > Custom Fields.


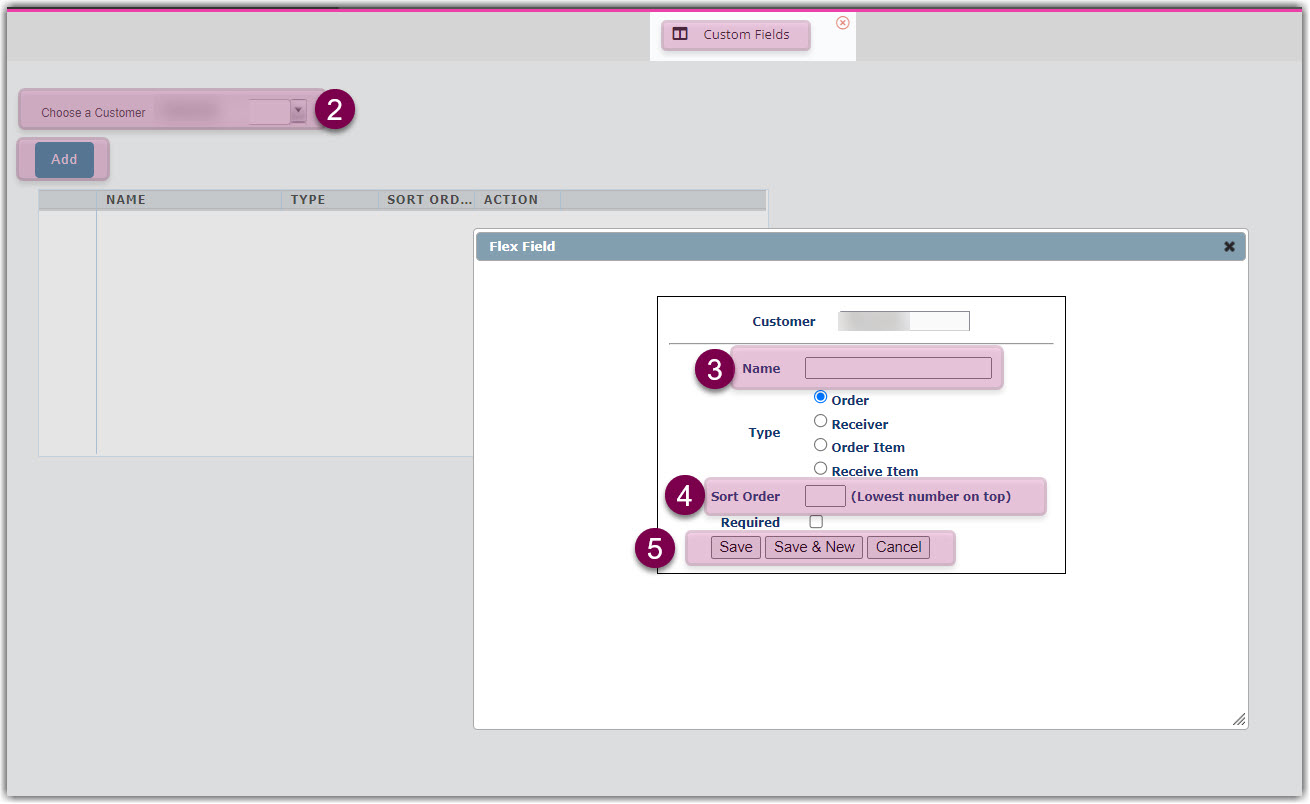
  2. Select a customer from the drop-down menu, then click Add.
     
  3. Enter the 'Name' of the field you want to add, then select the 'Type' of field—i.e., order or receipt; transactional or line item.
     
  4. Optional: Enter the 'Sort Order' if you want to display custom fields in a specified order, then click the selection box next to Required if you want the custom field to be required to save an order.
     
  5. If you have just one custom field to enter, click Save. If you want to add additional custom fields, click Save & New and repeat these steps.

If you need to modify or delete a custom field, do so from the same Custom Fields page. To modify, click the Edit icon next to the appropriate custom field, make your changes, then click Save. To delete, click the trash icon, then click OK to confirm.


field analysis customize fields

Was this article helpful?

Yes
No
Share additional feedback about this article

Related Articles

  • Understanding Allocation Logic
  • Entering Carrier and Routing Information
  • Managing Retailers
  • Common Transactional Shipping Charges

Not finding the help you need?

Contact Support
Solutions
  • Solutions for Brands
  • Solutions for 3PLs
  • Solutions for 4PLs
  • Solutions for B2B
Products
  • Extensiv 3PL Warehouse Manager
  • Extensiv Warehouse Manager
  • Extensiv Order Manager
  • Extensiv Integration Manager
  • Extensiv Network Manager
Products
  • Customer Success
  • Implementation
  • Consulting
Ecosystem
  • Fulfillment Marketplace
  • Integrations
  • Partners
  • Become a Partner
Resources
  • Resource Library
  • Blog
  • Market Insights
  • What is a 3PL?
  • What is a 4PL?
  • What is a WMS?
  • Why a Cloud-based WMS?
  • Glossary
Help
  • Help Center
  • API Documentation
  • Extensiv Univerisity
  • Community
  • System Status
  • Extensiv Logo
  • 100 N Pacific Coast Hwy, Suite 1100, El Segundo, CA 90245
  • |
  • Contact Us:
  • 83-EXTENSIV 888.375.2368 (main)
  • |
  • 310.844.7570 (local)
  • Copyright © 2023 Extensiv
  • |
  • All rights reserved.
  • Privacy Policy
  • |
  • Terms of Service
  • Follow Us:
Expand