CSV Warehouse Mapping Instructions
1.5 min read
|To set up your own custom CSV format for sending orders from Extensiv Integration Manager to your warehouse, go to the WMS Setup tab. If you already have defined some formats, you can select them here, otherwise, click the Customize CSV Fields button at the bottom of the page. You don't need to fill out any of the other CSV settings fields to begin this process.
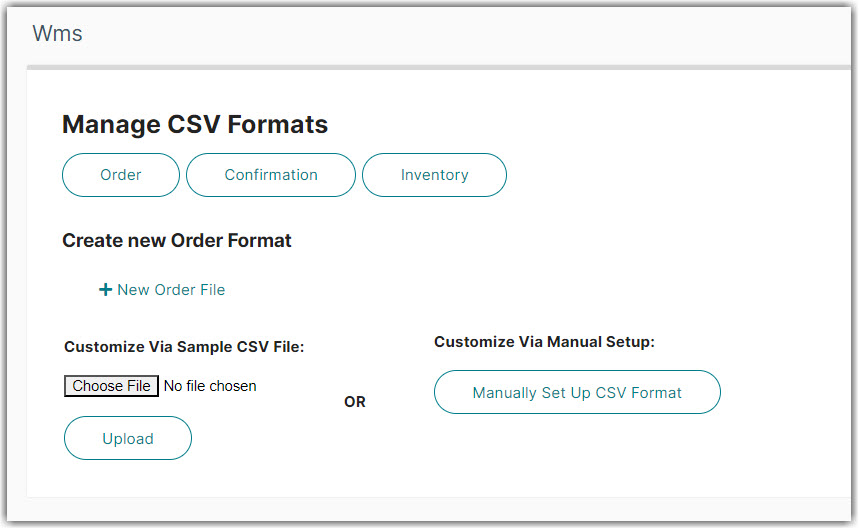
- Select the file type you will be mapping (Order, Confirmation, or Inventory).
- Click New Order File. You can come back here later and edit an existing format if needed. There will be another button displayed for editing.
- If you have a sample file, choose it on the left and click Upload. If not, click Manually Set Up CSV Format on the right.
When uploading a sample file for mapping, large files are not allowed. If your file is too big, try uploading a smaller sample file or edit your file so it only contains a few orders.

You must next define the delimiter in the file (eg: comma), if the file will have a header row, and whether orders with multiple products will be listed Vertically (One item per line), or Horizontally (have additional products added at the end of the line). Double check these and make sure they are correct. An error here will cause your orders to be loaded incorrectly or could cause some records to be missed.
Next, for each column in the CSV file, you must select what type of data is there. Choose from the dropdown.
Order Number
Both the cust_ref and cust_po_no fields will contain a unique order number. Cust Ref is a shorter version guaranteed to be 16 digits or shorter. Cust Po No can be up to 45 characters. Choose the best value for your warehouse, or choose both!
If your CSV file is Vertical each row in your CSV file must have exactly 1 item and contain the same number of columns. A new line is required for each additional item on an order with the order number repeated.
If your CSV file is Horizontal, all the item fields must be at the end of the file. Just add the fields for the first item and Integration Manager will automatically append additional items after it as needed if you receive an order with multiple items.
Additionally, you can add Constant Values to the file where needed. This lets you pass a value to your warehouse which is not actually in Integration Manager. Just select the constant_value in the Order Field dropdown and enter what data should be placed in it.
Extra/Custom fields from specific Order Sources can also be passed to the warehouse. Instructions are available here: CSV Mapping - Extra Fields
