 Integration Management

Updated on September 11th, 2025
-
Order Destinations
- Amazon MCF
- Amware
- Anchanto
- ApparelMagic OMS
- Bergen Logistics
- ChannelAdvisor
- Cin7 Omni
- CIO Direct
- Connected Business
- Core Warehouse
- CoreCommerce OMS
- CSV Warehouse
- Cin7 Core OMS (Dear)
- Deposco
- DesktopShipper
- DSV
- Enlinx
-
Extensiv 3PL Warehouse Manager
- Extensiv 3PL Warehouse Manager Alerts
- Extensiv 3PL Warehouse Manager API Permissions
- Extensiv 3PL Warehouse Manager Error Code: ValueNotSupported. Not assigned to Customer X
- Extensiv 3PL Warehouse Manager Overview
- Setting Up Extensiv 3PL Warehouse Manager
- Setting Up International Warehouse Group
- Setting Up Kelly Global Logistics
- Extensiv Warehouse Manager
- Feature List
- Fishbowl
- Flowspace
- GoCadence
- HighJump
- Infoplus Commerce
- Katana MRP
- Landmark Global
- LogiView
- Logiwa
- Moulton Logistics
- NetSuite OMS
- Northstar Automation
- OfficeDepot
- Omni Logistics
- Orderbot
- PowerHouse
- Propago
- Rakuten Super Logistics
- Red Stag Fulfillment
- RF Pathways
- Rockpoint Logistics
- Ruby Has
- Ship Central
- ShipBob
- Shipedge
- ShipHero
- Shippo
- Ship-Right Solutions
- ShipStation
- Shopping Cart Fulfillment
-
Extensiv Order Management OMS
- Extensiv Order Manager OMS - Cannot acknowledge inventory for non-manual sales channels
- Extensiv Order Manager OMS Inventory Not Syncing (Sync Per Order Manager Sales Channel Mode)
- Extensiv Order Manager OMS Overview
- Extensiv Order Manager OMS Settings Order
- How to enable inventory sync from Extensiv Order Manager OMS
- Setting Up Extensiv Order Manager OMS
- SmartTurn
- SnapFulfil
- SphereWMS
- Unleashed
- VeraCore
- Vin eRetail
- Wolin Design Group
-
Zoho Inventory
- Adding Custom Sales Order Fields in Zoho
- Error Retrieving Inventory Levels from Zoho
- Setting Up Zoho Inventory OMS
- Zoho - Error message: The Customer is inactive. Please enter an active Customer.
- Zoho - Error message: Unable to find or create Customer Record in Zoho for order number
- Zoho Inventory OMS Integration Overview
Setting up Flowspace
Integration specs:
Supported functions
- Order Download
- Inventory Sync
- Shipment Confirmation
Required Parameters (Provided by Flowspace)
- API Key
Workflow

- Sales Order Download from Order Sources to Integration Management
- Sales Order Delivery from Integration Management to Flowspace
- Shipment Tracking from Flowspace to Integration Management
- Shipment Tracking from Integration Management to Order Source
Step-by-step guide:
- Contact Flowspace to obtain your API key.
- Open Integration Management.
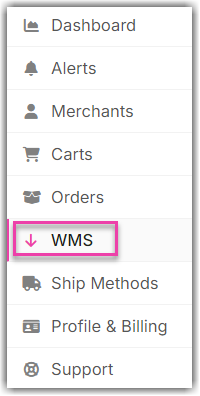
- Click on WMS and click Change WMS next to the dropdown list. Notice that the Change WMS disappears after clicking it, allowing you to select from the list.

- Enter the API Key.
- Set to No the Enable Flowspace Test Environment.
In order to use this account for live orders, the Enable Flowspace Test Environment drop down must be set to No. This is the default setting and should only be changed by developers who need to test new connections or functionality.
- Click Test WMS Connection to ensure that you are able to connect to Flowspace with your API key.
During the test process, Integration Management will acquire additional information from Flowspace that is necessary for the setup of your account. It is at this time that we will request and store your Flowspace customer id, as well as a list of warehouses that you have set up in Flowspace. You will be able to select from your list of warehouses during the setup of your cart or marketplace.
When setting up a new cart you have the option to choose a specific warehouse that you would like to route all orders to, as well as enter your Shipping Billing Account. If no warehouse is chosen, the default option is for Flowspace to automatically route the order to the warehouse closest to the order destination. If the Flowspace Shipping Billing Account Number field is left blank, the orders will default back to the shipping information that is passed from the cart with the order.