Configuring Invoice Settings
If your QuickBooks Online account is integrated with 3PL Warehouse Manager, you can modify the invoice number generation schema and customer notification options for your customer's invoices.
This article reviews how to configure your invoice settings for QuickBooks Online.
Please note that invoice settings are only applicable to QuickBooks Online users—this configuration is not supported with QuickBooks Desktop.
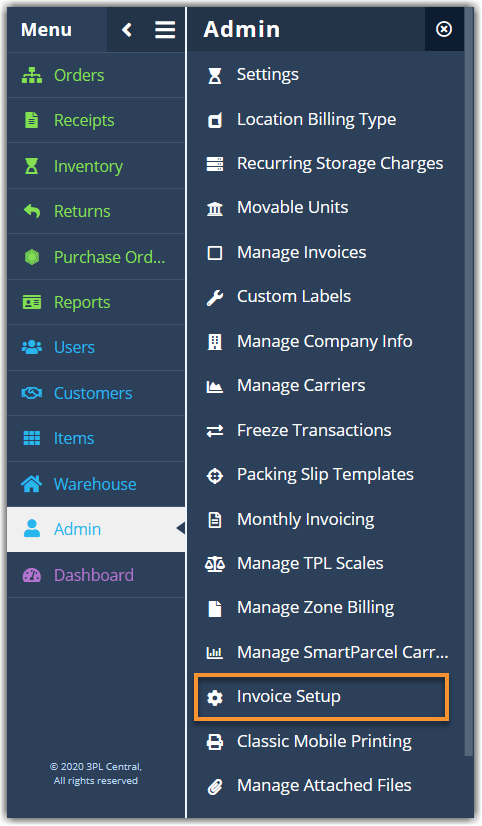
- Navigate to Admin > Invoice Setup in 3PL Warehouse Manager.

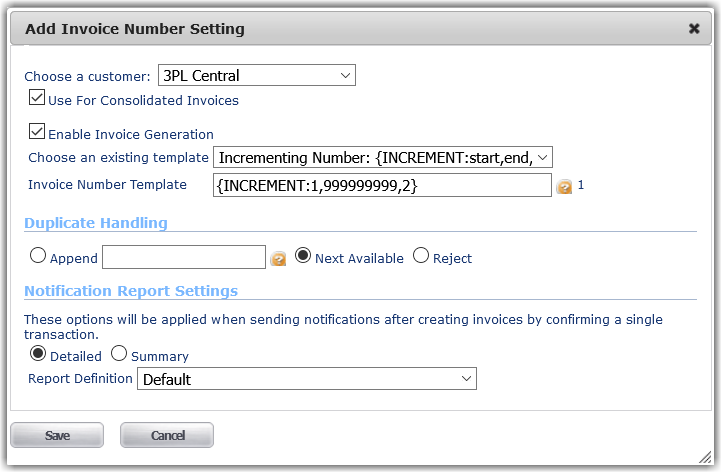
- If you want the invoice settings to be the same for all of your customers, click the Edit icon next to the Default Invoice Number Setup in the grid. If you want to create customer-specific invoice settings, click Add.
- Complete each field, then click Save. Note that the asterisk (*) next to the below fields indicate that these settings are unique to the customer-specific invoice settings.

- Choose a customer*: Allows you to select the relevant customer
- Use For Consolidated Invoices*: Option to use this configuration when consolidating multiple transactions into one invoice
- Enable Invoice Generation: Option to allow the generation of invoices for this customer
-
Choose an existing template: Allows you to augment the invoice number schema
- Transaction ID: Pulls the relevant transaction number as the invoice number
- Reference Number: Pulls the relevant reference number as the invoice number (default setting)
-
Incrementing Number: Allows you to choose a starting number, ending number, and incremental value for the schema
- We recommend using a low number for the 'start', a very large number for the 'end', and a relatively small increment so that the schema never ends.
- For example, {INCREMENT:1,99999999999,2} would create your very first invoice number for this customer as 1, your second invoice number as 3, and so on—until you reach invoice number 99999999999.
- Prefix + Transaction ID: Allows you to specify a value that precedes the transaction number for the schema—e.g., if you define "3PL-{OBJID}" as the schema, the invoice number for transaction 43420 would be "3PL-43420"
- Transaction ID + Suffix: Allows you to specify a value that succeeds the transaction number for the schema—e.g., if you define "{OBJID}-3PL" as the schema, the invoice number for transaction 43420 would be "43420-3PL"
- Date + Transaction ID: Pulls the invoice generation date, according to the time zone defined in your warehouse setup, and relevant transaction number as the invoice number—e.g., an invoice generated on October 17, 2020 for transaction 43420 would read as "2020-10-17-43420"
- Customer Name + Date: Pulls the customer's name and invoice generation date, according to the time zone defined in your warehouse setup as the invoice number—e.g., an invoice generated on October 17, 2020 for customer Extensiv would read as "Extensiv-2020-10-17"
-
Duplicate Handling: Allows you to control how the system handles duplicate invoice numbers to ensure that all invoices are unique
- Append: Option to specify a value at the end of the system-generated invoice number (special characters are not supported)—e.g., if you choose to append "-copy", a duplicate invoice number of 1234 would change to "1234-copy"
- Next Available: If using the Incrementing Number template, this option uses the next available incremental number
- Reject: Fails the invoice delivery and leaves the duplicate invoice in the Failed queue for further review
-
Notification Report Settings: These settings apply if you don't manually generate an invoice on the Manage Invoices page and include invoices in customer notifications
- Detailed: Includes every charge amount on the transaction
- Summary: Includes the total charge amount for the transaction
- Report Definition*: Allows you to select an available custom invoice template as the format of the invoice
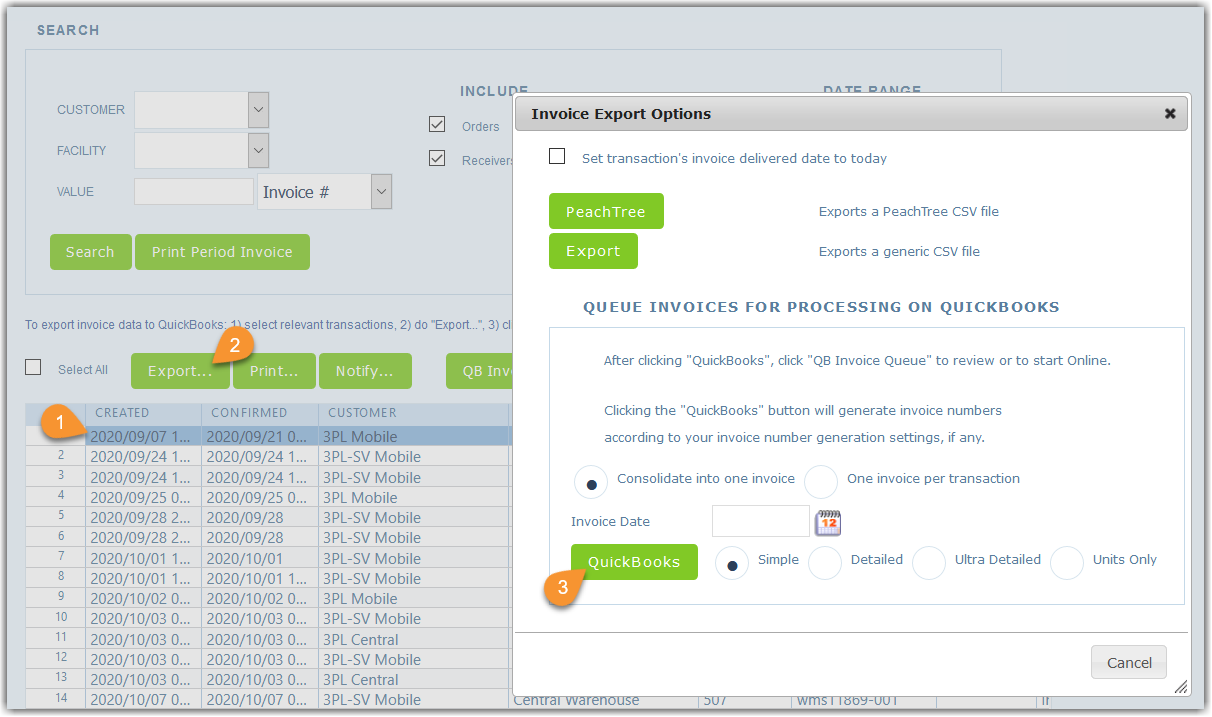
Once saved, the specified schema applies each time you manually generate an invoice via Admin > Manage Invoices. Select an invoice, click Export, make your needed selections, then click QuickBooks to generate the custom invoice number and export the invoice to the QuickBooks Invoice Queue.

