3PL Warehouse Manager

Updated on January 9th, 2023

Contact Us

If you still have questions or prefer to get help directly from an agent, please submit a request.
We’ll get back to you as soon as possible.

Please fill out the contact form below and we will reply as soon as possible.

  • Extensiv Hub
    Getting Started Using Hub Technical Issues & FAQs
  • 3PL Warehouse Manager
    Receiving Operations Inventory Management Shipping Operations System Configuration Scanning Operations Integrations Content Best Practice Resources Release Notes
  • Warehouse Manager
    Getting Started Admin Console Shipping Order Picking & Packing Receiving Customer Portal Cycle Counting Kit Building Managing Users Barcode Scanner Import/Export Integrations Barcoding Wave Picking Bin Move Mobile Receiving and Picking Settings
  • Order Manager
    Dashboard Orders Inventory Purchase Orders Shipments Customers Products Analytics Settings API API Integrations Accessing and Navigating Order Manager Error Messages Order Manager
  • Integration Manager
    General Support Order Sources Order Destinations Troubleshooting API Documentation Extras & Addons
  • FAQs
  • Support
+ More
  • Help Center
  • 3PL Warehouse Manager
  • Integrations Content
  • QuickBooks Online
  • Integrations Content
    • EDI Processes
        • Getting Started with an EDI Integration
        • Extensiv Carton Label Library
        • EDI Processing
        • Setting Up FTP Email Notifications
        • Sending Receipt Advice
        • Printing UCC Labels
        • Sending an ASN
        • Troubleshooting ASN Errors
        • Using the Customer Error Log
        • Understanding Common EDI Errors
    • API Shopping Cart Integrations
        • Getting Started with Shopping Cart Integrations
        • ShipStation Integration
        • Shopify Shopping Cart Connection
        • WooCommerce Shopping Cart Connection
        • Amazon Shopping Cart Connection
        • Magento 2.x Shopping Cart Connection
        • Volusion Shopping Cart Connection
        • eBay Shopping Cart Connection
    • REST API
        • Getting Started with Credential Management
        • Providing REST API Access
        • Webhooks FAQs
        • Configuring Webhooks
        • Implementing Webhooks
    • QuickBooks Desktop
        • Connecting a QuickBooks Desktop Account
        • Connecting Customers to QuickBooks Desktop
        • Understanding Class Tracking
        • Understanding QuickBooks Desktop Billing Setup
    • QuickBooks Online
        • Connecting a QuickBooks Online Account
        • Connecting Customers to QuickBooks Online
        • Configuring Invoice Settings
        • Defining International Tax Codes
        • Understanding QuickBooks Online Billing Setup
    • SmartDock
        • Understanding SmartDock
        • SmartDock FAQs
        • Scheduling with an Existing Receipt
        • Scheduling and Creating a Receipt
        • Scheduling with an Existing Order
    • General Information
        • Whitelisting IP Addresses

Connecting Customers to QuickBooks Online

Once your QuickBooks Online account is connected, you can capture each of your customers' QuickBooks information within 3PL Warehouse Manager. This article reviews each customer setup field that maps over to QuickBooks.

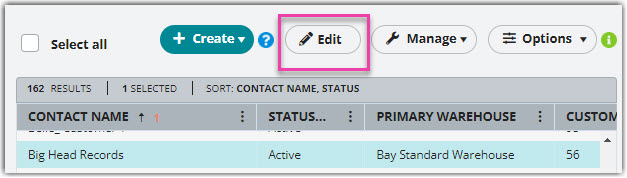
First, navigate to Customers > Manage Customers in 3PL Warehouse Manager, then select the relevant customer's record and click Edit.


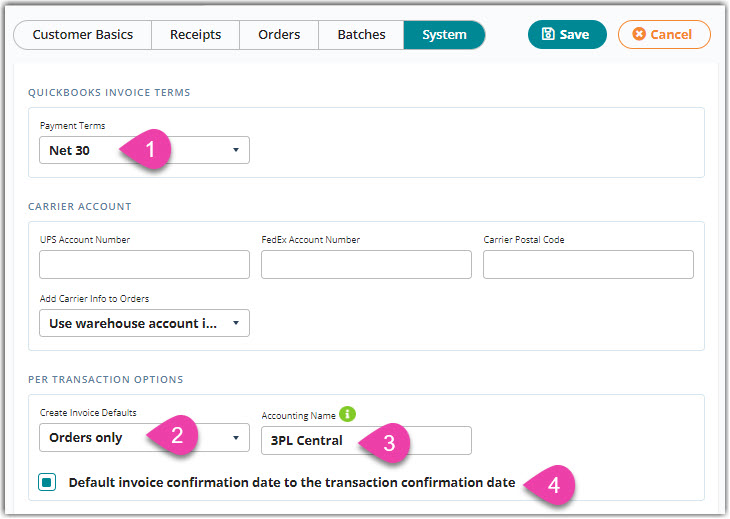
Then, select the System configuration section, then update the following accounting fields to connect your customer's QuickBooks information to the system.


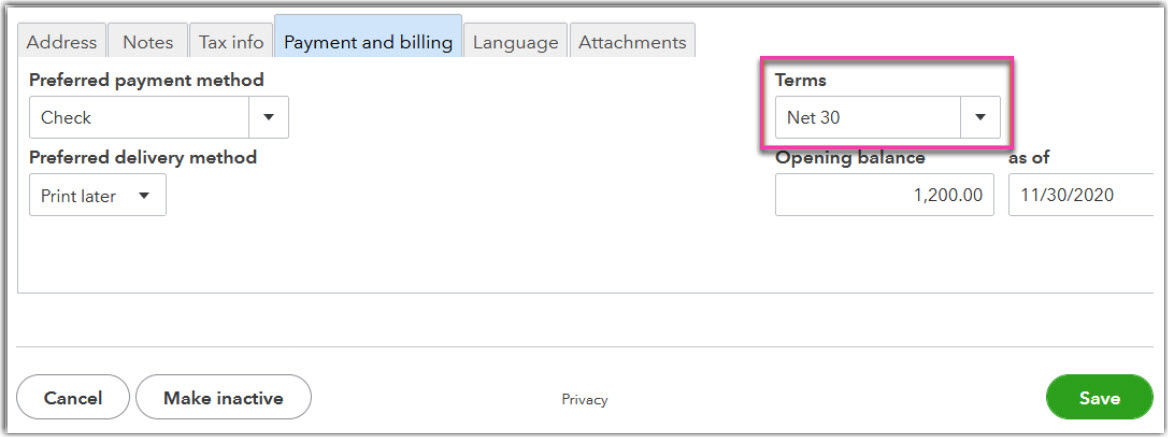
  1. Payment Terms: Allows you to define the customer's payment terms—Net 15, Net 30, Net 60, or Due on receipt are supported (must match the value defined in the customer's QuickBooks record)


  2. Create Invoice Defaults: Option to automatically toggle the checkbox that allows you to automatically generate invoices when closing a transaction—this sends the invoice directly to the QuickBooks Invoice Queue and removes the need to export from the Manage Invoices page
     
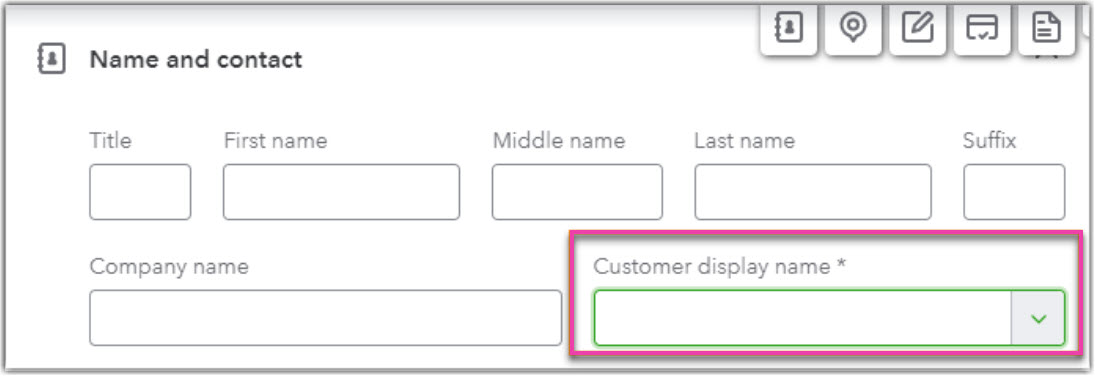
  3. Accounting Name (required): Customer's name on your QuickBooks account
    • This value can only contain alphanumeric characters and must match the 'Display name as' field exactly as it appears in the customer's QuickBooks record.


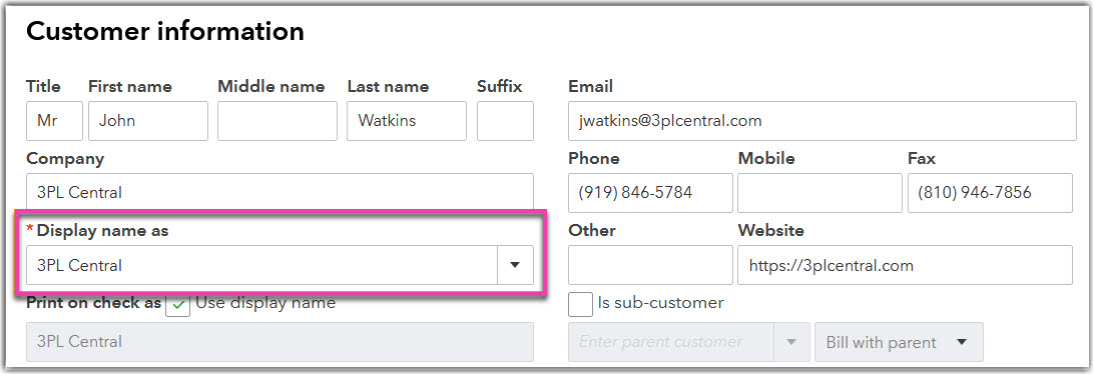
    • In Quickbooks Plus, this field is displayed as 'Customer display name'.


      We recommend you specify a unique 'Accounting Name' for each of your customers, including those which are inactive. Duplicate accounting names will result in an error, including null values.


4. Default invoice confirmation date to the transaction confirmation date: When checked, automatically populates the date a transaction was closed as the invoice confirmation date

Repeat these steps for each customer as needed.

Was this article helpful?

Yes
No
Share additional feedback about this article

Related Articles

  • Adjusting Order Charges
  • Receiving Movable Units
  • August 5, 2020 – Minor Release Notes
  • Understanding Directed Putaway Logic

Not finding the help you need?

Contact Support
Solutions
  • Solutions for Brands
  • Solutions for 3PLs
  • Solutions for 4PLs
  • Solutions for B2B
Products
  • Extensiv 3PL Warehouse Manager
  • Extensiv Warehouse Manager
  • Extensiv Order Manager
  • Extensiv Integration Manager
  • Extensiv Network Manager
Products
  • Customer Success
  • Implementation
  • Consulting
Ecosystem
  • Fulfillment Marketplace
  • Integrations
  • Partners
  • Become a Partner
Resources
  • Resource Library
  • Blog
  • Market Insights
  • What is a 3PL?
  • What is a 4PL?
  • What is a WMS?
  • Why a Cloud-based WMS?
  • Glossary
Help
  • Help Center
  • API Documentation
  • Extensiv Univerisity
  • Community
  • System Status
  • Extensiv Logo
  • 100 N Pacific Coast Hwy, Suite 1100, El Segundo, CA 90245
  • |
  • Contact Us:
  • 83-EXTENSIV 888.375.2368 (main)
  • |
  • 310.844.7570 (local)
  • Copyright © 2023 Extensiv
  • |
  • All rights reserved.
  • Privacy Policy
  • |
  • Terms of Service
  • Follow Us:
Expand