Magento 2.x Shopping Cart Connection
4.0 min read
|This article walks through the configuration of the connection between 3PL Warehouse Manager and Magento 2.x. Our Magento 2.x connection enables you to connect to a Magento store and perform the following functions:
- Pull open orders from Magento into 3PL Warehouse Manager
- Create a shipment in Magento with the carrier and tracking number value from 3PL Warehouse Manager
- Mark the order as complete (optional)
- Trigger invoice creation for orders that have not yet been invoiced (optional)
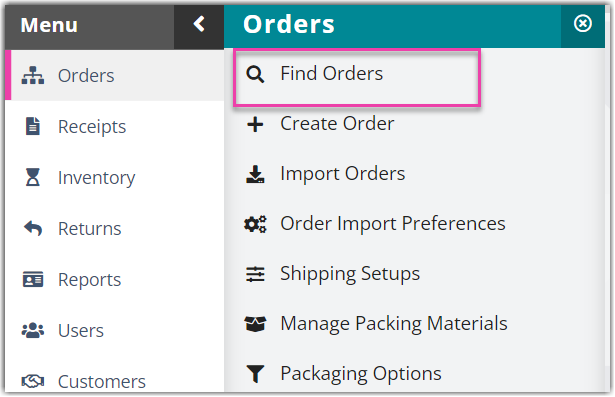
Set up the shopping cart connection
In order to connect the Magento store to 3PL Warehouse Manager, a set of integration keys must be generated within Magento. You have two options to accomplish this:
- Generate the keys yourself with Magento's help documentation. Continue reading below for further instructions.
- Provide your Extensiv representative with your username and password to the Magento store to make the connection for you.
- If you choose this option, please send us your credentials and look out for a DocuSign from your Customer Success Manager.
- Once you complete the DocuSign, our Professional Services team will begin the cart setup process—these requests are typically completed 24–48 hours after receiving all the necessary information.
- Continue to the next section for further instructions.
If you choose to generate the API keys yourself, log in to your Magento store and follow these steps:
- Navigate to Magento's help documentation on generating API keys.
- Follow the instructions under 'To add a new integration' and take note of the following guidelines:
- This connection does not require a 'Callback URL'. However, if a URL is going to be placed in this field, it must be a valid URL for the Magento store or the connection will encounter an error when trying to access the Magento store.
- Leave the 'Identity Link URL' blank.
- Set 'Resource Access' to All. The connection will only access order, product, and shipment data. Setting the permissions to 'All' reduces the chances of permission issues when attempting to access.
- Once you have generated the API keys, please fill out our API Integration Survey.
After you submit the survey, you will receive a DocuSign from your Customer Success Manager within one business day. Once you complete the DocuSign, our Professional Services team will begin the cart setup process. These requests are typically completed 24–48 hours after receiving all the necessary information.
In light of changes due to COVID-19, we are temporarily increasing this turnaround time to a maximum of 72 hours. We thank you for your patience as we work through your requests.
If you have not received a DocuSign within the specified time frame or would like to know the project status, please reach out to your CSM.
Create orders in 3PL Warehouse Manager
The 3PL Warehouse Manager Magento 2.x connection will periodically connect to the Magento store and attempt to pull orders into your WMS. The connection can pull orders that are in one of two Magento order states:
- Processing: orders in which payment has been captured and an invoice is generated
- New: orders in which payment has not been captured and an invoice has yet to be generated
Please tell your Extensiv representative which of these two states the Magento orders will be in, and they will set up the connection to pull in the designated state. This value can be changed by a warehouse admin user at any time by modifying the connection under Customers > Manage Connections.
All products on orders in Magento must have a SKU assigned to them, and that SKU must also exist in 3PL Warehouse Manager. If this is not the case, the order will be rejected by 3PL Warehouse Manager and the error will be logged under the customer error log. For more information on error logging, please see Using the Customer Error Log.
Sync inventory
If inventory sync is enabled, the connection will attempt to update all products in a Magento store that also exists in 3PL Warehouse Manager with the current available quantity for that product in the WMS. This update will occur once every 15 minutes.
In order to update the quantity for a product in Magento, the following criteria must be met:
- The product must have a SKU set up in Magento, and that SKU must also be assigned to an item in 3PL Warehouse Manager
- The item must have been received on a receipt in 3PL Warehouse Manager at least once
Update orders via 3PL Warehouse Manager
Once an order has been shipped and a tracking number has been added to the order in 3PL Warehouse Manager, the Magento connection can create a shipment with that tracking number in Magento and mark the order complete.
When creating the shipment in Magento, we must also pass through a carrier value. Magento has a preset list of carriers for major carriers. If your order has been shipped via UPS, USPS, FedEx, or DHL, the carrier on the shipment in Magento will match the carrier used in 3PL Warehouse Manager. Any other carrier will show as 'Custom Value' on the shipment in Magento.
- In 3PL Warehouse Manager, navigate to Orders > Find Orders.
- Select the order(s) from the grid that you need to close and mark as shipped. Use < Ctrl > or < Shift > on your keyboard to select multiple orders.
- Hover over Manage, then click Ship and close.
- Complete the appropriate fields under 'Routing Information'.
- If needed, enter any 'Additional Charges' that may have accumulated—each charge will display in the grid. For multiple orders, be sure to specify whether you wish to 'Apply Charges' separately to each order or divide the charges across all selected orders evenly.
Please note that charges added here will be in addition to all automatic and manual charges that have already been applied to the selected orders.
- Click Ship and Close. The orders in your Magento store will reflect the latest changes.
Set up event notifications
When Magento orders are created or fail to import into the system, you can set up automated emails to notify the desired parties. To enable these notifications, complete the following steps:
Please note that the error log may also be utilized to understand the cause of an error or rejection.
- Navigate to Customers > Customer Notifies.

- From the drop-down menu, 'Choose a Customer' and click Select. This screen allows you to specify which actions will trigger an event notification. The applicable options for notifications are as follows:
- Orders Created by Warehouse: Triggers each time an order is created by a warehouse user
- FTP Order Import Failed: Triggers each time an order import fails
- Under the 'Email Recipients' column, enter the email addresses in the relevant field for each event you would like your customer to receive a notification for. If using multiple recipients for one event, separate them with semicolons.
- To change the default email notification for each event, click Change this cust. for that particular customer or click Change master next to an event to change the email template for all of your customers. Make your modifications, then click Save.
- Click Save.
For more information on the Customer Notifies feature, see Managing Event Notifications.