Order Management

Updated on October 27th, 2023

  • Extensiv Hub
    Popular Articles Getting Started Using Hub Technical Issues & FAQs Extensiv's Ideas Portal
  • 3PL Warehouse Manager
    Receiving Operations Inventory Management Shipping Operations System Configuration Scanning Operations Integrations Content Best Practice Resources Release Notes Popular Articles Troubleshooting Guides
  • Warehouse Management
    Getting Started Admin Console Shipping Order Picking & Packing Receiving Customer Portal Cycle Counting Kit Building Managing Users Barcode Scanner Import/Export Integrations Barcoding Wave Picking Bin Move Mobile Receiving and Picking Settings Popular Articles Reporting
  • Order Management
    Dashboard Orders Inventory Purchase Orders Shipments Customers Products Analytics Settings API API Integrations Accessing and Navigating Order Manager Error Messages Order Manager Popular Articles Accounting Integrations
  • Integration Management
    Getting Started with Integration Manager General Support Troubleshooting Extras & Addons API Documentation Popular Articles Order Sources Order Destinations
  • FAQs
  • Network Manager
    Getting Started Order Routing Management Technical Issues Shopping Carts Settings Settings, Products, and Orders
  • Billing Manager
    Getting Started Using Billing Manager
  • Release Notes
    Extensiv Sandbox Extensiv Extensiv Hub 3PL Warehouse Manager Integration Management Warehouse Management Order Management Billing Manager
  • Fulfillment Marketplace
    Getting Started
  • Sandbox
    Getting Started
+ More
  • Help Center
  • Order Management
  • Settings
  • General
  • Settings
    • General
        • Tax Identifiers
        • Company Time Zone Setting
        • Ruby Has 3PL Integration
        • Disable the Inventory Update From Extensiv Order Manager to All Sales Channels
        • Update My Profile
        • How to Enable Out of Stock Control for eBay Sales Channels
        • Company Info and Additional Account Settings
        • How to View Your Extensiv Order Manager Invoices
        • Installing an App from the Order Manager App Store
        • How To Remove an App in Order Manager
        • Configuring Shipping Presets
    • Sales Channels
        • Walmart Fulfillment Services - WFS
        • Setting Up Shipment & Carrier Mappings for Your Sales Channels
        • WFS Workflow
        • Amazon Cancellation Settings
        • Amazon Pacific Time Orderbot Setting
        • Shopify Locations
        • Shopify Tags
        • Enable or Disable Extensiv Order Manager Email Notifications to Your Customers
        • Deactivating a Sales Channel
        • Adding Shopify as a Sales Channel
        • Viewing a Sales Edit Channel's History
        • Adding Amazon as a Sales Channel
        • Adding eBay as a Sales Channel
        • Adding Newegg as a Sales Channel
        • Steps in Adding Walmart as a Sales Channel
        • Editing Sales Channels
        • Adding a Manual Sales Channel
        • How to Exclude a Warehouse From Pushing Inventory to a Sales Channel
        • Assigning a Packing Slip and/or Email Template to your Sales Channel
        • Adding Sales Channels
        • Reactivating Sales Channels
    • Webhooks
        • Order Payment Webhook
        • Shopify Auto-Subscribing Webhooks
        • Shopify Product Update / Product Edit Webhook
        • Shopify Refund Webhook (e-commerce Orders)
        • Order Creation Webhook
        • Shopify Cancellation Webhook
        • Shopify Fulfillment Webhook
        • Shopify Refund Webhook - POS Orders
        • Shopify Product Deletion Webhook
        • BigCommerce Webhook
    • Shipping Providers
        • Adding Shipping Providers
        • Adding DHL eCommerce as a Shipping Provider
        • How to Add Express 1 as a Shipping Provider
        • Adding Amazon Buy Shipping as a Shipping Provider
        • UPS Mail Innovations Services
        • Customizing Shipping Services and Package Types Per Shipping Provider
        • FedEx ETD
        • Deactivate or Reactivate a Shipping Provider
        • Adding FedEx as a Shipping Provider
        • Adding Stamps.com as a Shipping Provider
    • Vendors
        • Adding a Dropship Vendor to Extensiv Order Manager
        • How to Automatically Create Purchase Orders For Dropship Orders
        • Creating or Updating Vendors
    • Warehouses & Vendors
        • Instructional Video - Creating Warehouses & Warehouse Settings
        • Use Component Inventory Setting for Bundles and Kits
        • Setting a Dropship Template and Fulfilling Orders with a P.O.
        • Configuring Dropship Vendor FTP
        • Configuring Shipping Label Print Format Options
        • Can I have additional order information populated on my Shipping label?
        • Configuring a Dropship Vendor
        • How to Configure the Order Export File for FTP Connections
        • Search for Vendors
        • Inventory Dependent Warehouses
        • Updating the Address/Return Address for Your Warehouse
        • Deactivating a Warehouse in Extensiv Order Management
        • Creating and Configuring Warehouses in Extensiv Order Manager
        • Pick List Settings
        • Setting Up Document Print Settings
        • Setting Up Domestic Backup Warehouses
        • FTP Inventory Import for a 3PL
        • Setting Up a Warehouse's International Rank
        • How do I connect Extensiv Order Manager with Deliver?
        • Setting Up a 3PL Warehouse
        • Creating an In-House Warehouse
    • Orderbots
        • Adding Order Item to Order Orderbot Action
        • Understanding Apply Best Rate vs Cheapest Rate Orderbots
        • Support for Shopify's Additional Details
        • Orderbots filtered by zip code range
        • Postal Zones in Extensiv Order Manager
        • Mark Order as Shipped Orderbot
        • Automating Orders to Fulfill from a Specific Warehouse
        • Editing an Orderbot
        • Deactivating an Orderbot in Extensiv Order Manager
        • Replace Address Orderbot
        • Creating an Orderbot
        • Orderbots - Complete List of Filters & Actions
        • Orderbot: Set order weight and dimensions based on products
        • Orderbot: Using Hold the order for and Mark Order as Shipped
        • Commonly Used Orderbots
    • Templates
        • Email Verification Process for P.O. & E-mail Templates
        • Email Templates
        • Setting up Packing Slip Templates
        • Setting up Purchase Order (PO) Templates

Configuring Shipping Presets

Within Extensiv Order Manager you have the ability to create shipping presets for various shipping options. This allows you to easily pre-populate the required shipping information when fulfilling an order through an in-house warehouse.

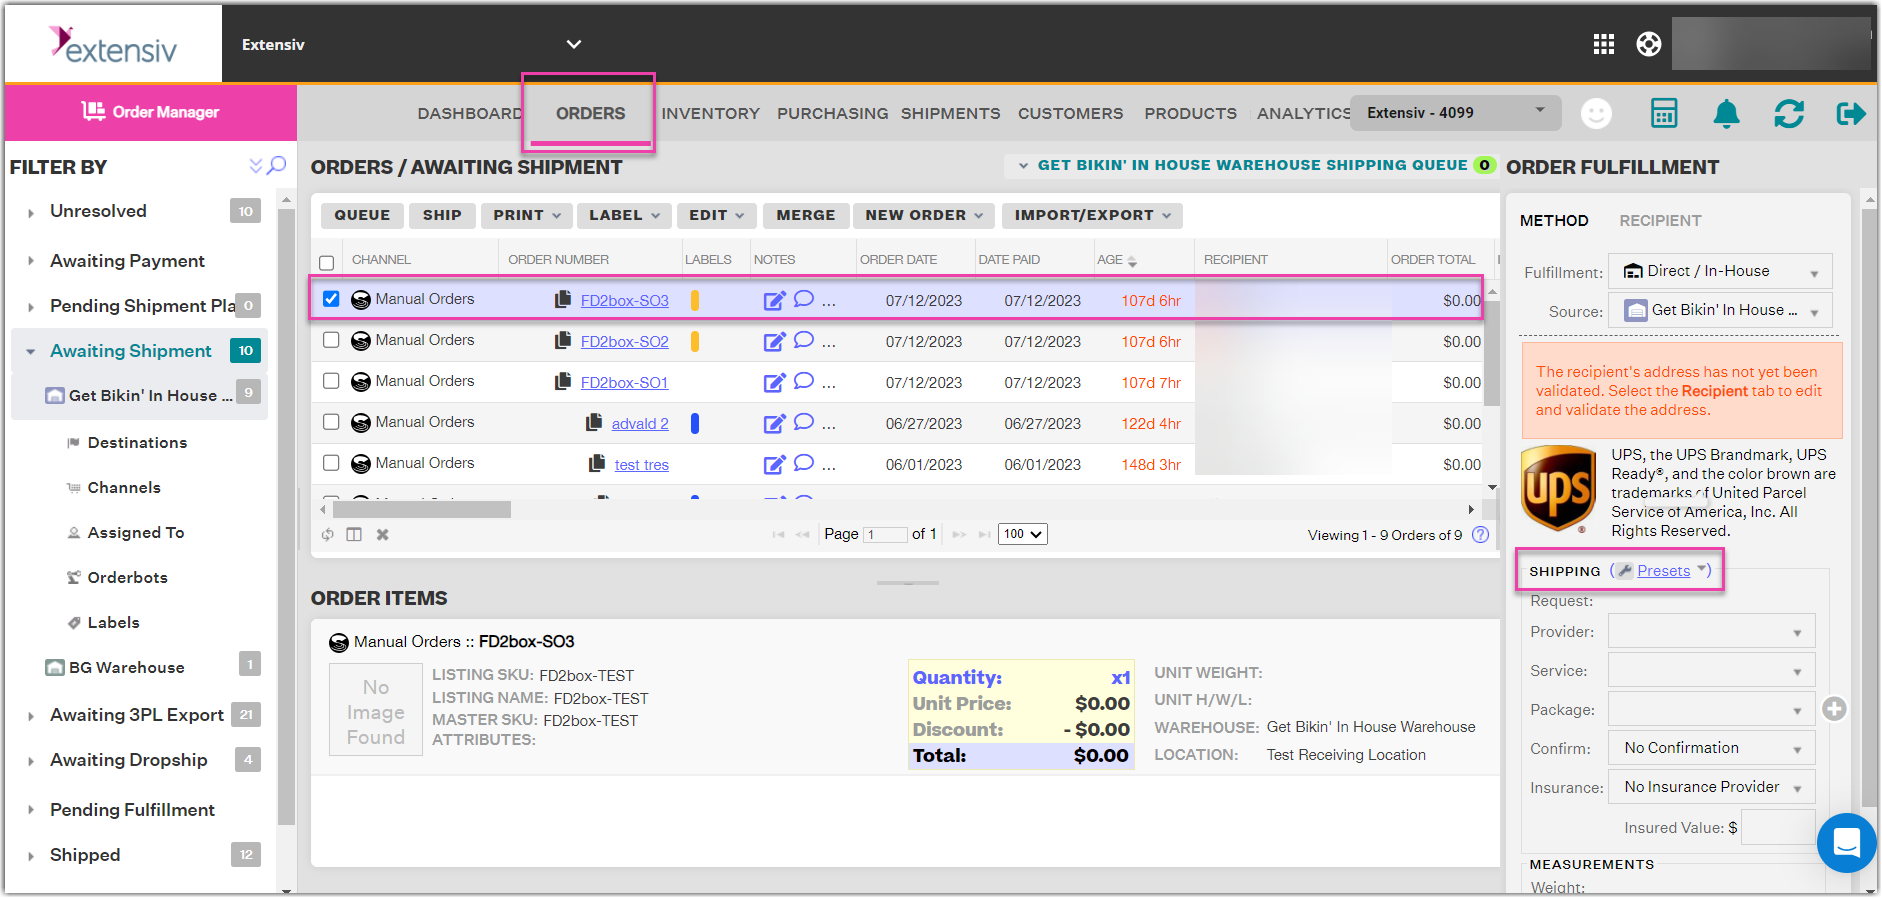
To begin, head over to your Orders Module and select the order you would like to ship. On the right-hand side of the window you will see a section titled “Order Fulfillment”. Here you will see a box titled “Shipping”. Click on the little wrench icon next to the “presets” dropdown. 

This will open up a new window where you can configure new presets and edit existing ones. To configure a new shipping preset, click the “+ New Preset” button. 

You can sort your list of existing shipping presets in alphabetical order by name, provider, or any of the above sections by clicking on the column header. 

A new window will open up, complete all the necessary fields to set up your shipping preset. Note that all information entered in the new shipping preset screen will automatically populate on the order when the preset is selected in the orders module.

  • Name: Name your shipping preset
  • Hotkey: You can assign this shipping preset with a keyboard shortcut
  • Measurements: If you have specific dimension requirements for this shipping preset you can input them here
  • Provider: Select the shipping provider for this preset from the dropdown
  • Service: Select the service from the shipping provider you chose
  • Package: If you’d like to use a specific packaging select from the dropdown here
  • Confirm: Is there any kind of delivery confirmation for this shipping method
  • Insurance: If you have carrier insurance you can select the option here

After you have set up your shipping presets you can always go back and edit them by selecting it in the previous window and clicking on the “Edit Selected” button. 

After you have set up your shipping presets you will be able to select them in the order fulfillment window for future orders. Click on the “Presets” button next to the shipping box and you will see all your presets in the dropdown menu. 


delivery settings shipping setup

Was this article helpful?

Yes
No
Share additional feedback about this article

Related Articles

  • Uploading Inventory Through the UI
  • Creating and Configuring Warehouses in Extensiv Order Manager

Not finding the help you need?

Contact Support
Solutions
  • Solutions for Brands
  • Solutions for 3PLs
  • Solutions for 4PLs
  • Solutions for B2B
Products
  • Extensiv 3PL Warehouse Manager
  • Extensiv Warehouse Manager
  • Extensiv Order Manager
  • Extensiv Integration Manager
  • Extensiv Network Manager
Products
  • Customer Success
  • Implementation
  • Consulting
Ecosystem
  • Fulfillment Marketplace
  • Integrations
  • Partners
  • Become a Partner
Resources
  • Resource Library
  • Blog
  • Market Insights
  • What is a 3PL?
  • What is a 4PL?
  • What is a WMS?
  • Why a Cloud-based WMS?
  • Glossary
Help
  • Help Center
  • API Documentation
  • Extensiv Univerisity
  • Community
  • System Status
  • Extensiv Logo
  • 100 N Pacific Coast Hwy, Suite 1100, El Segundo, CA 90245
  • |
  • Contact Us:
  • 83-EXTENSIV 888.375.2368 (main)
  • |
  • 310.844.7570 (local)
  • Copyright © 2023 Extensiv
  • |
  • All rights reserved.
  • Privacy Policy
  • |
  • Terms of Service
  • Follow Us:
Expand