Order Management

Updated on April 23rd, 2025

  • Extensiv Hub
    Popular Articles Getting Started Using Hub Technical Issues & FAQs Extensiv's Ideas Portal
  • 3PL Warehouse Manager
    Receiving Operations Inventory Management Shipping Operations System Configuration Scanning Operations Integrations Content Best Practice Resources Release Notes Popular Articles Troubleshooting Guides
  • Warehouse Management
    Getting Started Admin Console Shipping Order Picking & Packing Receiving Customer Portal Cycle Counting Kit Building Managing Users Barcode Scanner Import/Export Integrations Barcoding Wave Picking Bin Move Mobile Receiving and Picking Settings Popular Articles Reporting
  • Order Management
    Dashboard Orders Inventory Purchase Orders Shipments Customers Products Analytics Settings API API Integrations Accessing and Navigating Order Manager Error Messages Order Manager Popular Articles Accounting Integrations
  • Integration Management
    Getting Started with Integration Manager General Support Troubleshooting Extras & Addons API Documentation Popular Articles Order Sources Order Destinations
  • FAQs
  • Network Manager
    Getting Started Order Routing Management Technical Issues Shopping Carts Settings Settings, Products, and Orders
  • Billing Manager
    Getting Started Using Billing Manager
  • Release Notes
    Extensiv Sandbox Extensiv Extensiv Hub 3PL Warehouse Manager Integration Management Warehouse Management Order Management Billing Manager
  • Fulfillment Marketplace
    Getting Started
  • Sandbox
    Getting Started
+ More
  • Help Center
  • Order Management
  • Settings
  • General
  • Settings
    • General
        • Tax Identifiers
        • Company Time Zone Setting
        • Ruby Has 3PL Integration
        • Disable the Inventory Update From Extensiv Order Manager to All Sales Channels
        • Update My Profile
        • How to Enable Out of Stock Control for eBay Sales Channels
        • Company Info and Additional Account Settings
        • How to View Your Extensiv Order Manager Invoices
        • Installing an App from the Order Manager App Store
        • How To Remove an App in Order Manager
        • Configuring Shipping Presets
    • Sales Channels
        • Walmart Fulfillment Services - WFS
        • Setting Up Shipment & Carrier Mappings for Your Sales Channels
        • WFS Workflow
        • Amazon Cancellation Settings
        • Amazon Pacific Time Orderbot Setting
        • Shopify Locations
        • Shopify Tags
        • Enable or Disable Extensiv Order Manager Email Notifications to Your Customers
        • Deactivating a Sales Channel
        • Adding Shopify as a Sales Channel
        • Viewing a Sales Edit Channel's History
        • Adding Amazon as a Sales Channel
        • Adding eBay as a Sales Channel
        • Adding Newegg as a Sales Channel
        • Steps in Adding Walmart as a Sales Channel
        • Editing Sales Channels
        • Adding a Manual Sales Channel
        • How to Exclude a Warehouse From Pushing Inventory to a Sales Channel
        • Assigning a Packing Slip and/or Email Template to your Sales Channel
        • Adding Sales Channels
        • Reactivating Sales Channels
    • Webhooks
        • Order Payment Webhook
        • Shopify Auto-Subscribing Webhooks
        • Shopify Product Update / Product Edit Webhook
        • Shopify Refund Webhook (e-commerce Orders)
        • Order Creation Webhook
        • Shopify Cancellation Webhook
        • Shopify Fulfillment Webhook
        • Shopify Refund Webhook - POS Orders
        • Shopify Product Deletion Webhook
        • BigCommerce Webhook
    • Shipping Providers
        • Adding Shipping Providers
        • Adding DHL eCommerce as a Shipping Provider
        • How to Add Express 1 as a Shipping Provider
        • Adding Amazon Buy Shipping as a Shipping Provider
        • UPS Mail Innovations Services
        • Customizing Shipping Services and Package Types Per Shipping Provider
        • FedEx ETD
        • Deactivate or Reactivate a Shipping Provider
        • Adding FedEx as a Shipping Provider
        • Adding Stamps.com as a Shipping Provider
    • Vendors
        • Adding a Dropship Vendor to Extensiv Order Manager
        • How to Automatically Create Purchase Orders For Dropship Orders
        • Creating or Updating Vendors
    • Warehouses & Vendors
        • Instructional Video - Creating Warehouses & Warehouse Settings
        • Use Component Inventory Setting for Bundles and Kits
        • Setting a Dropship Template and Fulfilling Orders with a P.O.
        • Configuring Dropship Vendor FTP
        • Configuring Shipping Label Print Format Options
        • Can I have additional order information populated on my Shipping label?
        • Configuring a Dropship Vendor
        • How to Configure the Order Export File for FTP Connections
        • Search for Vendors
        • Inventory Dependent Warehouses
        • Updating the Address/Return Address for Your Warehouse
        • Deactivating a Warehouse in Extensiv Order Management
        • Creating and Configuring Warehouses in Extensiv Order Manager
        • Pick List Settings
        • Setting Up Document Print Settings
        • Setting Up Domestic Backup Warehouses
        • FTP Inventory Import for a 3PL
        • Setting Up a Warehouse's International Rank
        • How do I connect Extensiv Order Manager with Deliver?
        • Setting Up a 3PL Warehouse
        • Creating an In-House Warehouse
    • Orderbots
        • Adding Order Item to Order Orderbot Action
        • Understanding Apply Best Rate vs Cheapest Rate Orderbots
        • Support for Shopify's Additional Details
        • Orderbots filtered by zip code range
        • Postal Zones in Extensiv Order Manager
        • Mark Order as Shipped Orderbot
        • Automating Orders to Fulfill from a Specific Warehouse
        • Editing an Orderbot
        • Deactivating an Orderbot in Extensiv Order Manager
        • Replace Address Orderbot
        • Creating an Orderbot
        • Orderbots - Complete List of Filters & Actions
        • Orderbot: Set order weight and dimensions based on products
        • Orderbot: Using Hold the order for and Mark Order as Shipped
        • Commonly Used Orderbots
    • Templates
        • Email Verification Process for P.O. & E-mail Templates
        • Email Templates
        • Setting up Packing Slip Templates
        • Setting up Purchase Order (PO) Templates

Company Info and Additional Account Settings

Company Info and Additional Account Settings

Your company's name, address, and contact information are visible in the Settings module, in addition to account settings like Purchase Order Settings, Product Settings, Inventory Settings, Inventory Value Reconciliation Settings, and Shipping Settings. To update this info, first, go to the Settings Module, click on the Company Info tab, then follow the steps below.


Company Info Section

You can edit your company name, contact name, email address, phone number, and address. These fields are pulled from for Field Replacements on things like packing slip templates, email templates, PO templates, etc.

Example: Field Replacements under the Company section for a packing slip template


Company Logo Section

You can upload or delete your company logo. Click on the Select button to choose & upload the file you wish to upload as your company logo or click on the Delete Logo button to delete the currently uploaded company logo image.


Billing, Operations, & Technical Sections

You can edit the recipient name, email address, and phone number of the billing, operations, and technical contacts. The following details what each contact is emailed about. You can enter one email address per field.

Billing

  • Combine orders notifications
  • Credit card expiring soon
  • Deactivated company
  • eBay quota limit reached
  • Invoice paid
  • No payment info
  • Payment failed
  • Postage balance recredit
  • Shipment void failure
  • Trial ending

Operations

  • Inventory update failure
  • Channel purchase updates errors
  • Combine orders notifications
  • Credit card expiring soon
  • Deactivated company
  • Deactivated sales channel notification
  • eBay quota limit reached
  • FBA inventory sync failed
  • Orders download failed
  • Skipped download orders notification
  • Order status change notification
  • Void shipment failure
  • PO received

Technical

  • Access denied to Amazon Finance API
  • Channel health
  • Deactivated sales channel notification
  • eBay token expiring soon
  • Invalid parameter value
  • Amazon marketplace (FBA listing SKU service)

Order Settings Section

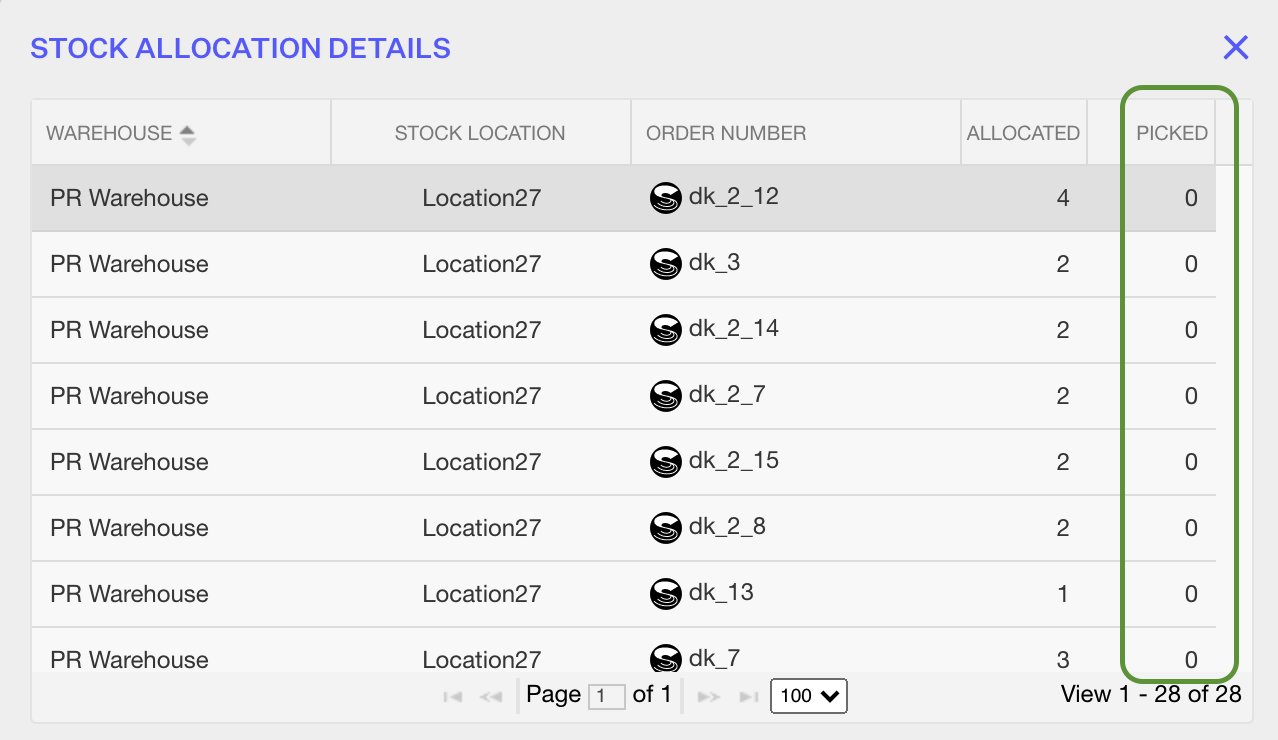
Prevent the editing of partially picked orders: This setting blocks the editing of order items once the order has had any quantities picked. Once the order is picked and this checkbox is selected, the order will not be able to be edited in the UI or via API. "Partially picked" means that the order has had at least one unit of an order item indicated as picked in Extensiv Order Manager.

NOTE

This setting is only applicable to customers who use Barcoders.


Example: These orders have not had any units of this SKU picked because the Picked quantities are all 0.


Purchase Order Settings Section

You can edit the PO Number Prefix and Auto PO Generation settings.

Note

If you make any changes to these settings, make sure to click on the Update button at the bottom of the page.

 
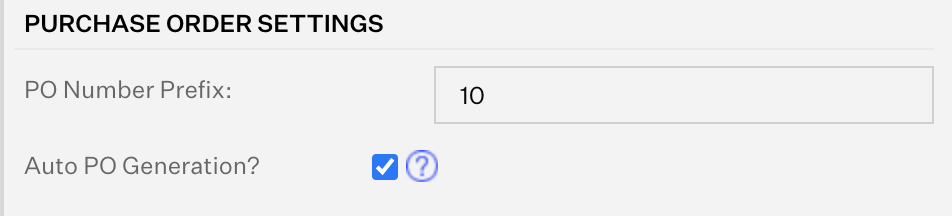
  • PO Number Prefix: Any number or text that you input here will be appended to the beginning of all non-dropship purchase order numbers generated by Extensiv Order Manager.
  • Auto PO Generation: Selecting this checkbox will enable Extensiv Order Manager to generate Auto POs, which will be visible in the Awaiting Authorization Status in the Purchasing module.

Product Settings Section

Note

If you change any of the settings here, make sure you click the Update button at the bottom of the page.

 
  • Automatically update product weight and dimensions from shipped orders?: Checking this setting will automatically update the weight and dimensions of a product based on the weight and dimensions of the most recent shipped order that contained a single unit of the product.
  • Allow Default FBA Box Content Measurements?: When a user creates an FBA Workflow, Extensiv Order Manager can auto-populate the box contents for those products when adding labels to FBA workflows the first time.

Inventory Settings Section

You can edit the Inventory Update setting and the default auto-reorder rules that will be assigned to any new products that are created after these settings have been updated.

Note

If you make any changes to these settings, make sure to click on the Update button at the bottom of the page.

 
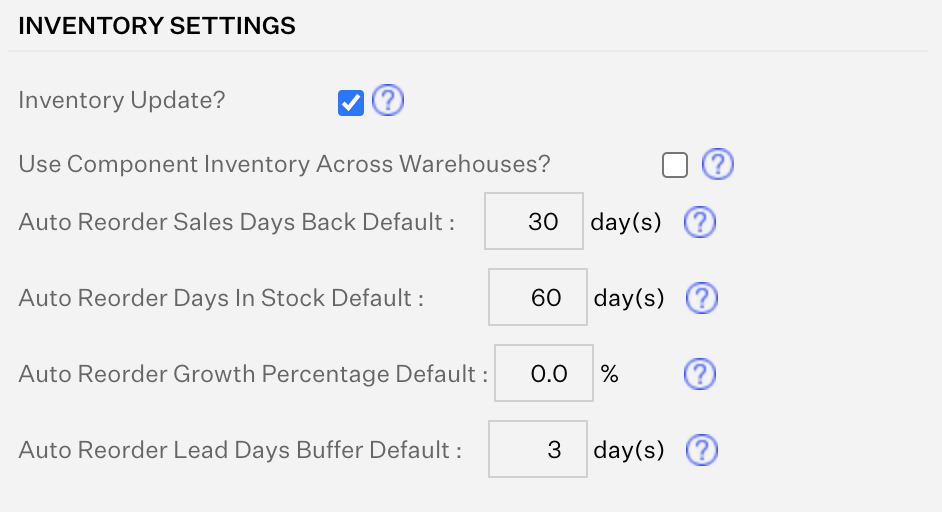
  • Inventory Update: This checkbox enables Extensiv Order Manager to push inventory to all active sales channels with active listing SKUs that have the "Push inventory to channel" setting enabled. ⚠️ Note: DO NOT TOUCH THIS SETTING WITHOUT CONSULTING YOUR IMPLEMENTATION MANAGER, ACCOUNT MANAGER, OR Extensiv Order Manager SUPPORT.
  • Auto Reorder Sales Days Back Default: The number of days that Extensiv Order Manager will use to calculate the sales velocity of a product.
    Auto Reorder Days In Stock Default: The number of days that you want the product to be in stock for once it's been reordered.
  • Auto Reorder Growth Percentage Default: The expected percentage change in the sales velocity for a product. This can be a positive or negative number.
  • Auto Reorder Lead Days Buffer Default: The number of days that you want to add to the lead time of the product as a buffer.

Inventory Value Reconciliation Settings Section

Note

If you change any of the settings here, make sure you click the Update button at the bottom of the page.

 
  • Choose from all Vendors for reconciliation?: Enables you to reconcile bundles based on the vendor products of the core components. To enable this setting, select its checkbox and click on the Update button at the bottom of the page.

Shipping Settings Section

Note

If you change any of the settings here, make sure you click the Update button at the bottom of the page.

 
  • VAT Number for UK Shipments: Enter your VAT number for UK shipments and click on the Update button at the bottom of the page.

Returns Settings Section

Note

If you change any of the settings here, make sure you click the Update button at the bottom of the page.


Note

This section is currently part of a Beta feature - contact Support if you'd like this enabled for your account.


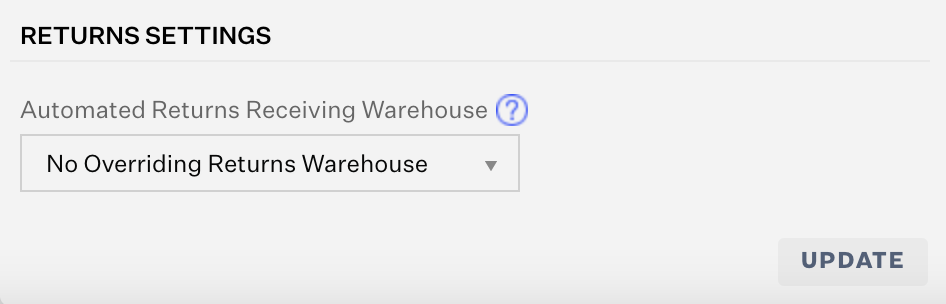
Automated Returns Receiving Warehouse: This setting will determine what the Receiving Warehouse is for any automatically generated RMAs (such as those created from webhooks). Read on here to learn more about returns webhooks and their default warehouse settings for RMAs.

NOTE

If a user deactivates the warehouse that is assigned to be the Automated Returns Receiving Warehouse, then Extensiv Order Manager will automatically reset this dropdown value to "No Overriding Returns Warehouse" and will record that edit in the History logs. If this happens or if the No Overriding Returns Warehouse option is chosen here in general, then Extensiv Order Manager will return to its previous functionality.

 
account settings company info

Was this article helpful?

Yes
No
Share additional feedback about this article

Related Articles

  • Adding Inventory to a Stock Location Manually
  • Understanding Listing Profitability Analytics

Not finding the help you need?

Contact Support
Solutions
  • Solutions for Brands
  • Solutions for 3PLs
  • Solutions for 4PLs
  • Solutions for B2B
Products
  • Extensiv 3PL Warehouse Manager
  • Extensiv Warehouse Manager
  • Extensiv Order Manager
  • Extensiv Integration Manager
  • Extensiv Network Manager
Products
  • Customer Success
  • Implementation
  • Consulting
Ecosystem
  • Fulfillment Marketplace
  • Integrations
  • Partners
  • Become a Partner
Resources
  • Resource Library
  • Blog
  • Market Insights
  • What is a 3PL?
  • What is a 4PL?
  • What is a WMS?
  • Why a Cloud-based WMS?
  • Glossary
Help
  • Help Center
  • API Documentation
  • Extensiv Univerisity
  • Community
  • System Status
  • Extensiv Logo
  • 100 N Pacific Coast Hwy, Suite 1100, El Segundo, CA 90245
  • |
  • Contact Us:
  • 83-EXTENSIV 888.375.2368 (main)
  • |
  • 310.844.7570 (local)
  • Copyright © 2023 Extensiv
  • |
  • All rights reserved.
  • Privacy Policy
  • |
  • Terms of Service
  • Follow Us:
Expand