3PL Warehouse Manager

Updated on November 10th, 2023

  • Extensiv Hub
    Popular Articles Getting Started Using Hub Technical Issues & FAQs Extensiv's Ideas Portal
  • 3PL Warehouse Manager
    Receiving Operations Inventory Management Shipping Operations System Configuration Scanning Operations Integrations Content Best Practice Resources Release Notes Popular Articles Troubleshooting Guides
  • Warehouse Management
    Getting Started Admin Console Shipping Order Picking & Packing Receiving Customer Portal Cycle Counting Kit Building Managing Users Barcode Scanner Import/Export Integrations Barcoding Wave Picking Bin Move Mobile Receiving and Picking Settings Popular Articles Reporting
  • Order Management
    Dashboard Orders Inventory Purchase Orders Shipments Customers Products Analytics Settings API API Integrations Accessing and Navigating Order Manager Error Messages Order Manager Popular Articles Accounting Integrations
  • Integration Management
    Getting Started with Integration Manager General Support Troubleshooting Extras & Addons API Documentation Popular Articles Order Sources Order Destinations
  • FAQs
  • Network Manager
    Getting Started Order Routing Management Technical Issues Shopping Carts Settings Settings, Products, and Orders
  • Billing Manager
    Getting Started Using Billing Manager
  • Release Notes
    Extensiv Sandbox Extensiv Extensiv Hub 3PL Warehouse Manager Integration Management Warehouse Management Order Management Billing Manager
  • Fulfillment Marketplace
    Getting Started
  • Sandbox
    Getting Started
+ More
  • Help Center
  • 3PL Warehouse Manager
  • Shipping Operations
  • Order Management
  • Shipping Operations
    • Order Creation
        • Creating Orders
        • Importing Orders
        • Entering Order Contact Details
        • Entering Order Line Items
        • Entering Carrier and Routing Information
        • Entering Custom Order Info
        • Entering Order Charges
        • Cloning an Order
    • Order Management
        • Understanding Order Statuses
        • Navigating the Find Orders Page
        • Generating Order Documents
        • Batch Order Processing
        • Adjusting Order Charges
    • Shipping Setups
        • Understanding the Parcel API
        • Connecting Carriers to Providers
        • Understanding Carrier Account Logic
        • Configuring Zebra Browser Print
        • Configuring Small Parcel Settings
        • Using Address Validation
        • Connecting Multiple Accounts for the Same Carrier
        • Managing Carrier Accounts
        • Configuring Fulfillment Invoicing
        • Using a Flat File Carrier Integration
        • Managing Shipping Carriers
        • Configuring a Drop Ship Address
        • Managing Ship-to Contacts
        • Managing Retailers
        • Importing Ship-to Contacts
        • Managing Ship Method Mappings
        • Managing 3rd-Party-Billing Contacts
        • Shipping Hazardous Materials
    • Small Parcel Carriers
        • Shipping in Small Parcel Suite
        • Shipping with Amazon Buy
        • Shipping with APC
        • Shipping with Australia Post
        • Shipping with Canada Post
        • Shipping with Canpar
        • Shipping with DHL eCommerce
        • Shipping with DHL Express (AU)
        • Shipping with DHL Express (US)
        • Shipping with ePost Global
        • Shipping with FedEx
        • Shipping with FirstMile
        • Shipping With Flexport
        • Shipping with Globegistics
        • Shipping with Landmark
        • Shipping with OnTrac
        • Shipping with PARCLL
        • Shipping with Passport
        • Shipping with Pitney Bowes Cross-Border Delivery
        • Shipping with Pitney Bowes Standard
        • Shipping with Purolator
        • Shipping with RR Donnelley
        • Shipping with SEKO Ecommerce
        • Shipping with Sendle
        • Shipping with Stallion Express
        • Shipping with Tusk Logistics
        • Shipping with UPS
        • Shipping with USPS (BUKU Ship)
        • Shipping with USPS (Endicia)
        • Shipping with USPS (Stamps.com)
        • Shipping with UPS Mail Innovations®
        • Shipping with FedEx One Rate®
        • Shipping with USPS (Pitney Bowes Expedited)
        • Connecting Small Parcel to UPS
    • Packing Basics
        • Packing Orders
        • Managing Packing Materials
        • Configuring Scales for SmartPack
        • Creating Packing Slip Templates
        • Processing Packages
        • Understanding Automatic Package Generation
        • Consolidating Packages
        • Recalculating Packages
        • Using Packing Materials
        • Understanding Multi-Tier Packing in Process Packages
    • Order Processing
        • Navigating the Small Parcel Homepage
        • Packing in the Small Parcel Space
        • Shipping in the Small Parcel Space
        • Using High Volume Processing (HVP) with SmartParcel
        • Printing Return Labels
        • Printing Combo Labels
        • Voiding Shipping Labels
        • Troubleshooting Blank Shipping Labels
        • Creating End of Day Requests (Manifesting)
    • Billing Best Practices for Shipping
        • Common Transactional Shipping Charges
        • Flat Order Processing Fees
        • Item-Based Handling Fees
        • Freight Fees
    • International Shipping
        • Shipping Internationally with SmartParcel
        • Capturing Digital Assets for FedEx ETD
        • Tax Identifiers in Small Parcel Suite
        • Package Description for Mexico Shipments
      • Enabling Integrated Packing Slip

Batch Order Processing

The Batch Order Processing feature allows you to take a large set of orders, sort them, and batch them by certain attributes so they can be easily picked and shipped together. Whether you choose to batch items based on their SKU, the customer, or the shipping carrier and/or service, 3PL Warehouse Manager makes it a simple process to do so.

This article reviews how to batch orders manually or automatically and reviews a few helpful tips related to batching.

To access the Batch menu on the Find Orders page, you must have the following permission assigned to your user role: Orders Module > Manage Orders > Edit Batches.


Guidelines

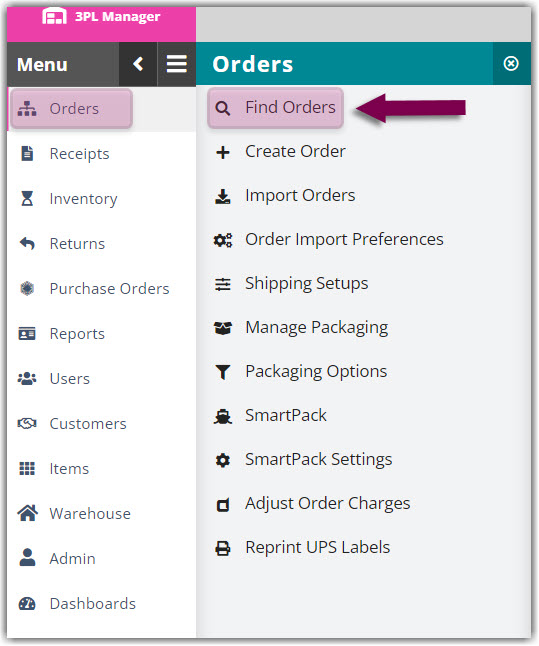
Navigate to Orders > Find Orders. If needed, use the search filters in the left pane to refine the results displayed in the grid.


Decide whether you want to batch orders manually or let the system batch them automatically—both methods are outlined below.


Manually add orders to a new or existing batch

This method is preferred when you specifically batch by SKU and quantity to utilize batch-picking. 3PL Warehouse Manager requires the following to create a batch of orders: same customer, same warehouse, fully allocated.

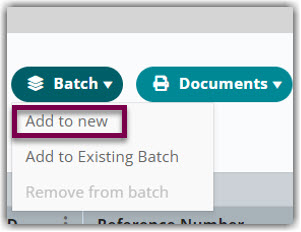
Select the order(s) you want to batch, using < Ctrl > or < Shift > on your keyboard to select multiple orders, then hover over Batch.

  • To add the order(s) to a new batch, click Add to New, enter the name of the batch, then click Create and Add.


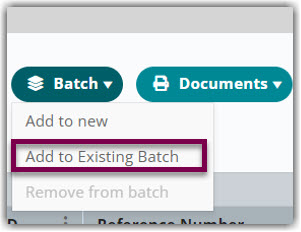
  • To add the order(s) to a previously created batch, click Add to Existing Batch, select the appropriate batch from the drop-down menu, then click Add.


  • A confirmation message appears notifying you that the selected order(s) are batched.


Add orders to a new batch using auto-batch

Auto-batching allows 3PL Warehouse Manager to automatically generate batches of orders based on rules that you select in a customer's settings.

To utilize the auto-batching functionality, you must first enable Auto Batch for your account under Admin > Settings.


Orders must have the following criteria to qualify for an auto-batch: same customer, same facility, in an Open or Complete status, fully allocated, created in the last 30 days, and not in an existing batch.
 

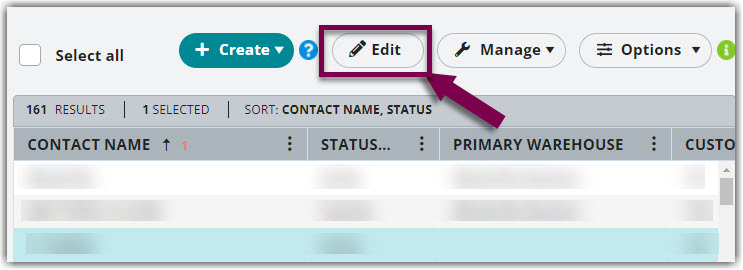
  1. To get started, you need to enable auto-batching in a customer's settings. Navigate to Customers > Manage Customers in 3PL Warehouse Manager, select a relevant customer from the grid, then click Edit.


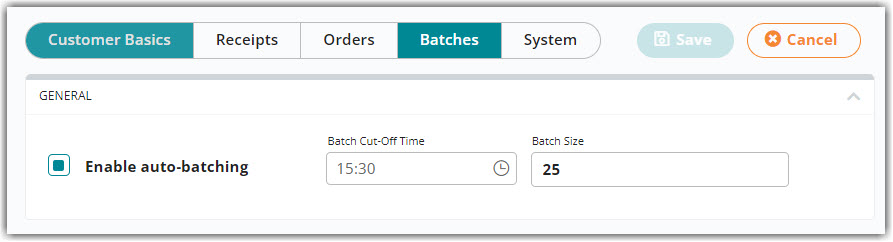
  2. Select the Batches configuration section.
     
  3. Click the selection box for Enable auto-batching.
     
  4. For Batch Cutoff Time, enter the time of day you want to stop creating batches, which is typically driven by your carrier's pickup schedule. If orders are imported or created after the specified cutoff time and qualify for batching, they are held and batched automatically the following day.
     
  5. For Batch Size, enter the number of orders you'd like in each batch. The default batch size is 25 and can be increased up to 500 orders per batch.


  6. Next, select the rule you want to apply to make orders eligible for auto-batching.
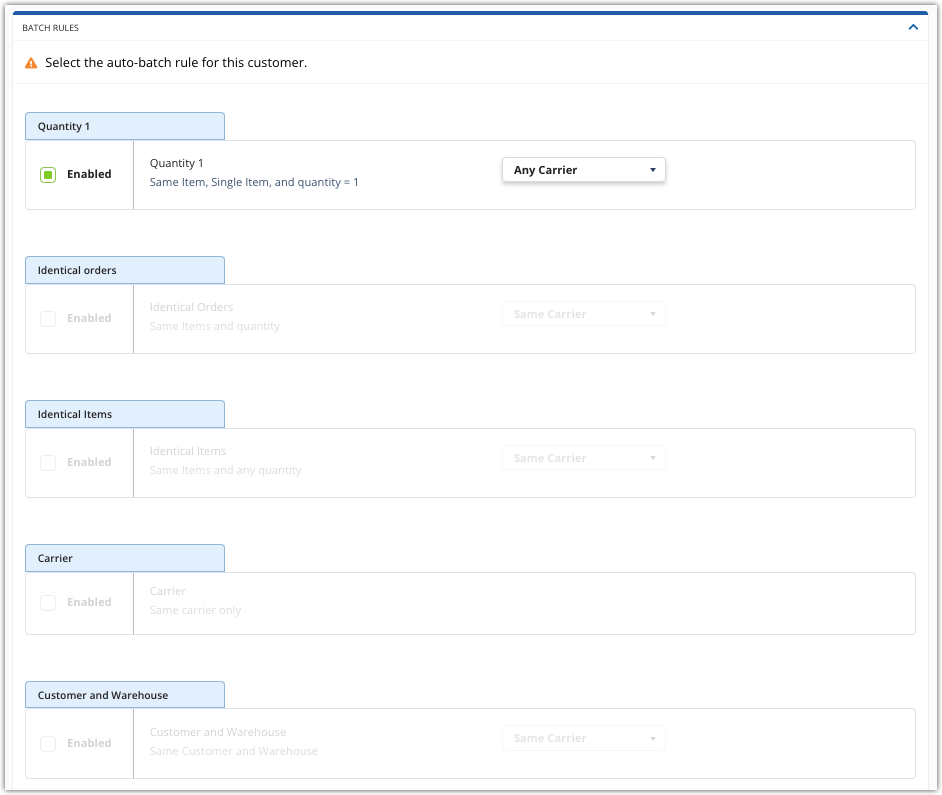


    Each rule is described below:
    • Quantity 1: Batches single-item orders that include the same item and have a quantity of 1
    • Identical Orders: Batches orders that include the same items and quantities of those items
    • Identical Items: Batches orders that include the same items regardless of item quantities
    • Carrier: Batches orders assigned the same shipping carrier
    • Customer and Warehouse: Batches orders for the same customer and warehouse

      If you'd like to see additional auto-batch rules, please submit a Product Idea. We'd love your feedback!


  7. Once you select a rule, choose whether you want orders to also be batched by carrier by selecting the relevant option in the Same Carrier drop-down menu. Note: This does not apply to the "Carrier" rule.
     
  8. Click Save to apply your auto-batch settings.
     
  9. Repeat Steps 1–8 for each customer as needed.

Once configured, it's important to understand how the batching process occurs.

  • When an order transitions into a Complete status, 3PL Warehouse Manager evaluates it against the customer's auto-batch rule. If the order matches the rule, it's grouped with other orders of the same configuration. Once the specified batch size is reached based on these batching qualifications and the rule selected in a customer's settings, the system creates a batch.
     
  • However, if one or more eligible orders come in after the specified cutoff time, those orders are held and batched starting at midnight the following day.
     
  • The system automatically names each batch using the following formatting: Customer Name (up to 10 characters)-Batch rule number-Month/Day-How many batches of that type have been created that day. For example: customerA-1-07/26-5.
     
  • Once a batch is created, it is searchable and manageable through the Find Orders grid. You can manually add orders to these batches as needed.


Batching tips

Now that your orders are batched, here are a few helpful tips related to batching:

  • Add batch columns to the Find Orders grid. If you're batching orders regularly, you may find it helpful to add the 'Batch ID' and 'Batch Name' columns to the Find Orders grid via Options > Columns to quickly reference an order's batch details.
     
  • Filter the Find Orders grid by batch. After specifying a customer, you can Choose a Batch in the 'Search by Order Details' filter container to display batches from the last 30 days. Note that the 'Edit Batches' permission must be enabled for a user to access this search filter, found in the 'Orders Module' permission set under 'Manage Orders'.


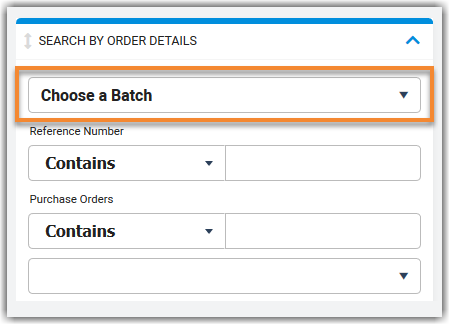
    To search for batches older than 30 days, you must use the relevant column filters.
     
  • View details for all the transactions in a batched order. To view all the transactions in a batch, select at least two orders from the batch, click Documents > Master Pick Ticket, make the appropriate selections, and then click Generate. A Master Pick Ticket opens in a new tab in your browser, which lists each transaction on the batched order.

If you are using SmartScan to pick, you need to create pick jobs separately. Please visit the Picking Orders with SmartScan article and the Picking Multiple Orders article for more information.

 
processing batch order batching

Was this article helpful?

Yes
No
Share additional feedback about this article

Related Articles

  • Entering Order Contact Details
  • Understanding Order Statuses
  • Configuring a Drop Ship Address
  • Creating Receipts

Not finding the help you need?

Contact Support
Solutions
  • Solutions for Brands
  • Solutions for 3PLs
  • Solutions for 4PLs
  • Solutions for B2B
Products
  • Extensiv 3PL Warehouse Manager
  • Extensiv Warehouse Manager
  • Extensiv Order Manager
  • Extensiv Integration Manager
  • Extensiv Network Manager
Products
  • Customer Success
  • Implementation
  • Consulting
Ecosystem
  • Fulfillment Marketplace
  • Integrations
  • Partners
  • Become a Partner
Resources
  • Resource Library
  • Blog
  • Market Insights
  • What is a 3PL?
  • What is a 4PL?
  • What is a WMS?
  • Why a Cloud-based WMS?
  • Glossary
Help
  • Help Center
  • API Documentation
  • Extensiv Univerisity
  • Community
  • System Status
  • Extensiv Logo
  • 100 N Pacific Coast Hwy, Suite 1100, El Segundo, CA 90245
  • |
  • Contact Us:
  • 83-EXTENSIV 888.375.2368 (main)
  • |
  • 310.844.7570 (local)
  • Copyright © 2023 Extensiv
  • |
  • All rights reserved.
  • Privacy Policy
  • |
  • Terms of Service
  • Follow Us:
Expand