Setting Up a 3PL Warehouse
4.7 min read
|A 3PL, or third-party logistics warehouse, is a warehouse that stores and ships your products for you.
NOTE
Before you set up your 3PL in Order Manager, you will need to know how your connection will be set-up. You can connect a 3PL to Order Manager via FTP, API, EDI or XML.
FTP
To set up a 3PL via FTP, you'll need:
- FTP Credentials provided by the 3PL
- Folder paths for the orders export, shipment import, and inventory import.
- Archive paths for the orders export and shipment import.
- A sample of an order export file your warehouse can support.
- A sample of a shipment file the 3PL will send to Order Manager. (Shipping Carrier, Sales Channel, Tracking Number & Order Number are required on this file)
- A sample of an inventory file your warehouse will be sending back.
- A list of any sales channel, state, country, and carrier mappings your warehouse may have.
- Run times for each import/export. Please keep in mind these times cannot overlap.
- Please keep in mind we only support multi-line files in CSV, Excel, or Text format. They can be fixed or flexible.
API
To connect via API, please inform your Account Manager or the Order Manager Support Team so that they can provide you with information on native integration options available in the Order Manager App Store. If we do not already have an option that can connect with your warehouse, you will need to find a developer on your end to build out the connection into Order Manager for your warehouse. You can begin the process by reaching out to our team (via AM or Support) to first confirm if there is any existing option you can use. We can provide further directions from that point on.
Please keep in mind we do not do any custom development. All custom development must be done on your end or via a partner upon our developers' approval.
EDI or XML
To connect your 3PL to Order Manager via EDI or XML, please inform your Account Manager or the Order Manager Support Team so that they can introduce you to our EDI and XML partners. Order Manager’s partners will outline the connection and integration process with you, provide a quote, and then build out a solution.
How to Create a 3PL Warehouse in Order Manager
Once you've assessed the information above, you can begin creating a 3PL warehouse in Order Manager.
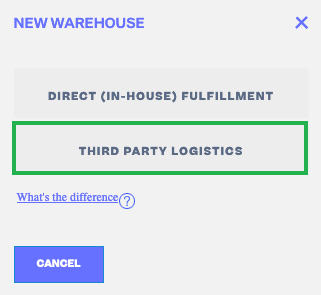
To add a new 3PL warehouse, go to the Settings module and go to the Warehouses tab in the left-hand navigation panel. Then click + New Warehouse and select Third Party Logistics.
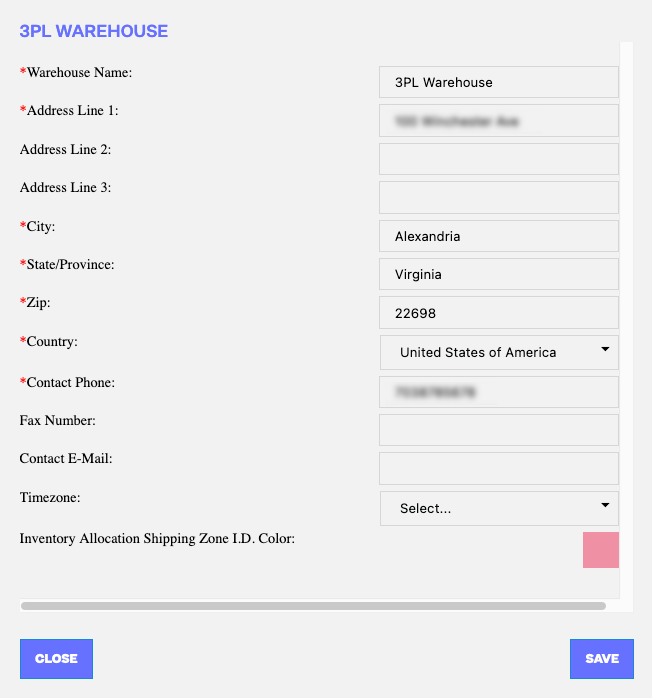
In the new window, you’ll need to complete several required fields, including:
- Warehouse Name
- Address
- City
- State
- Zip Code
- Country
- Contact Phone
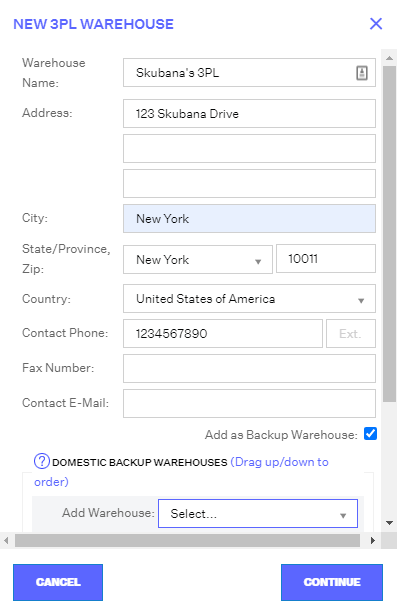
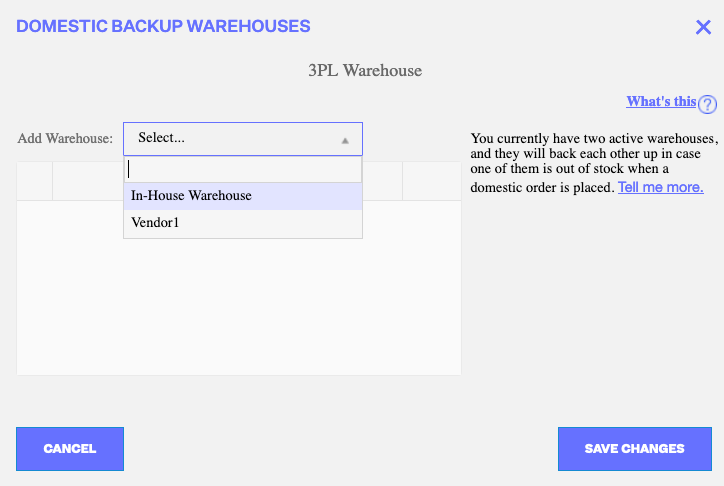
If you’ve already created other warehouses, you can assign them as domestic backup warehouses for the new warehouse you’re creating. Select the backup warehouses you want to add, then drag and drop the entries to change their order. This determines the order in which the warehouses will fulfill orders in the event that the primary warehouse is out of stock. This is all information that can be modified after you save it. Once you’ve finished, click “Continue.”
Note
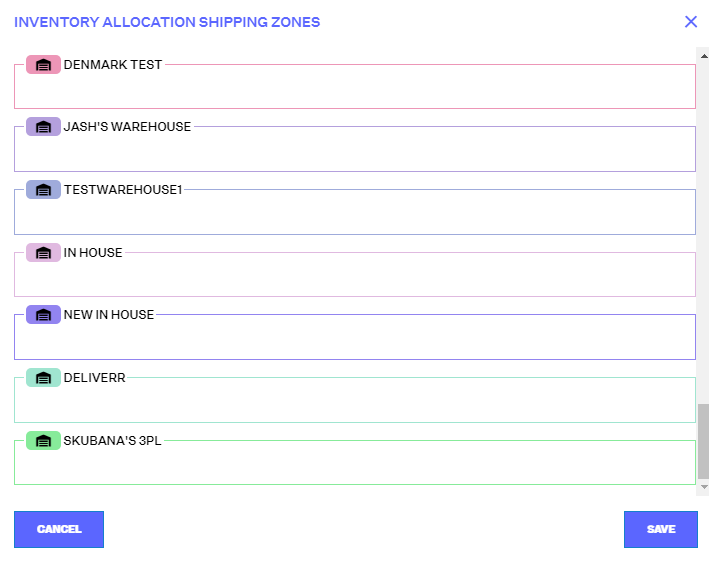
If you create more than one warehouse (In-House, 3PL, or otherwise), you will be prompted to assign inventory allocation shipping zones. Doing so will allow you to assign inbound orders from certain states or regions to a particular warehouse.
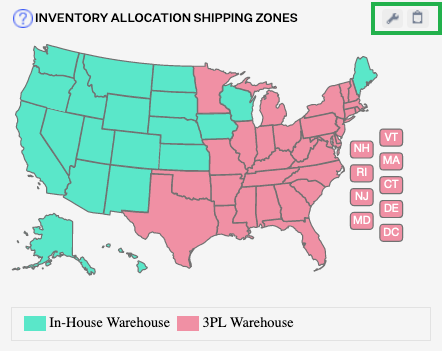
This can also be adjusted by clicking on the wrench button next to the U.S. map on the Warehouses page. Selecting the clipboard button (next to the wrench icon) will show you an edit history of changes made to the allocation zones.
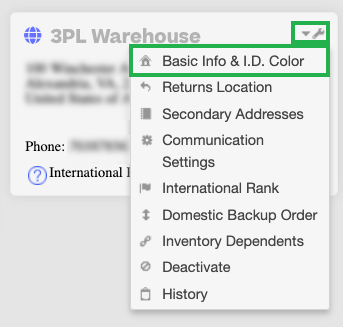
Once you’ve created the warehouse, you can click the wrench button next to its name and select from a number of options, including:
-
Basic Info & I.D. Color: You can revise basic warehouse contact information here and assign a unique color to the warehouse (as displayed on the Inventory Allocation Shipping Zones map).
-
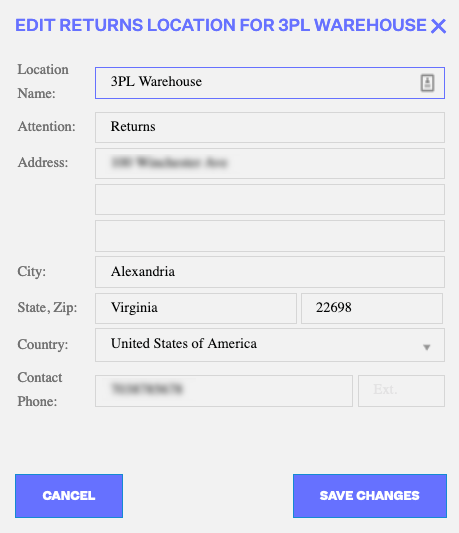
Returns Location: This is the address to which returned items will ship, assuming they were originally fulfilled by this warehouse. This does not have to match the address of the origin warehouse. The returns location will default to the origin warehouse’s address if these fields are left blank.
NOTE: If you are connecting to your 3PL via FTP you will need to fill out the Communication Settings portion of the warehouse setup below. This is where you will need to fill in all of the FTP information that you previously collected from your 3PL.
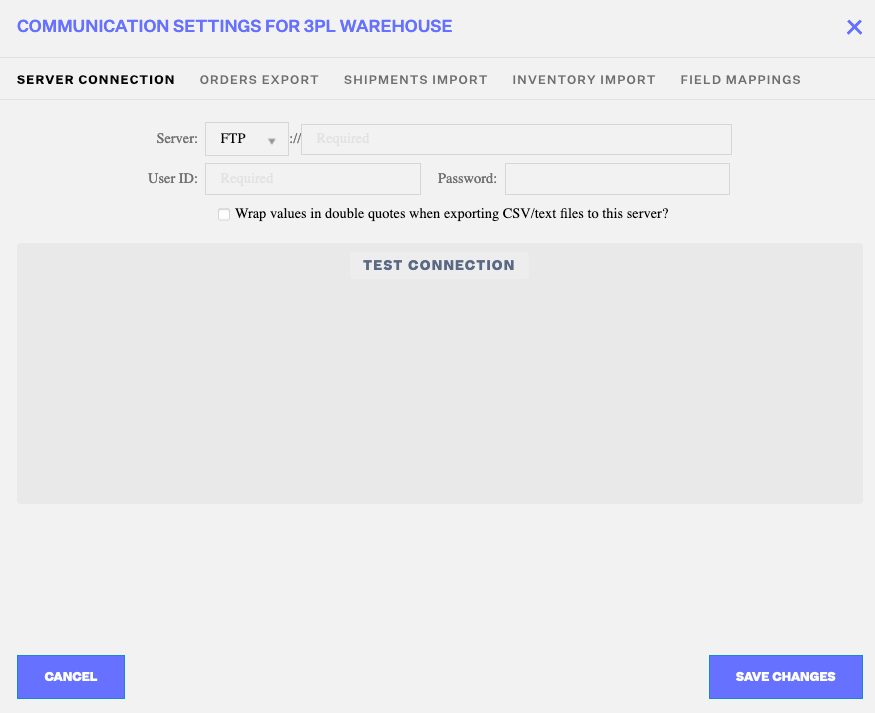
Each tab will need to be filled out before you can proceed to the next tab. You will not be able to save your changes if any required fields are blank.
- In the Server Connection tab, enter your FTP credentials provided by the 3PL and make sure that they are validated by clicking the Test Connection button.
- In the Export and Import tabs, you will need to set up the specific folder paths, archive paths, and file formats according to your 3PL. You'll need to indicate Folder Paths for all import/export tabs.
- For Order Exports, you'll need to choose how orders for multiple SKUs will be formatted - one SKU per row, or one order with multiple SKUs separated by the assigned Delimitor in a row.
- Under the Daily Schedule section of these tabs, you can set up Run Times, when these files will automatically either import or export to/from the 3PL. Make sure that the Import Run Times DO NOT share the same times selected in the Export Run Times, or there will be a communication failure. You can choose for Run Times to happen both on weekdays and weekends, or just on weekdays. Import Times may be at the same time as each other.
- In the Import/Export Fields sections, you'll need to set up mappings so your 3PL can read the file contents. The left column houses the terms Order Manager uses, and the right column should be the terms your 3PL uses. Make sure to only map corresponding content, otherwise, you may end up with a very confused warehouse employee not understanding why an order lists "Ship To Country" as an email address! Select whether or not you want the export file to include Column Headers (the first row of the export file will be Headers instead of order data) and make sure that the Import files also should/should not be importing inventory and shipments with the Column Headers. If the wrong option is chosen, the import will always have at least one failed entry.
- Order Export: You must indicate at least one field mapping. No specific columns are mandatory.
-
Shipment Import: Mandatory columns are Sales Channel, Order Number, Shipping Carrier, and Shipment Tracking Number.
Inventory Import: Mandatory columns are Master SKU & On Hand Stock. - Failing to map the required columns will likely result in complications with order fulfillment and/or imports failing to be created successfully in Order Manager.
- Lastly, the Field Mappings tab is where you can associate any potential differences in terminology for field inputs between Order Manager and the 3PL. For example, if you want to export orders assigned to ship with the Carrier value as USPS, but your 3PL refers to that Carrier as "Endicia", you would map that under the Shipping Carriers subsection. These mappings are populated as a default, so they are simply here for customization as needed.
Click Save to save all of the information above.
-
International Shipping Warehouse Order: This is the order in which warehouses will be assigned to orders shipping internationally. This hierarchy can be “activated” by creating an orderbot.
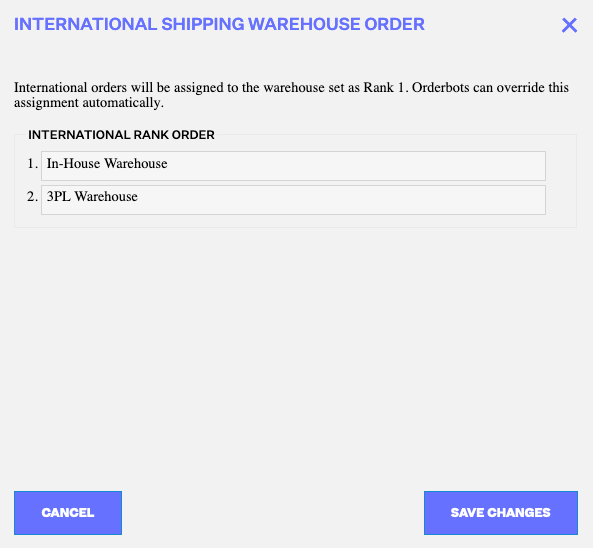
-
Domestic Backup Order: This is the order in which inventory will be pulled from if the warehouse associated with the order runs out of stock.
Note
Setting up dependents will result in the merging of sales velocities, which will be reflected in Order Manager-generated POs.
- Inventory Dependents: These are the warehouses that source new inventory from the Master (Parent) Warehouse.
- Deactivate: This will deactivate the warehouse.
-
History: This tracks the history of actions performed on the warehouse.
